Easy Updos for Women Over 50 With Medium Hair
This post contains affiliate links. As an Amazon associate, I earn from qualifying purchases. I only recommend products that are of high quality and that I would use myself.
Medium hair is the updo sweet spot: long enough to twist, coil, and tuck, but light enough that a few pins actually hold it all day. Yet so many of us over 50 default to wearing it down, or scraped into the same tired ponytail, because updos have a reputation for being fiddly — or worse, aging.
The truth is the opposite. The right updo lifts the face, shows off your neckline and earrings, and keeps hair off your neck on warm days. This guide collects 20 genuinely easy updos for medium hair — every one of them doable in five to ten minutes with simple step-by-step instructions, no salon visit and no braiding degree required.
If you are still deciding on your next cut, our guide to short hairstyles for women over 50 is worth a browse, and if your hair is finer than it used to be, the ideas in hairstyles for fine hair over 50 pair beautifully with the fuller-looking updos below.
Table of Contents
- 1. The Classic Low Chignon
- 2. The Twisted Low Bun
- 3. The Simplified French Twist
- 4. The Two-Minute Claw Clip Twist
- 5. The Braided Crown
- 6. The Tucked Low Ponytail
- 7. The Messy Top Knot
- 8. The Gibson Tuck
- 9. The Side-Swept Low Chignon
- 10. The Rope Braid Bun
- 11. The Full Donut Bun
- 12. The Double Twist Updo
- 13. The French Braid Tuck
- 14. The Soft Rolled Updo
- 15. The Knotted Low Bun
- 16. The Fishtail Braid Bun
- 17. The Twisted Halo Updo
- 18. The Sleek High Bun
- 19. The Curly Pinned-Up Updo
- 20. The Banana Clip Fold
- Recommended Products
- FAQs
1. The Classic Low Chignon
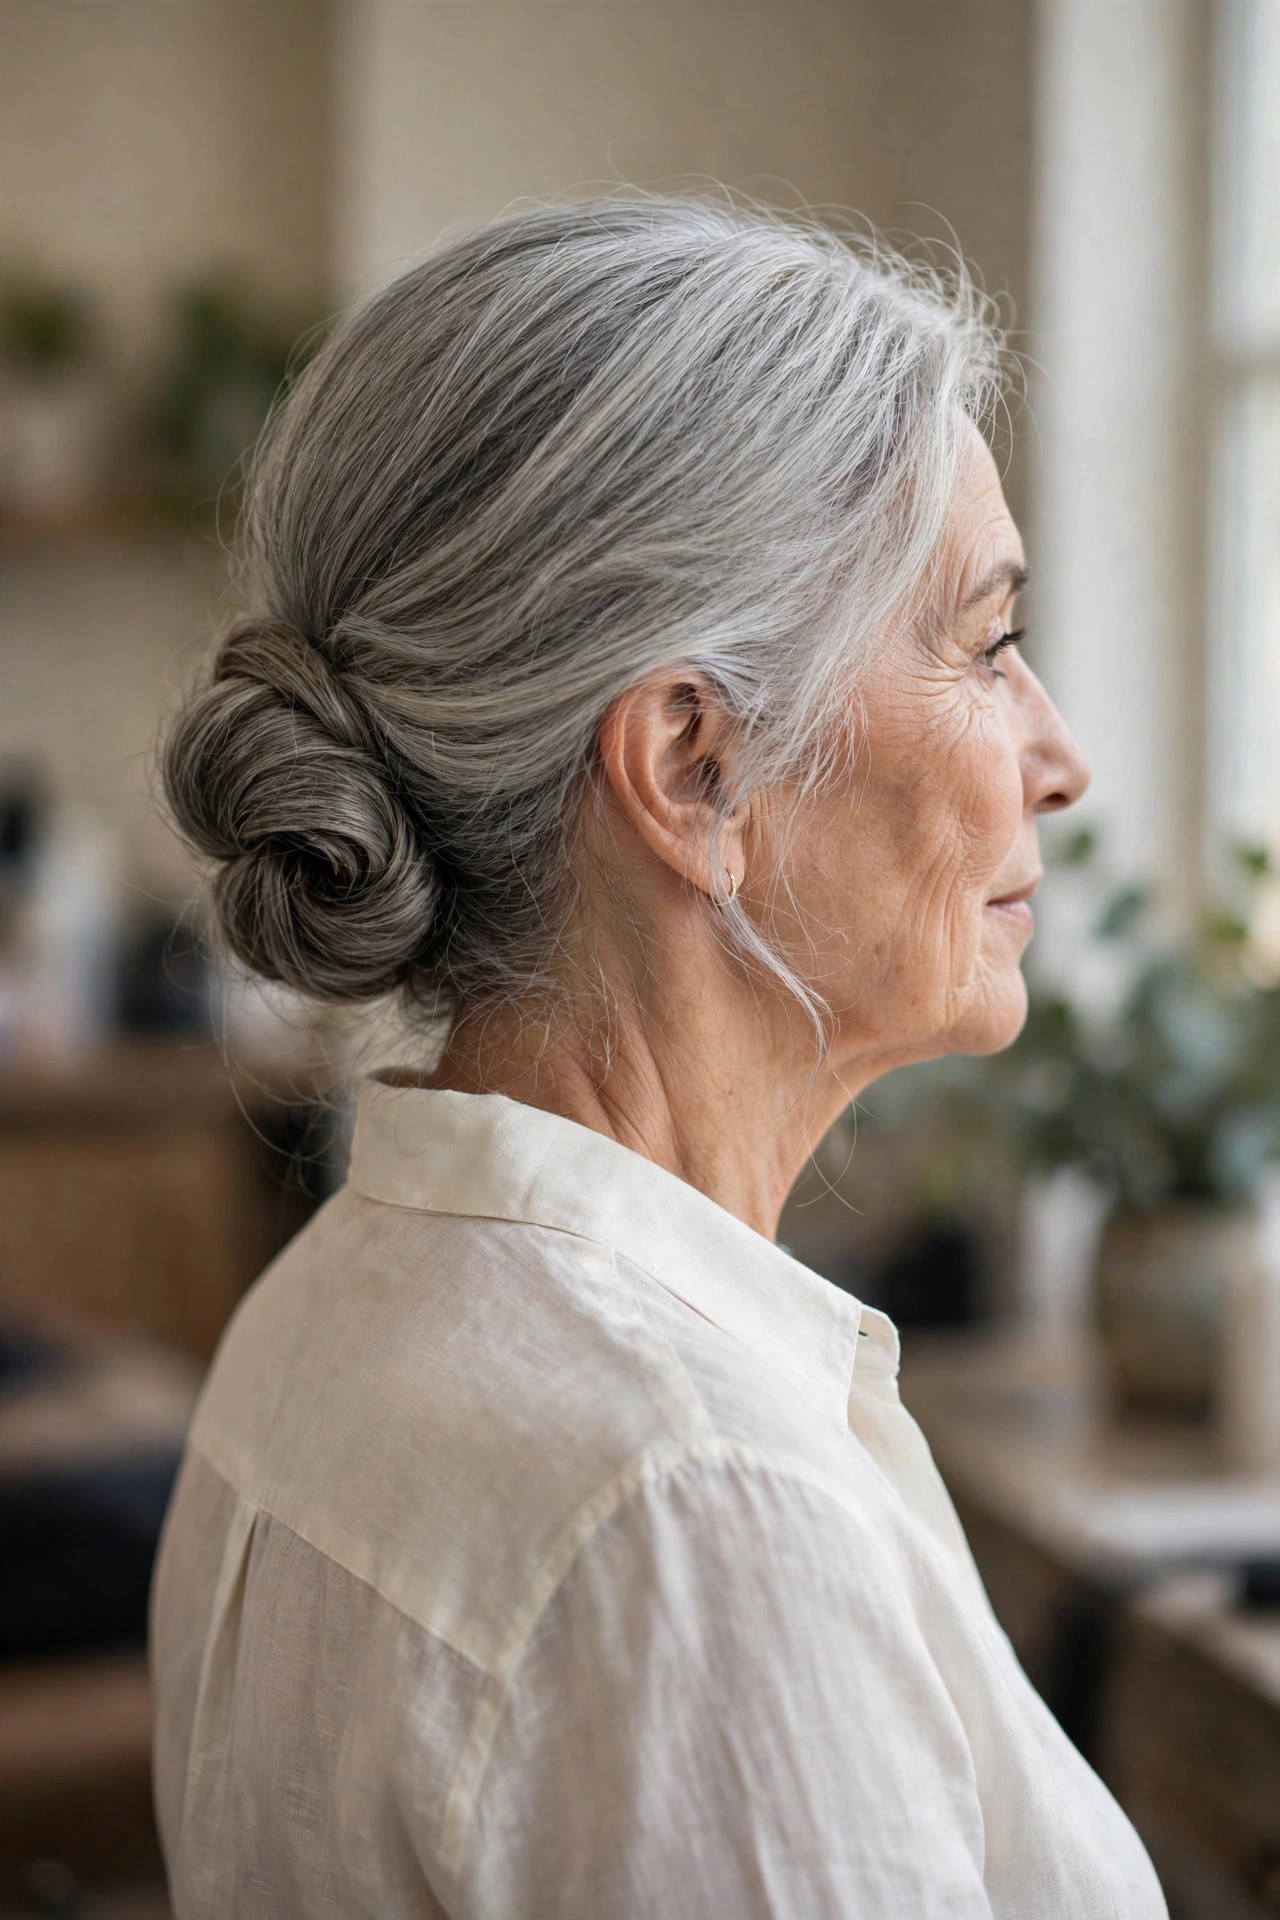
The low chignon is the updo that never lets you down: it sits at the nape, looks polished from every angle, and works just as well with a grocery-store outfit as with an evening dress. For women over 50 it has a quiet advantage — the low placement lifts the eye away from the jawline and keeps the silhouette soft rather than severe.
How to do it: brush hair into a low ponytail at the nape and secure it with a small elastic. Twist the ponytail until it coils against your head, wrap it into a flat spiral, and pin the edges with U-shaped pins, sliding each pin in at an angle so it catches both the coil and the hair beneath. Leave it sleek for formal days or pull two fine strands loose at the front for a softer, everyday finish.


2. The Twisted Low Bun
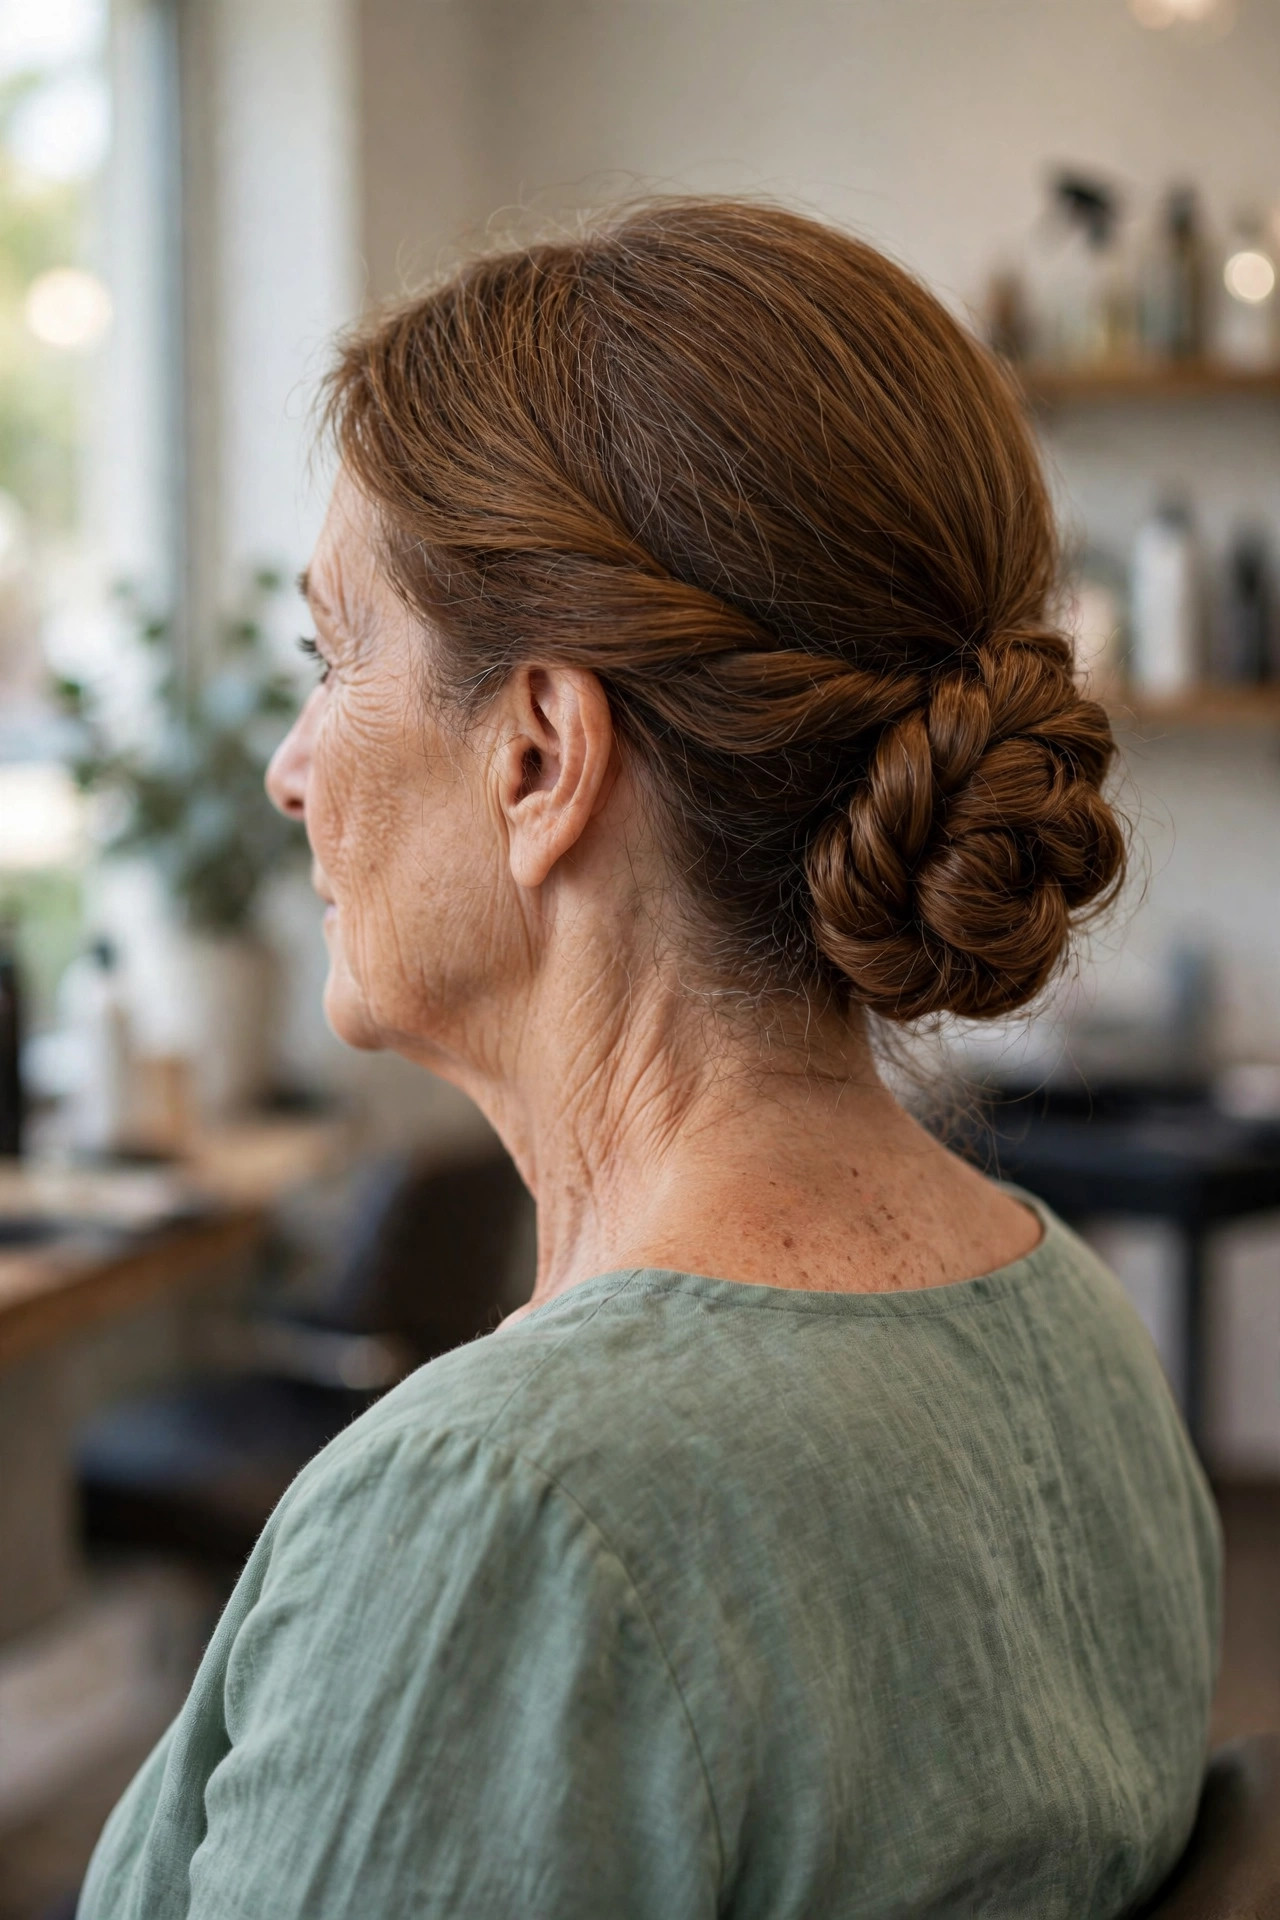
If a chignon feels a touch too formal, the twisted low bun is its relaxed sister. The visible twist adds texture, which is exactly what medium hair needs once it starts to lose density — the eye reads the twists as fullness, so the bun looks bigger than it really is.
How to do it: split a low ponytail into two equal sections and twist each one in the same direction, then wind the two sections around each other to form a rope. Coil the rope into a bun at the nape, tuck the ends underneath, and pin generously. A light mist of hairspray at the end keeps the twists defined without any crunch.
3. The Simplified French Twist
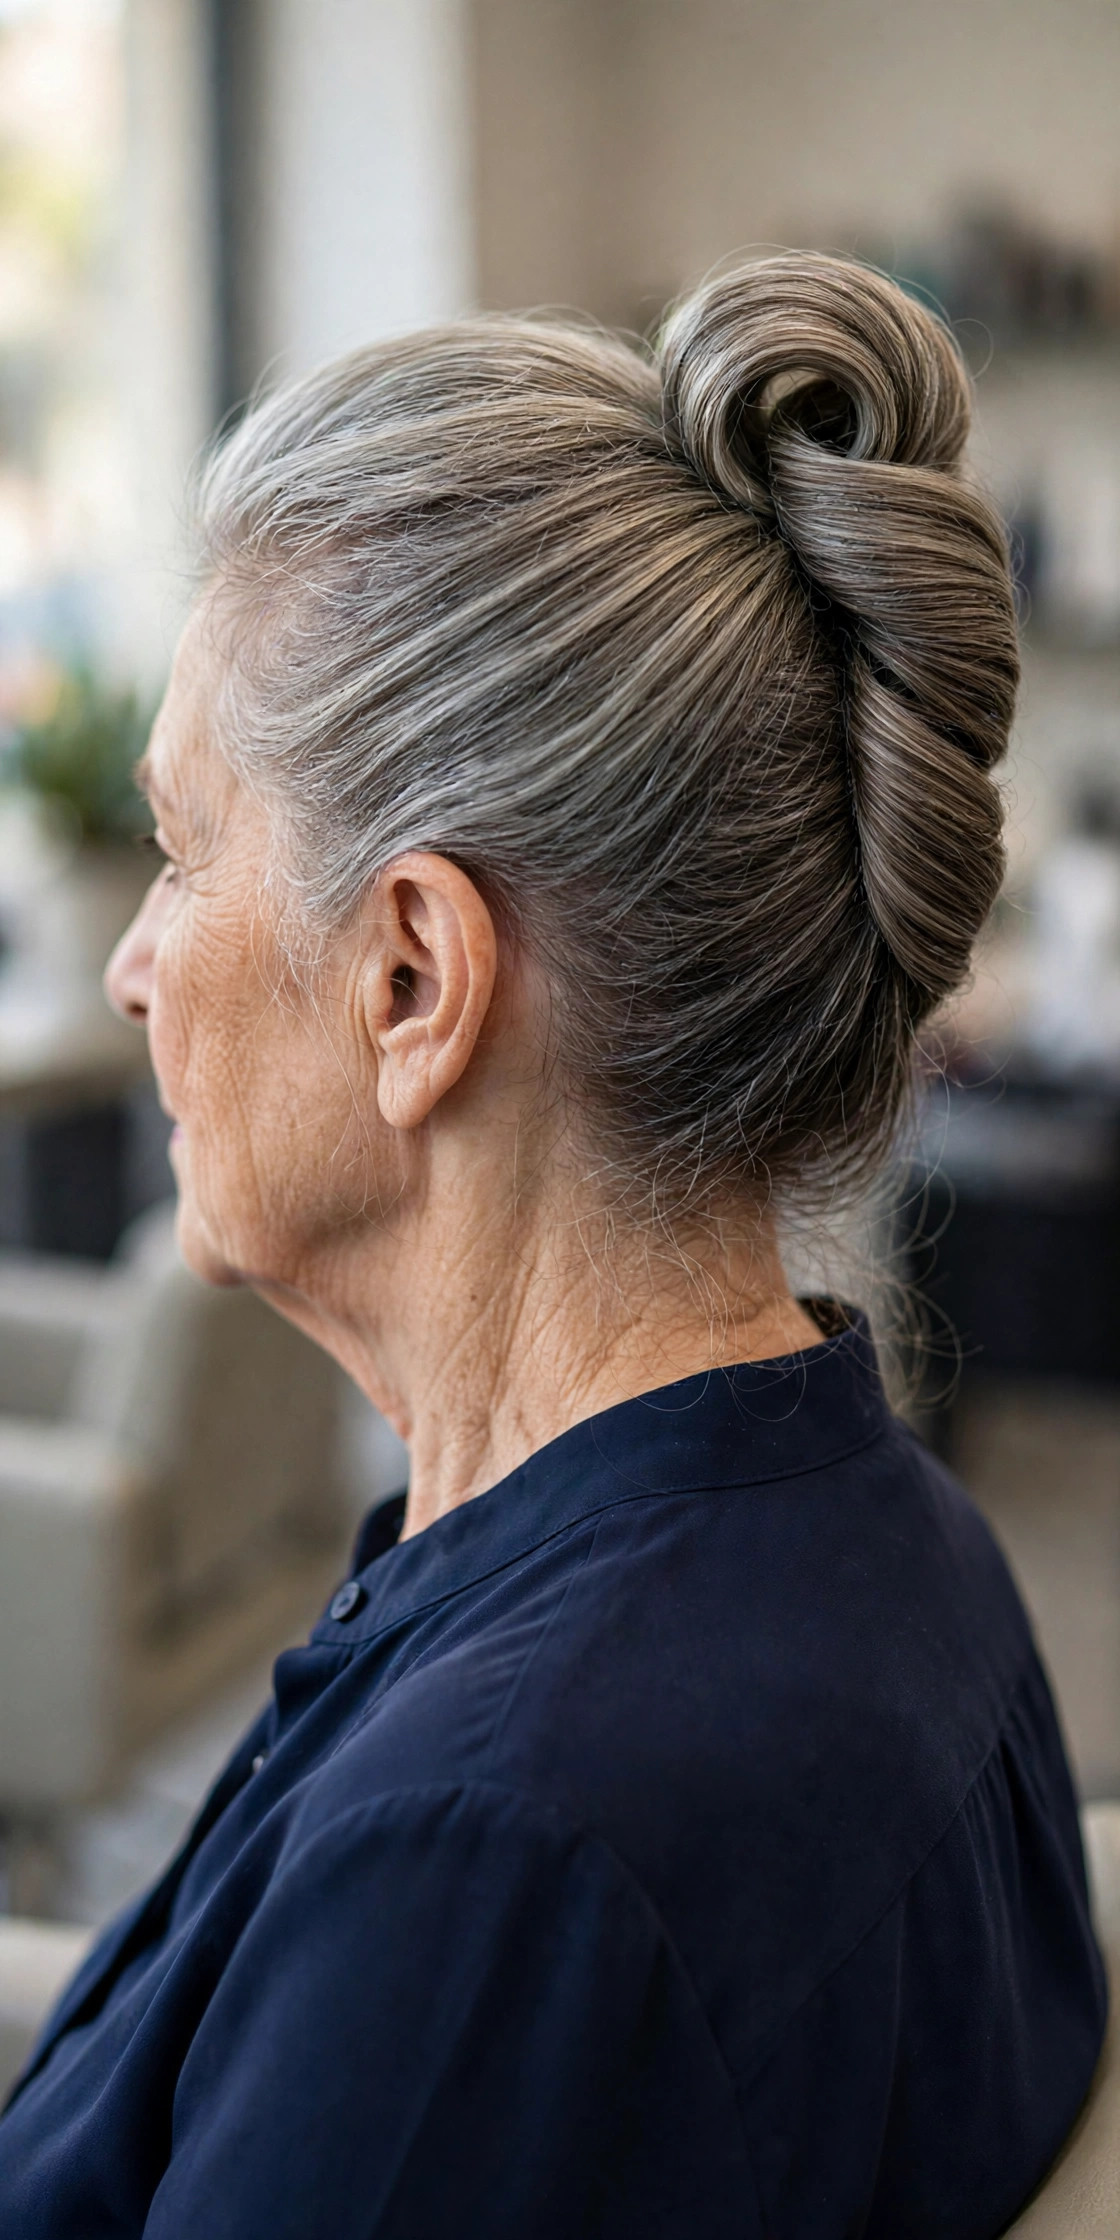
The French twist has a reputation for being difficult, but the simplified version is genuinely a five-minute style. It creates a long, elegant line at the back of the head that lengthens the neck and pairs beautifully with earrings — a lovely choice for weddings, dinners, and photographs.
How to do it: gather all your hair at the back as if for a low ponytail, but instead of tying it, twist the whole mass upward against your head. Tuck the ends down into the fold you have created, then pin along the seam from bottom to top with U-pins. Do not aim for salon perfection; a slightly soft seam looks modern and is far more forgiving.
4. The Two-Minute Claw Clip Twist
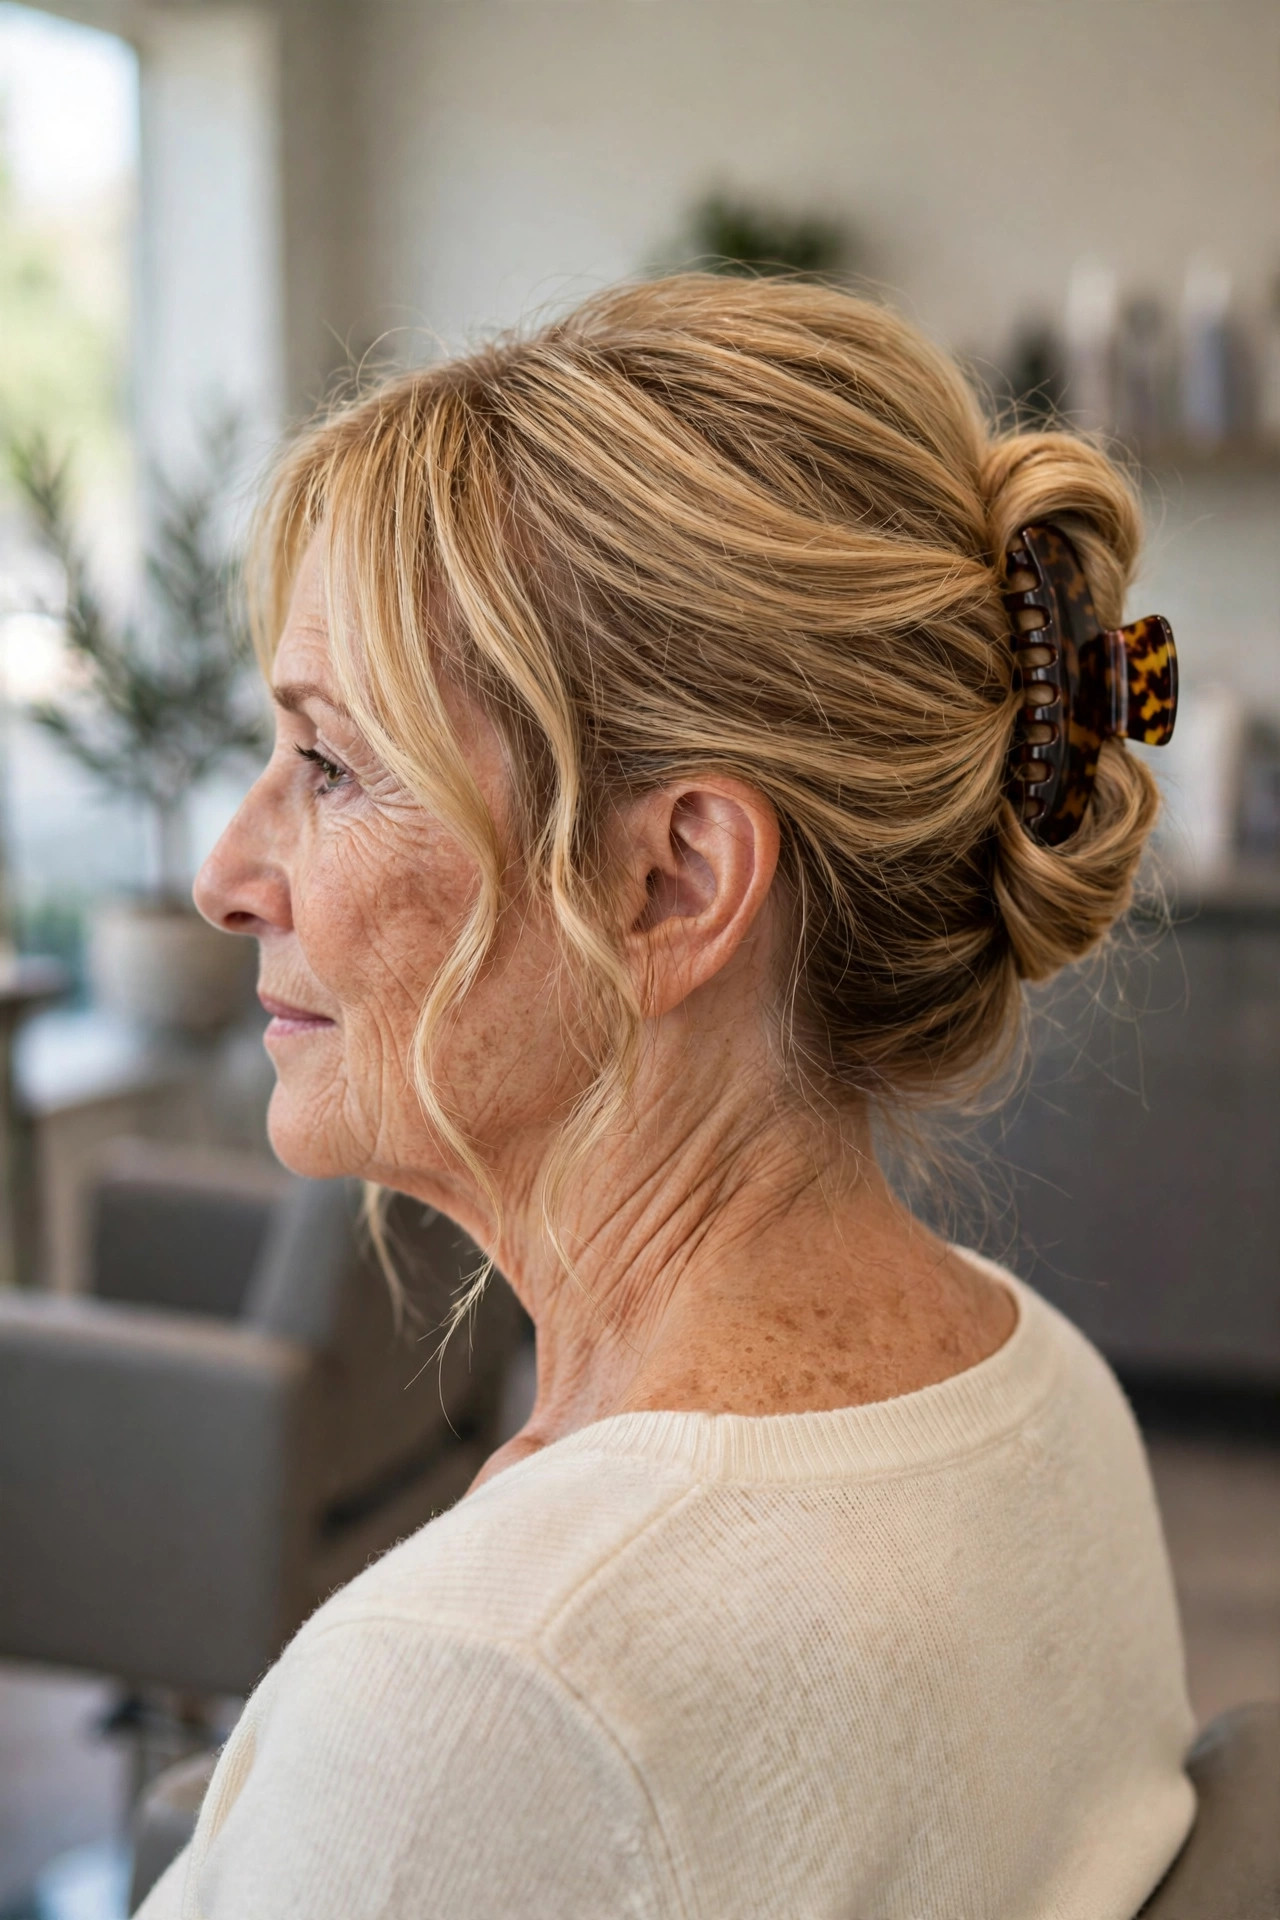
This is the updo most of us actually wear: hair up, off the neck, and done before the kettle boils. A flat claw clip is kinder than a bulky one at this age because it lies close to the head, so you can lean back against a chair or headrest without the clip digging in.
How to do it: gather your hair at the nape, twist it upward once or twice, fold the twist down against the back of your head, and clamp a medium claw clip over the fold so it grabs both the twist and the hair underneath. Tug gently at the crown for a little height, pull out a wisp or two at the temples, and you are finished.

5. The Braided Crown
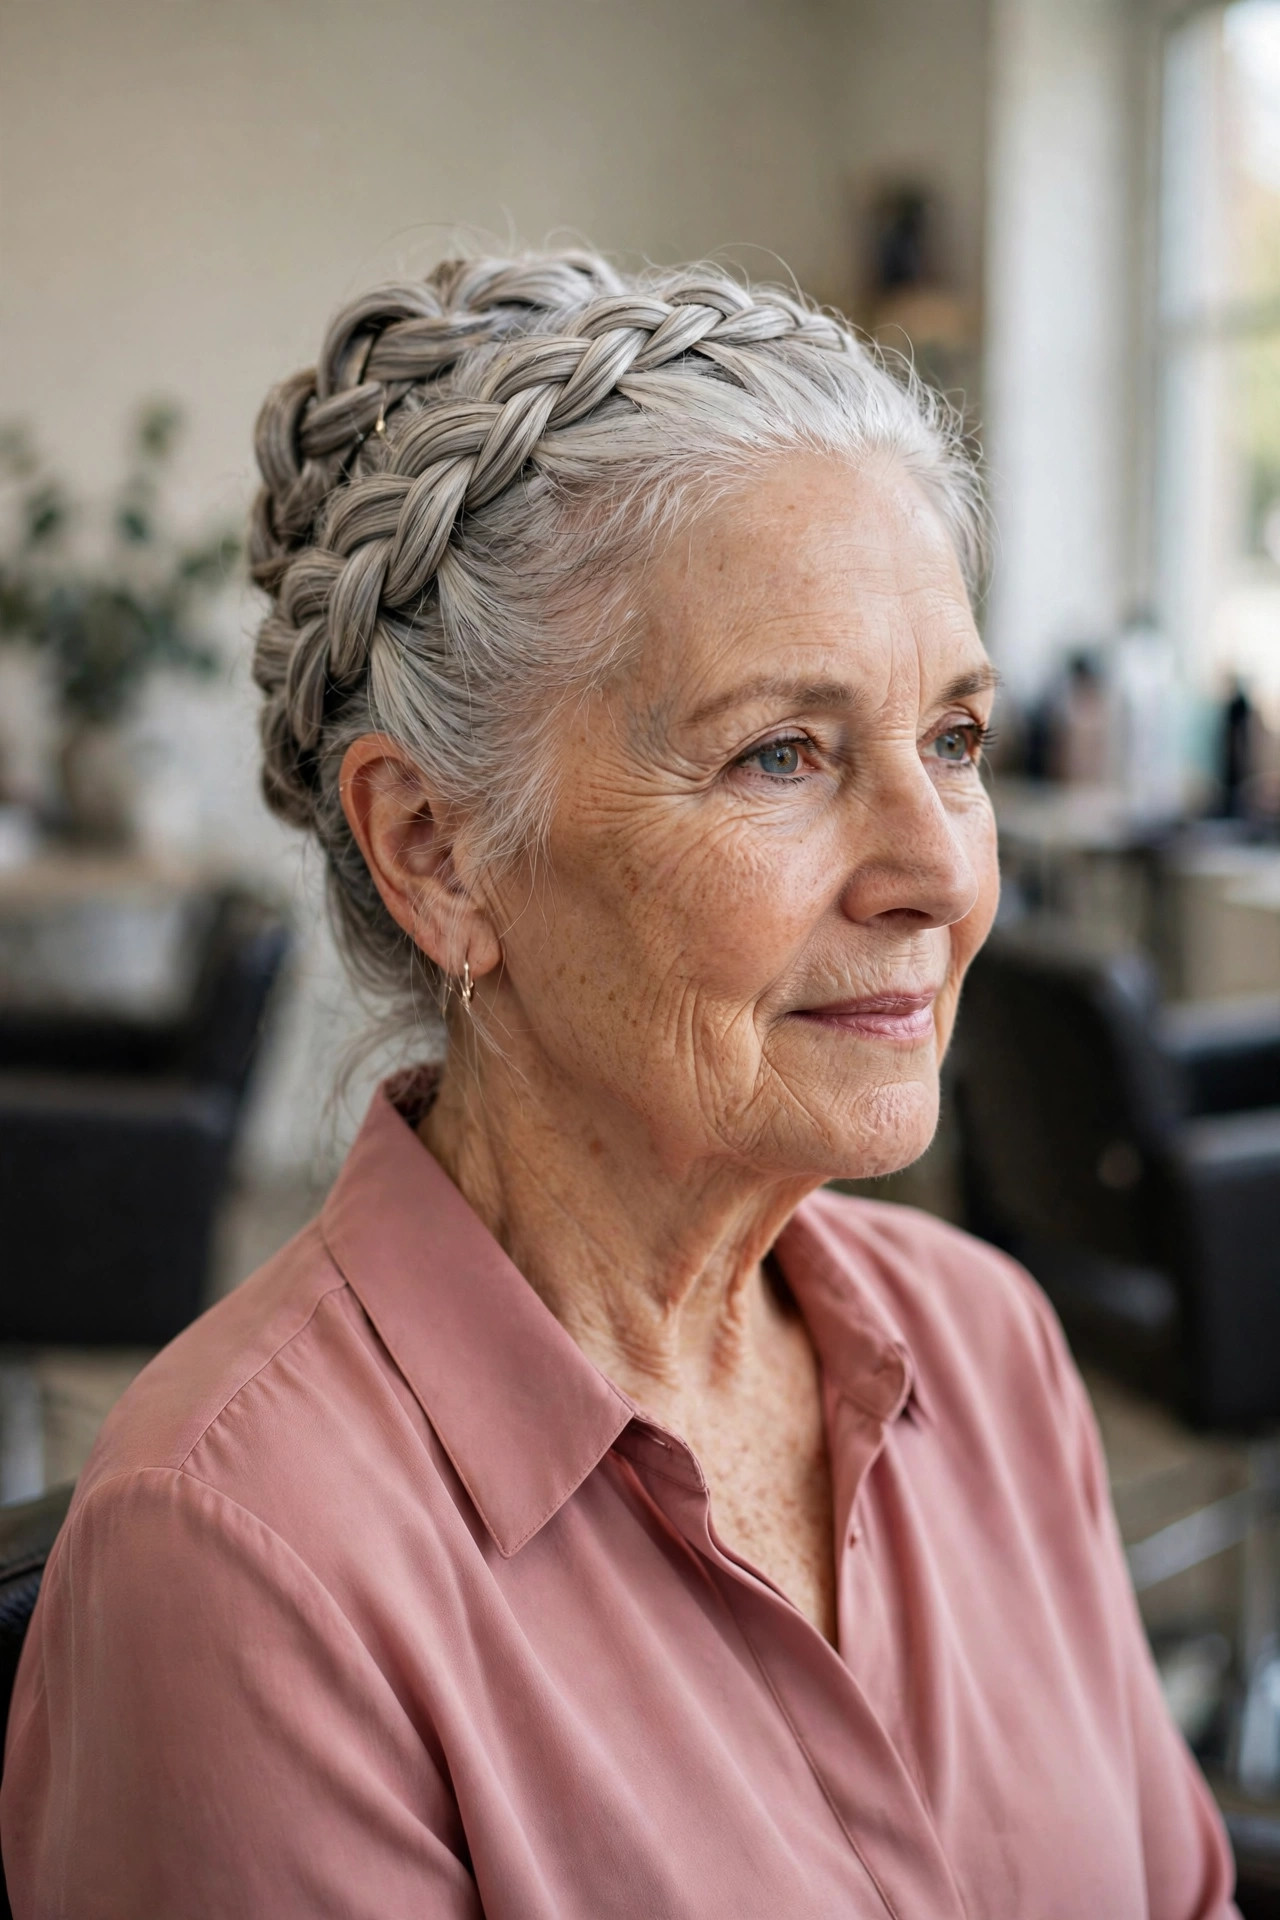
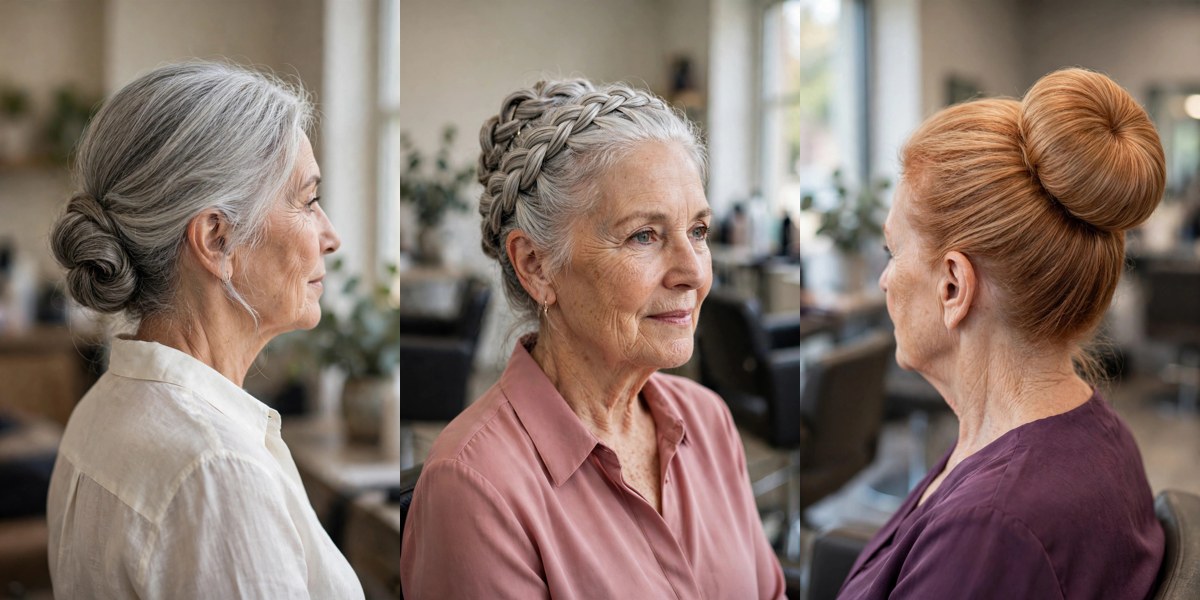
A braided crown reads romantic and intentional, yet it is simply one braid pinned around the head. It is a smart style for silver and gray hair in particular, because the braid shows off the natural dimension and sparkle of multi-toned gray strands.
How to do it: take a section from behind one ear and braid it in a simple three-strand plait, then bring it up and across the top of your head like a headband and pin it behind the opposite ear. Gather the remaining hair into a low pinned bun or tuck, and pin any loose pieces into the braid. The crown does the decorating for you, so no accessories are needed.
6. The Tucked Low Ponytail
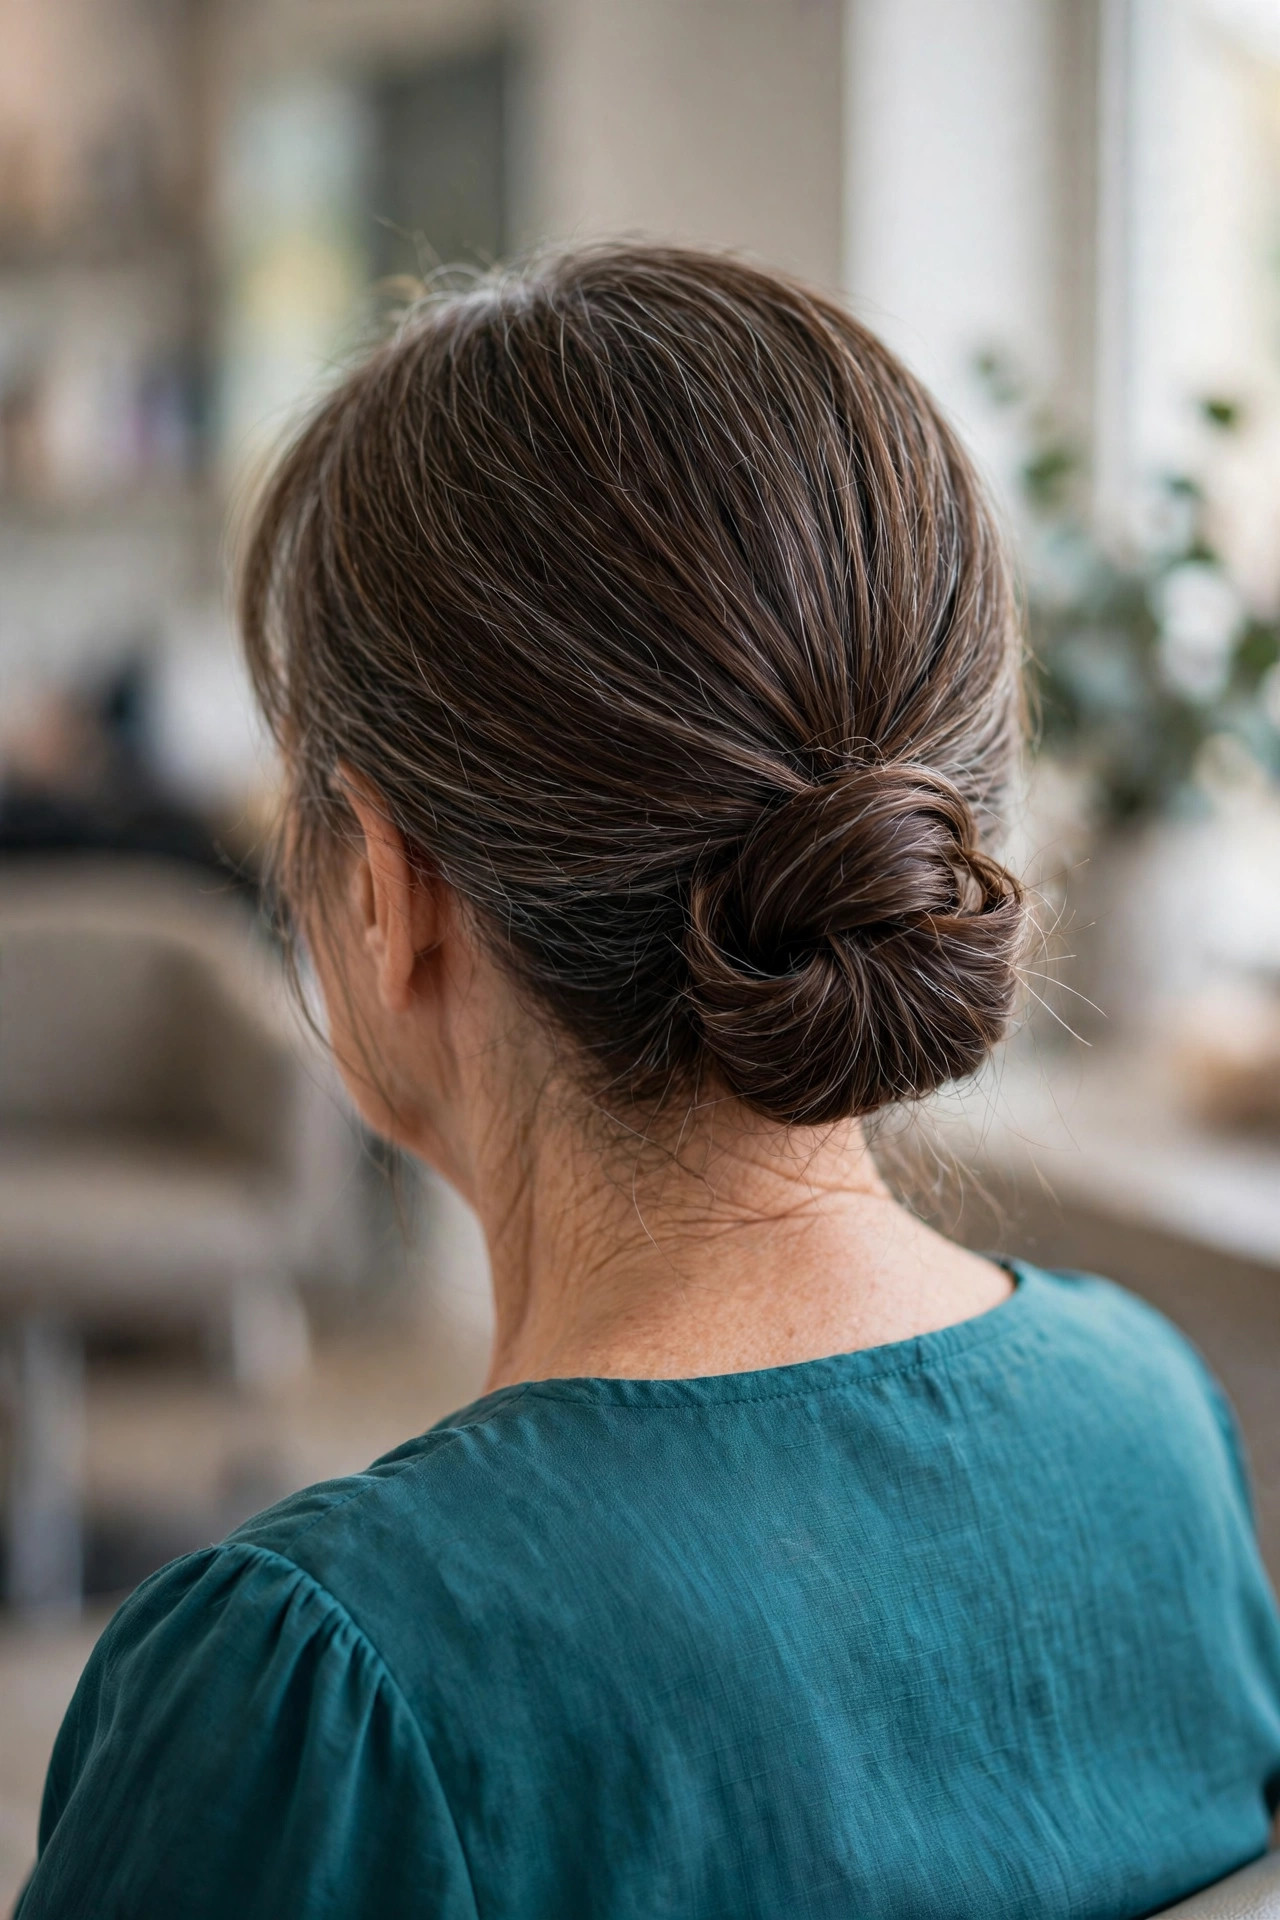
The tucked ponytail — sometimes called a flip-through updo — turns the simplest ponytail into something that looks professionally done. It is an excellent first updo if your arms tire quickly, because almost all the work happens low at the nape where your hands can rest.
How to do it: tie a loose low ponytail, then use your fingers to open a small gap in the hair just above the elastic. Flip the ponytail up and push it down through that gap, pulling it snug. Repeat the flip a second time if your length allows, then roll the remaining tail upward and pin it into the fold for a neat, knotted finish.
7. The Messy Top Knot
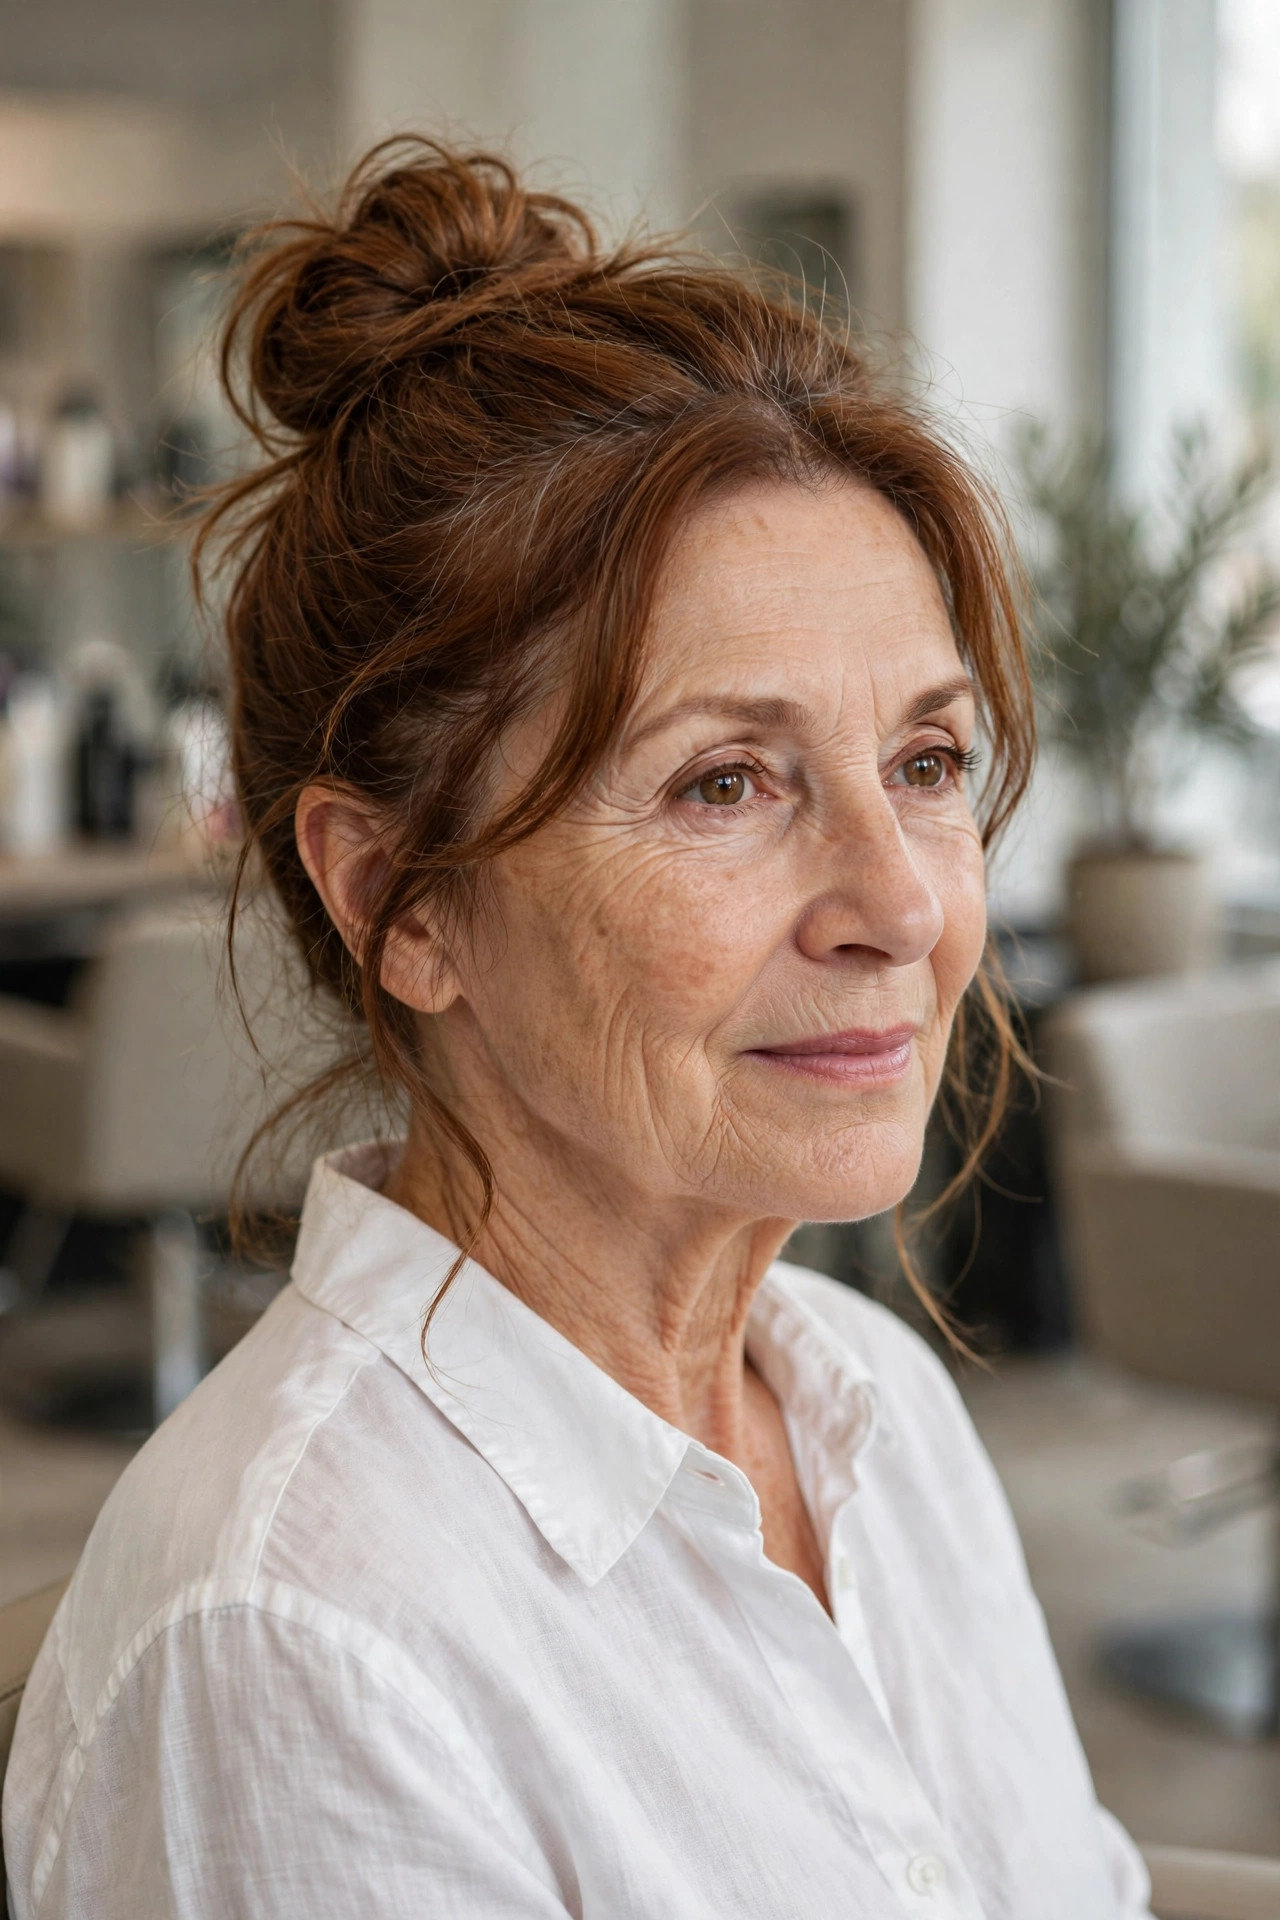
The top knot is the youngest-feeling updo on this list, and the secret to wearing it well after 50 is placement and softness: sit it slightly behind the highest point of your head, keep the sides loose rather than scraped back, and let a few strands escape on purpose.
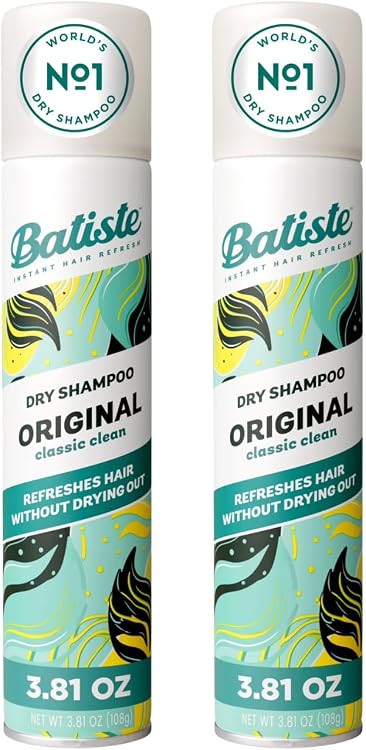
How to do it: flip your head forward and gather everything into a high ponytail, but on the last pull through the elastic, only pull the hair halfway to form a loop. Wrap the remaining tail around the base, pin it, then fan the loop out and tug small sections to build volume. A spritz of dry shampoo at the roots beforehand gives fine hair the grip it needs to stay put.
8. The Gibson Tuck
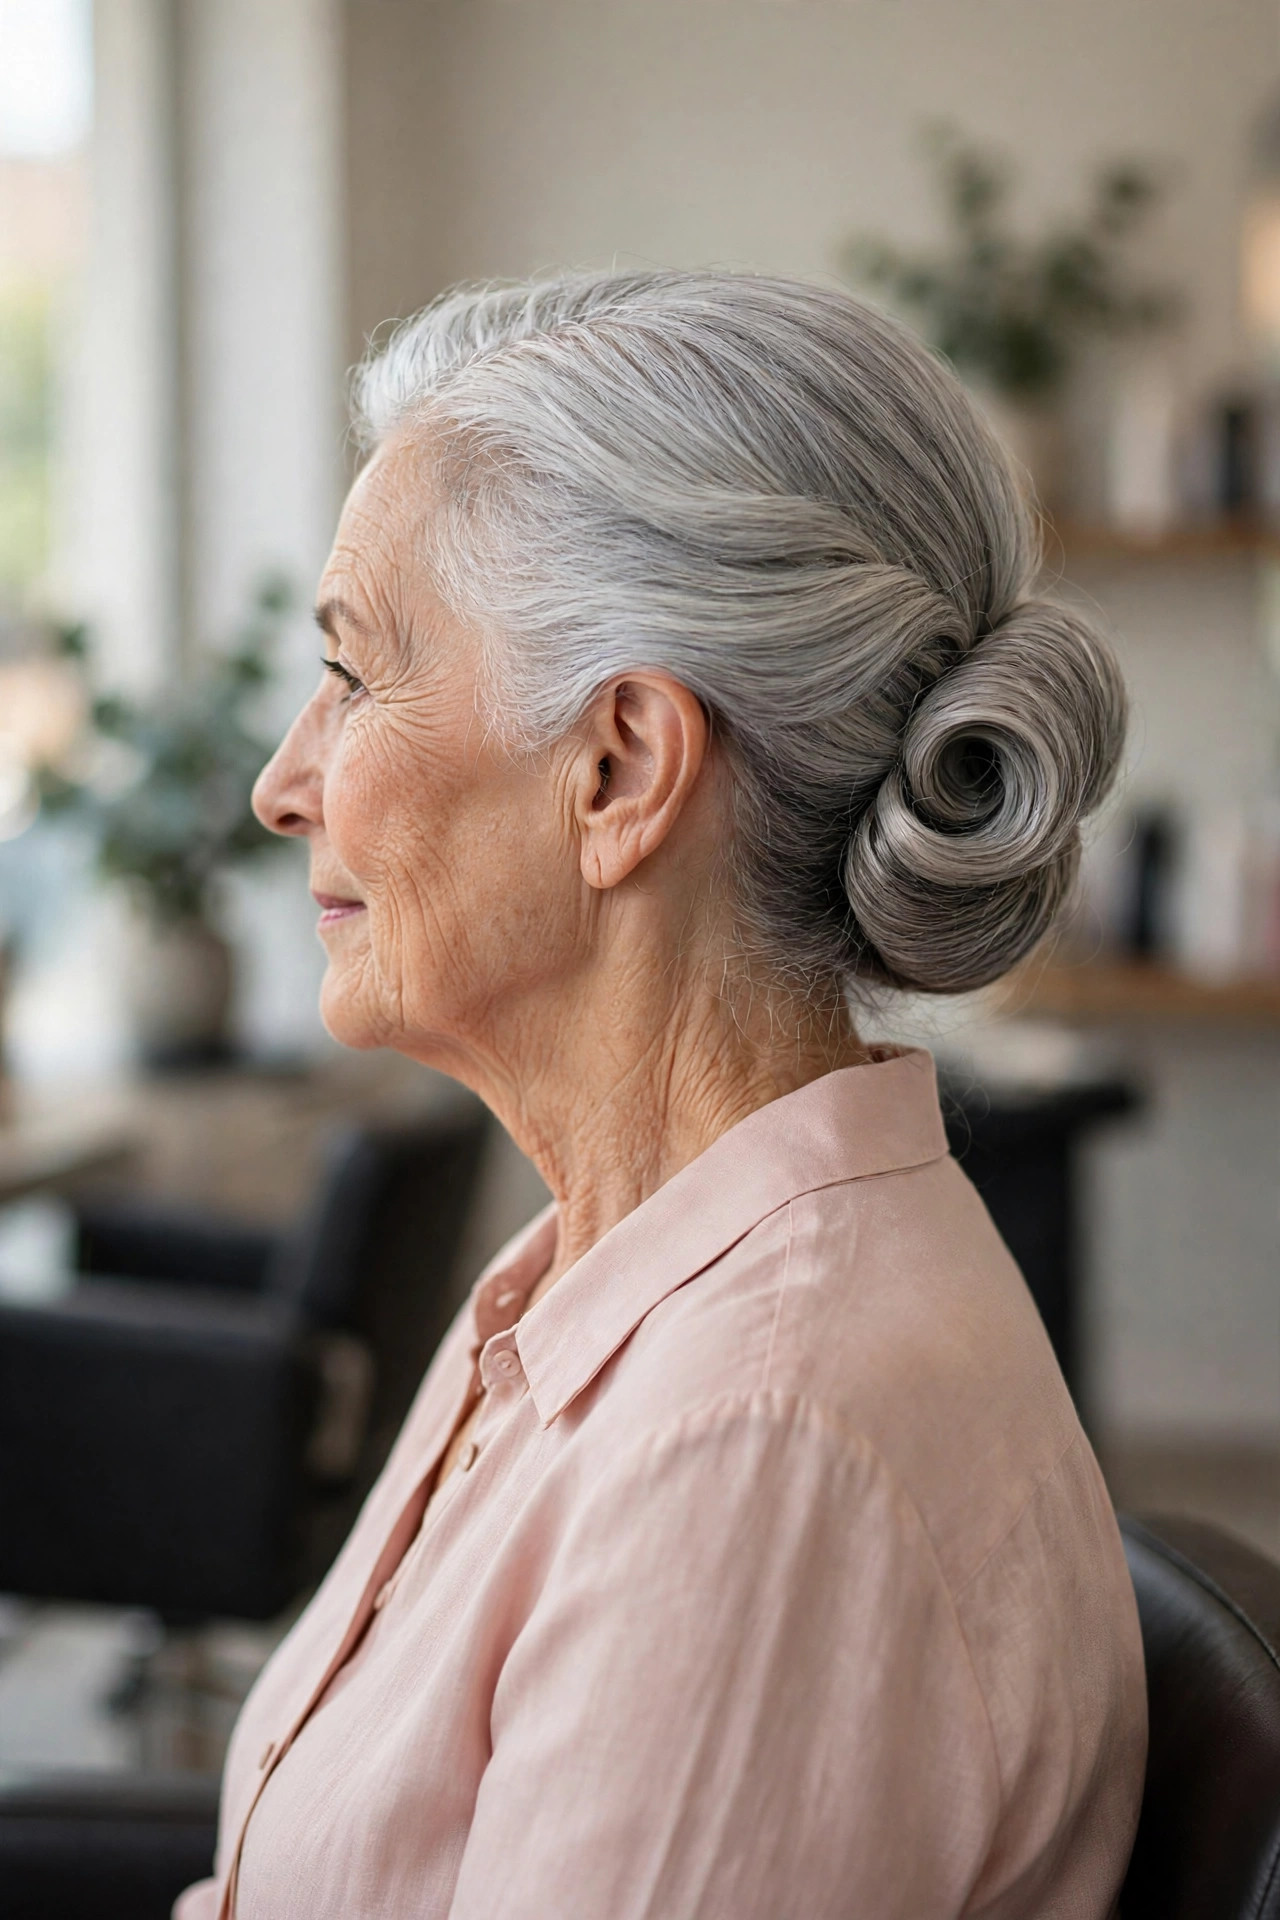
The Gibson tuck is a vintage treasure that deserves its comeback: hair rolled into a smooth horizontal cushion at the nape. It looks intricate, yet it is really just a ponytail rolled into a pocket — and it holds surprisingly well on medium hair because there is less weight pulling it down.
How to do it: put on a thin elastic headband over loose hair, or simply tie a very low, loose ponytail and slide the elastic down a couple of inches to create a pocket. Roll the ponytail upward, tucking it into the pocket as you go, then spread the roll evenly from side to side and pin the corners. Finish with a gentle brush over the surface to smooth it.
9. The Side-Swept Low Chignon
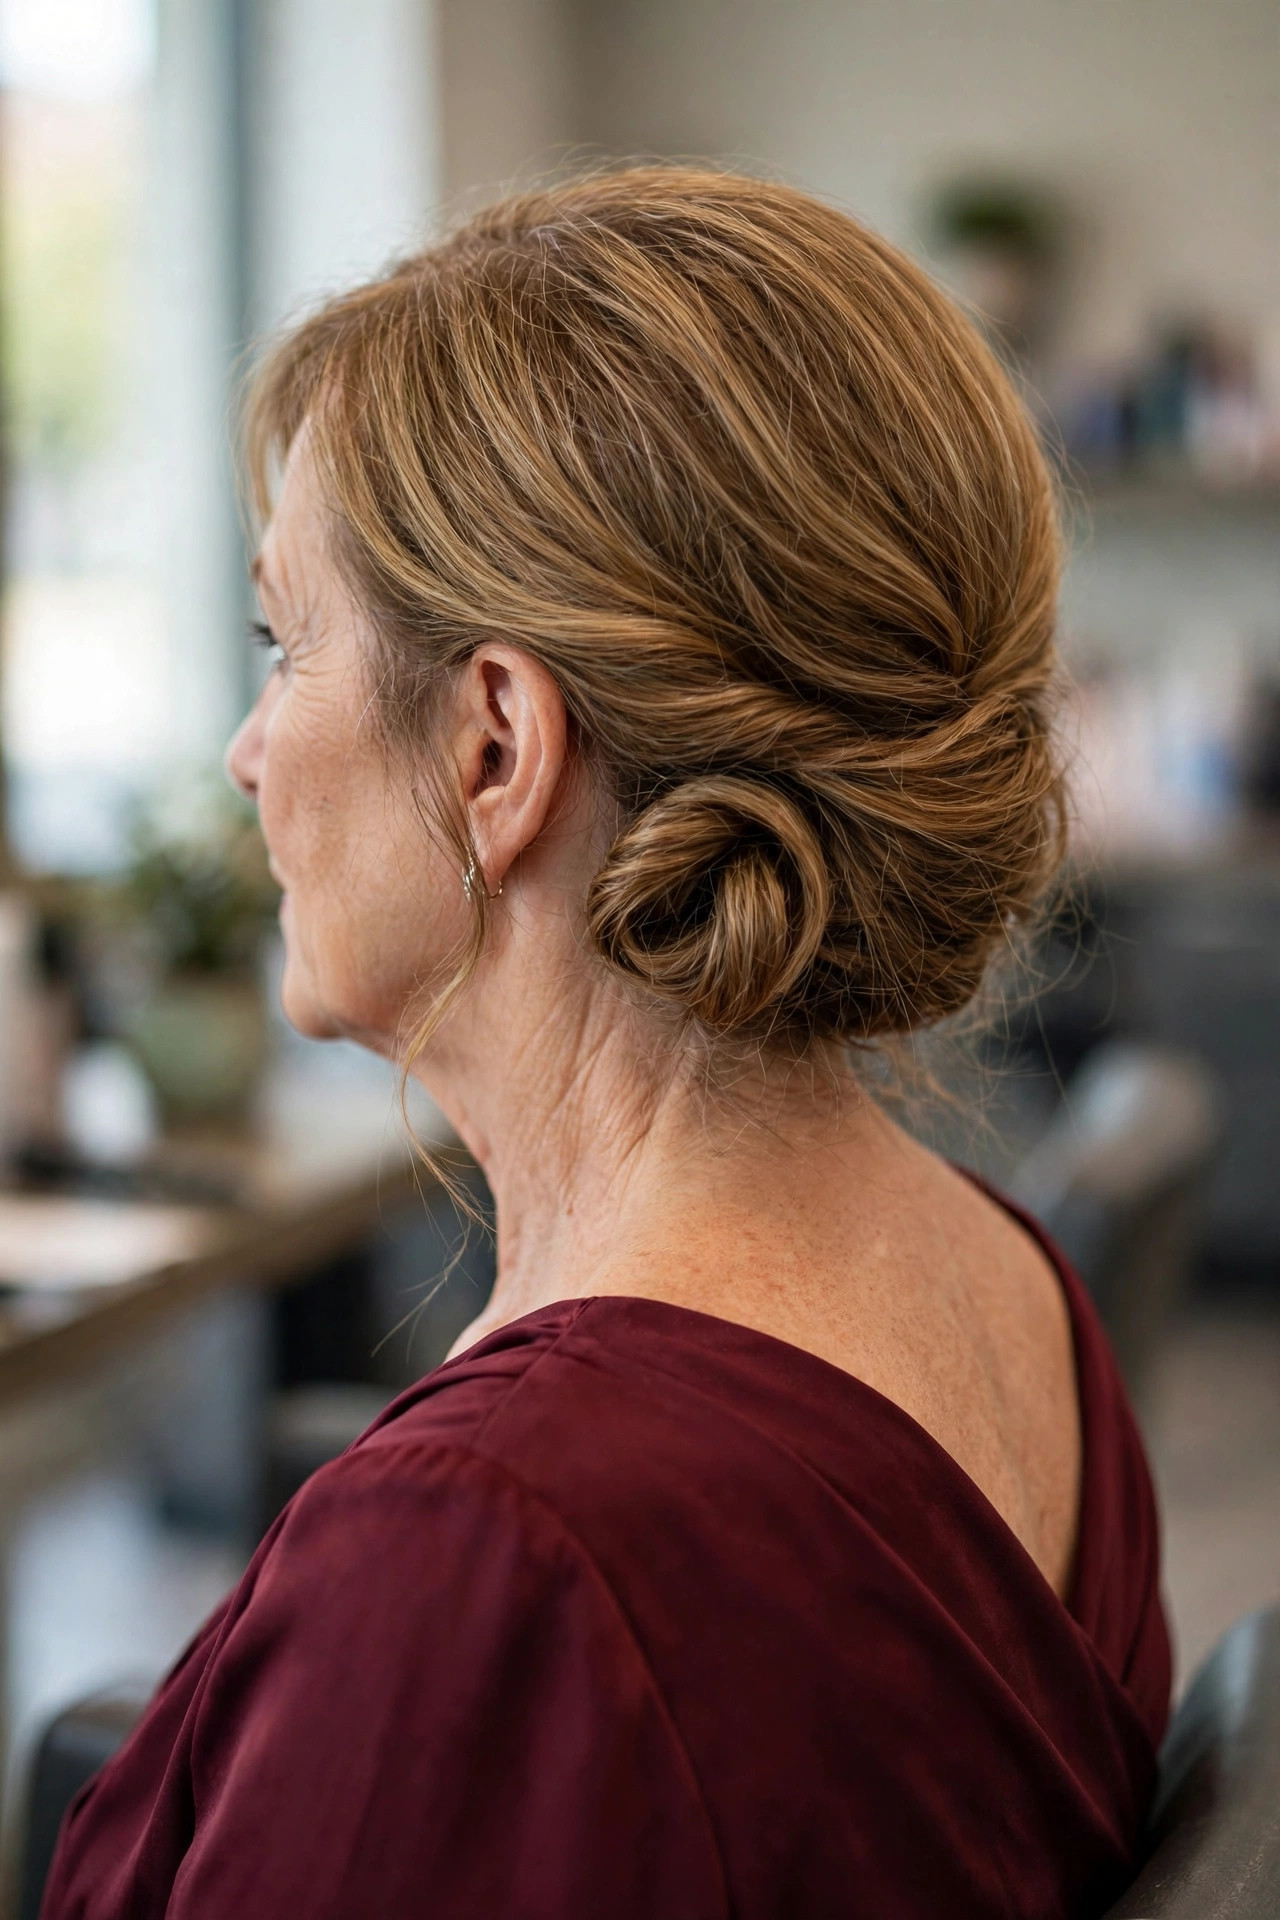
Moving the chignon to one side changes everything: it softens the profile, shows off a good earring, and feels instantly more dressed-up than the centered version. It is a flattering trick for anyone who finds a center bun a little stark from the front.
How to do it: make a deep side part and sweep all the hair toward the opposite side, gathering it into a low ponytail just below and behind the ear. Twist, coil into a small knot, and pin well, letting the knot sit slightly forward so it is visible from the front. Smooth a drop of serum over the sweep to keep the surface glossy and flyaway-free.

10. The Rope Braid Bun
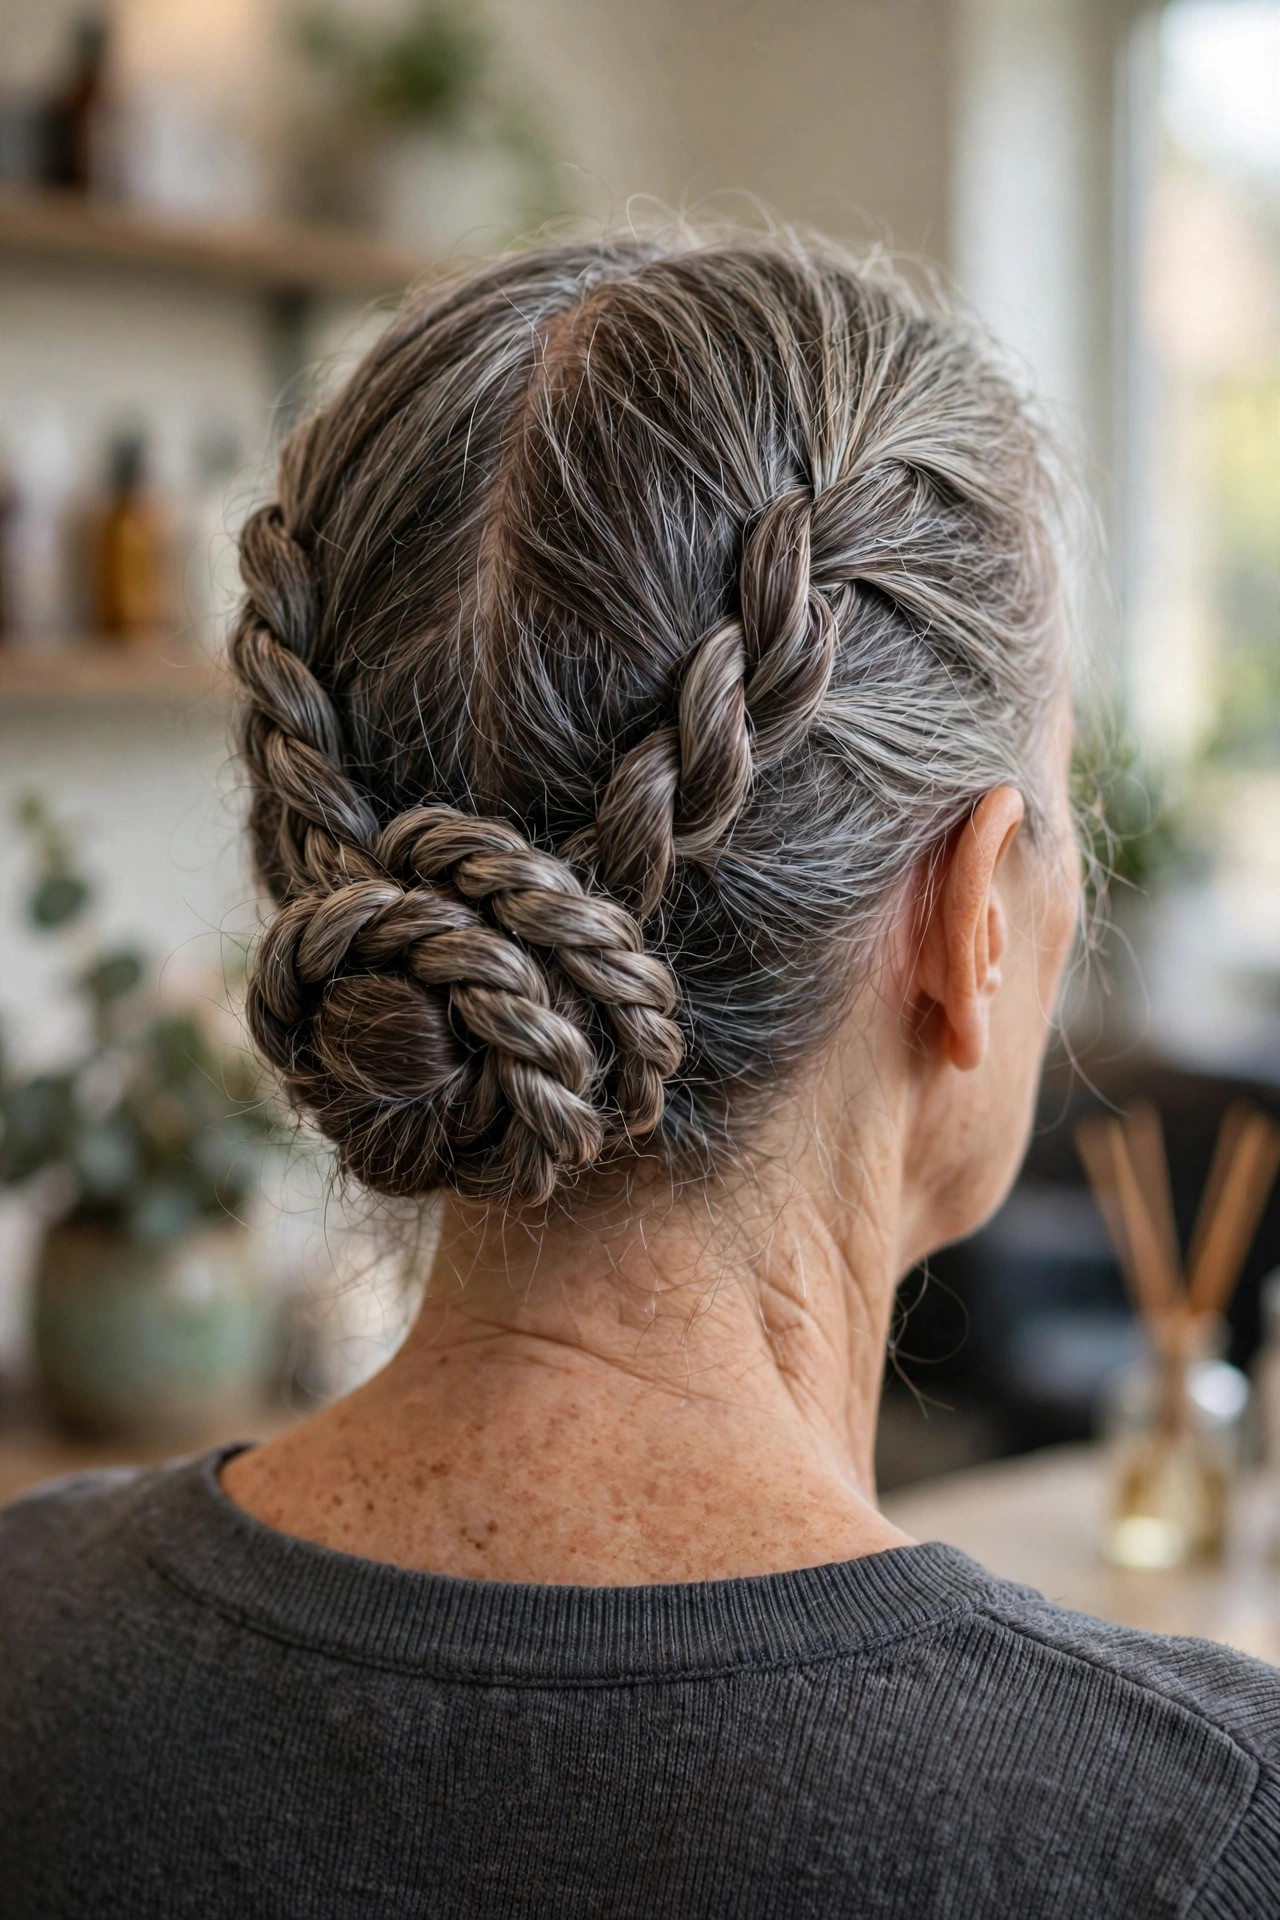
Rope braids are the easiest braid of all — two sections, one direction — and when coiled into a bun they create a beautiful swirled texture that disguises thinning at the back of the head better than a plain bun can.
How to do it: tie a ponytail where you want the bun to sit, divide it in two, twist each section to the right, then wrap the sections around each other to the left. Coil the finished rope into a bun, tuck the ends under, and pin around the perimeter. If the rope tries to untwist as you work, you are wrapping in the wrong direction — reverse and it will hold its shape.
11. The Full Donut Bun
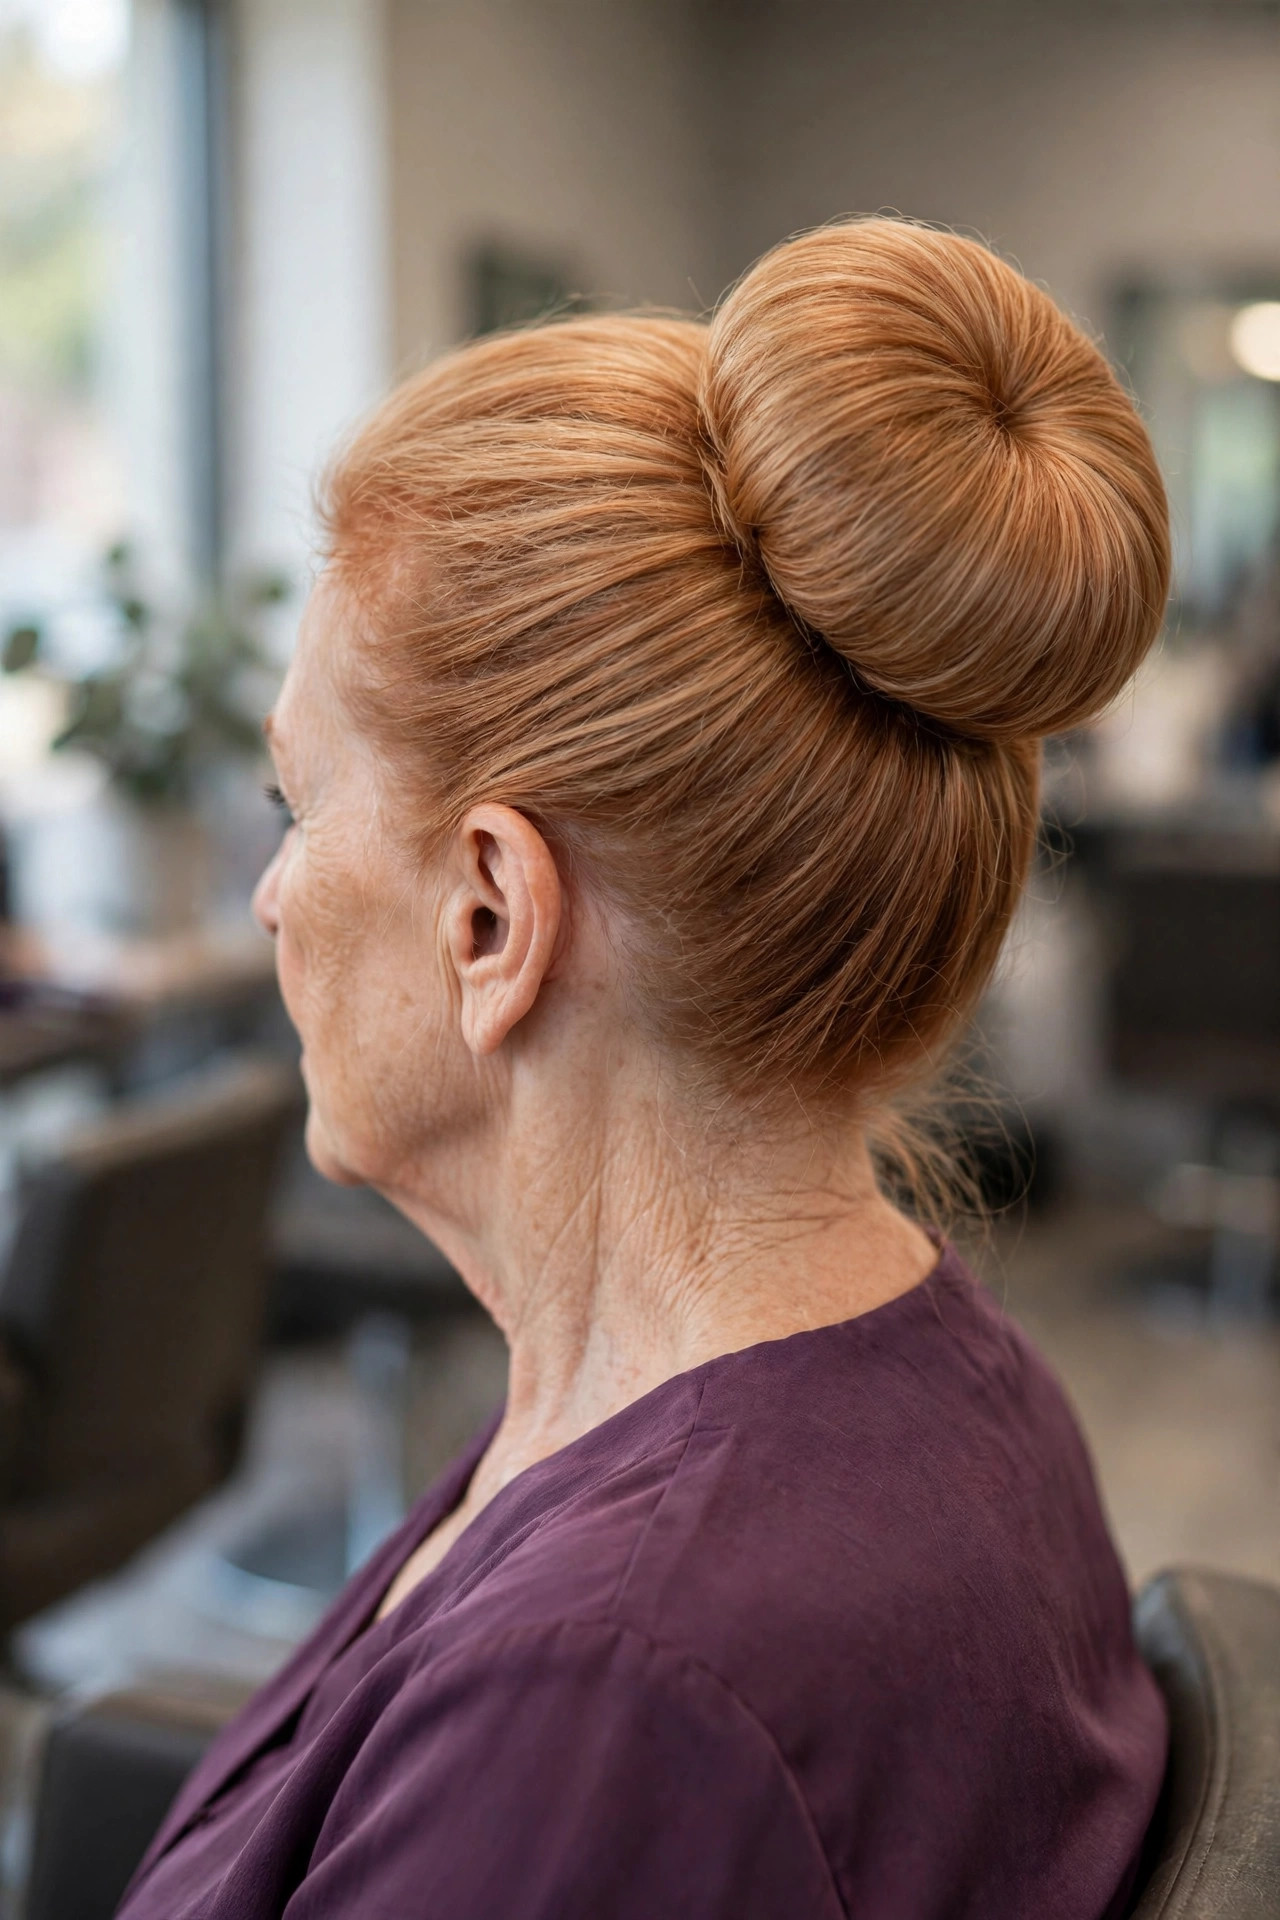
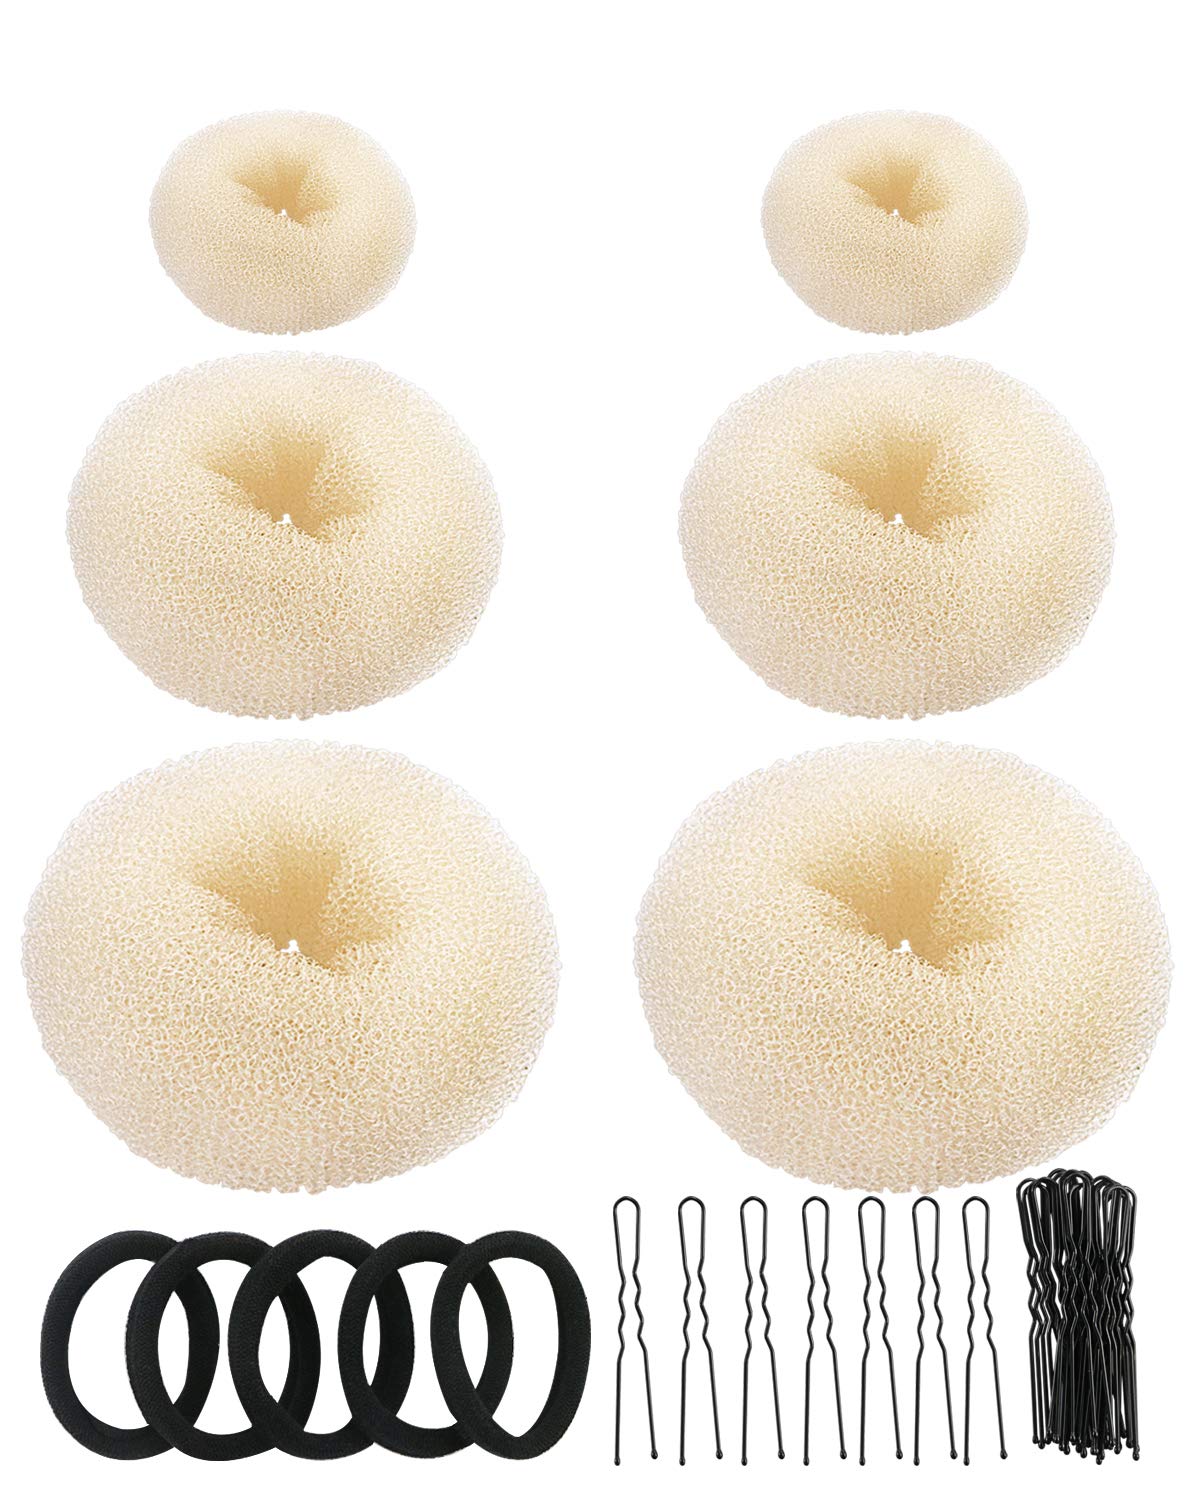
If your bun always comes out smaller than you would like, a donut bun maker is the honest shortcut stylists use. The mesh ring gives the bun its round, full shape while your own hair simply wraps over the top — nobody can tell, and the result photographs beautifully.
How to do it: pull a ponytail through the center of the donut and tip your head forward so the hair falls evenly over the ring. Smooth the hair down around it, secure with a second elastic over the top, then twist the leftover ends around the base and pin. Choose the beige or light-brown ring for gray and blonde hair so nothing peeks through.
12. The Double Twist Updo
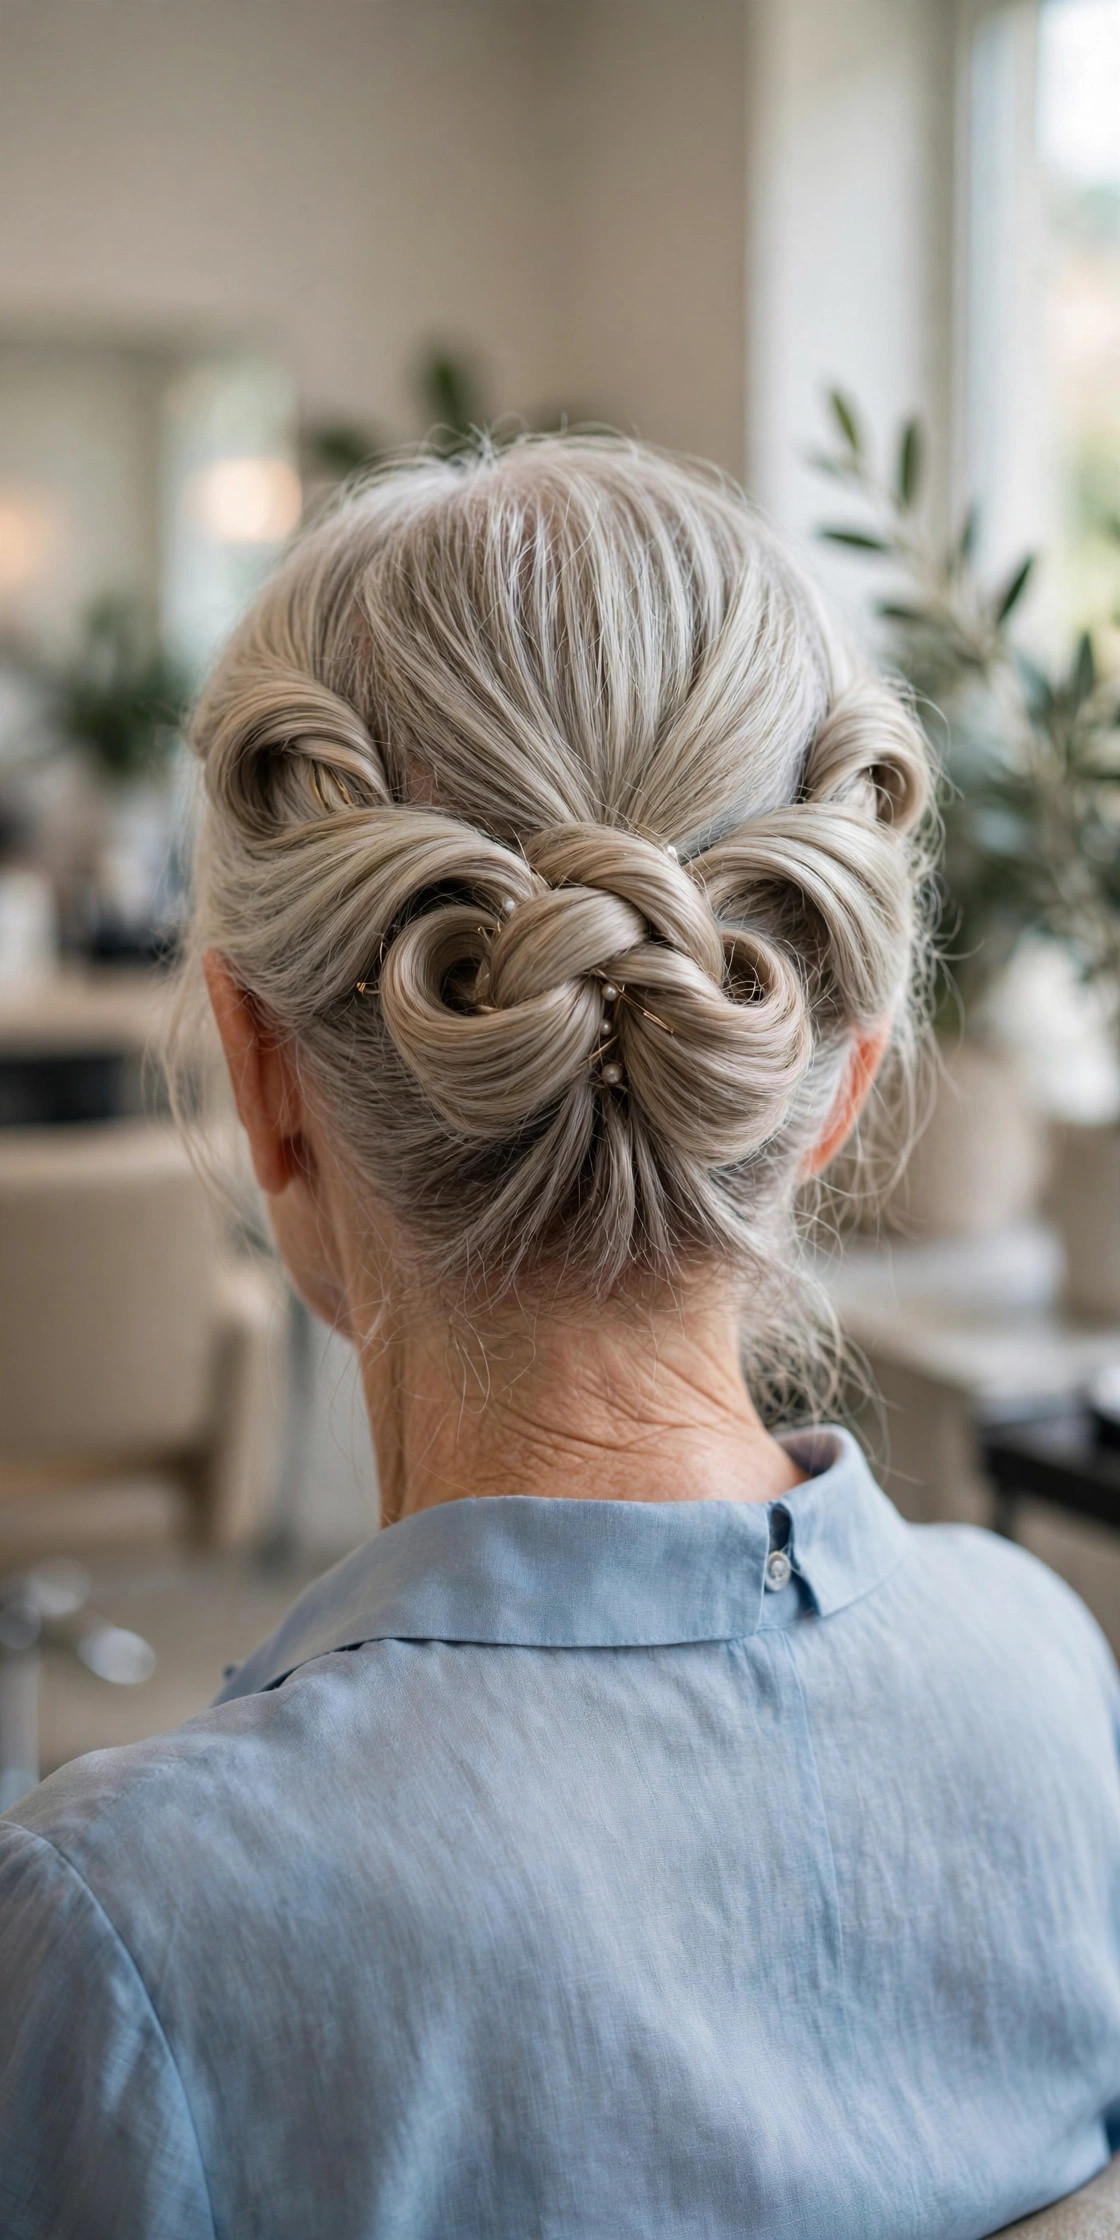
Two twists are more forgiving than one: each side is rolled separately, so you never fight with the full weight of your hair at once. The finished back view has a lovely symmetrical pattern that looks far more complicated than the two minutes it takes.
How to do it: part your hair down the middle at the back. Roll the left section inward toward the center, tucking and pinning as you go from nape to crown, then do the same on the right so the two rolls meet in the middle. Tuck the ends into the seam where the rolls touch, add two crossed pins for security, and soften the front with your fingers.
13. The French Braid Tuck
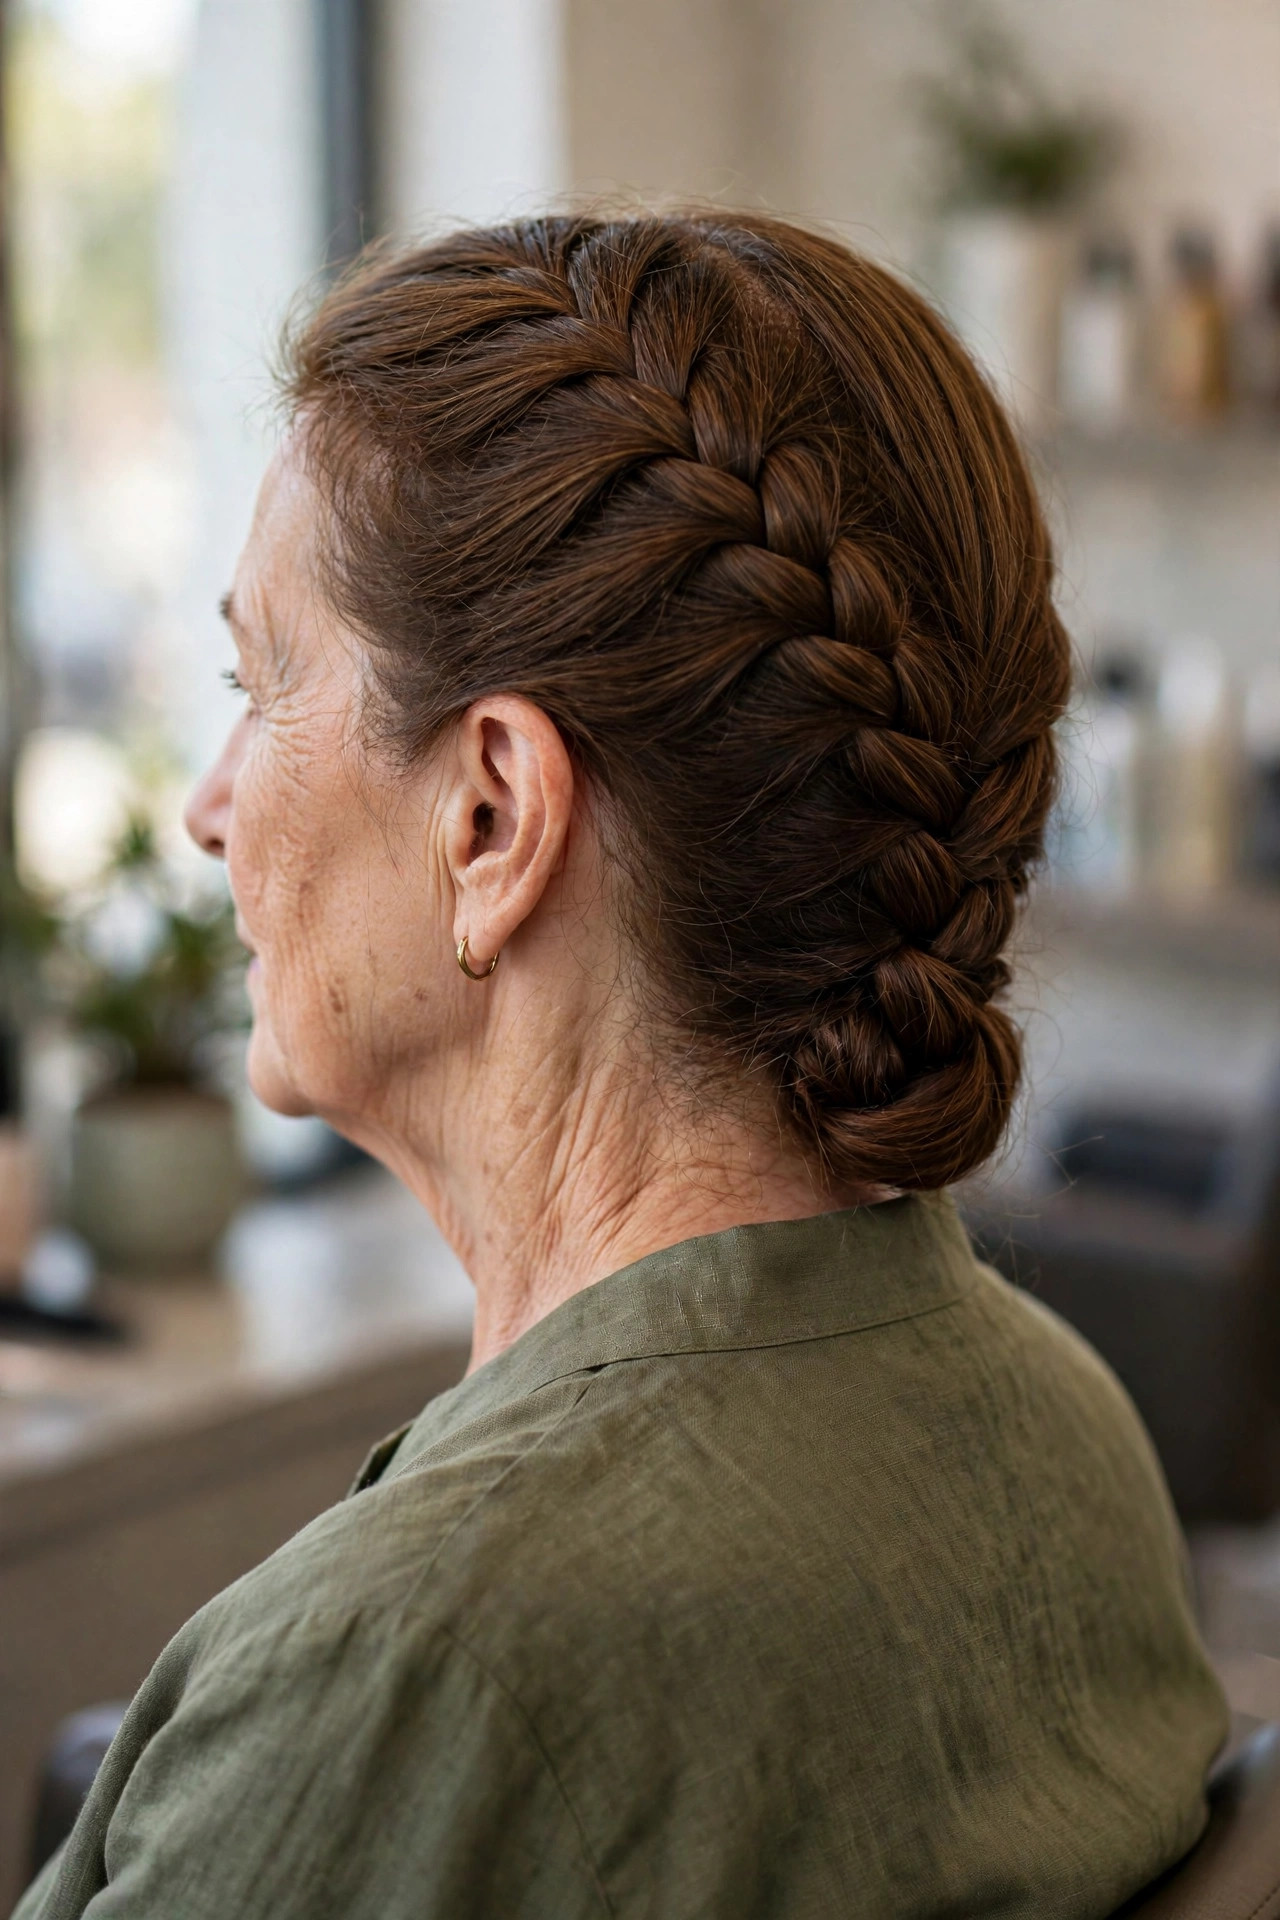
A French braid that disappears into a tuck at the nape is equal parts practical and pretty: the braid keeps every layer contained, which makes this the updo to choose for travel days, gardening, or any time you need hair completely off your neck for hours.
How to do it: French braid from the crown down to the nape, picking up small sections so the braid sits close to the head, then continue into a regular three-strand braid to the ends. Fold the braid tail up underneath itself at the nape and pin it flat, hiding the elastic. If your arms fatigue, rest your elbows on a table — the braid does not mind a pause.
14. The Soft Rolled Updo
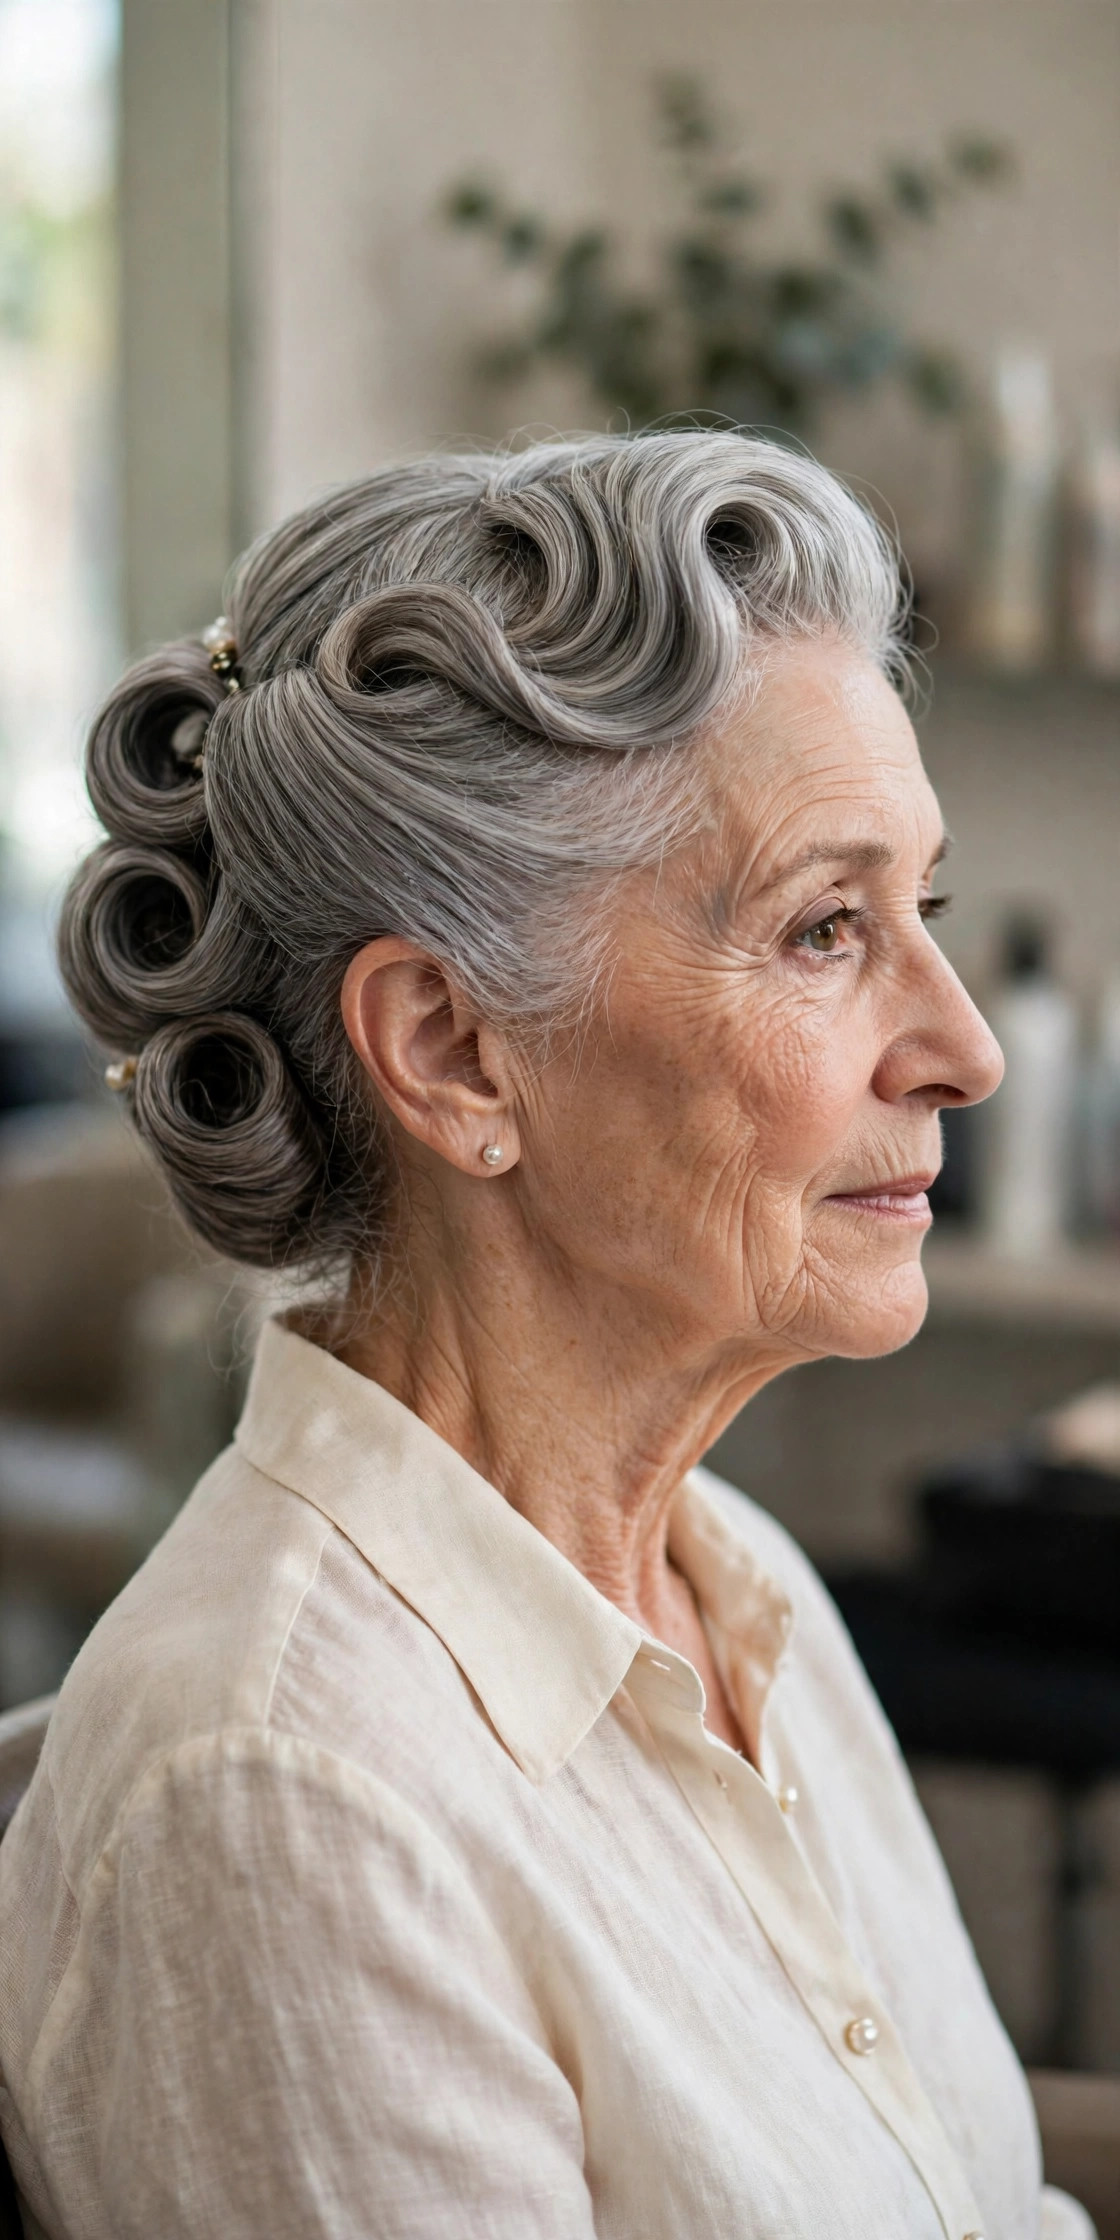
Rolled updos borrow from 1940s styling without looking costumey when kept soft. Rolling the hair upward in sections builds gentle height around the head, which balances the face and gives fine hair the impression of much greater volume.
How to do it: divide the back hair into three horizontal sections. Roll the bottom section upward into a soft roll at the nape and pin it, then roll the middle section down over it, and finish with the top section rolled back from the crown. Work loosely — the rolls should look like soft cushions, not tight sausages — and mist with hairspray to set.
15. The Knotted Low Bun
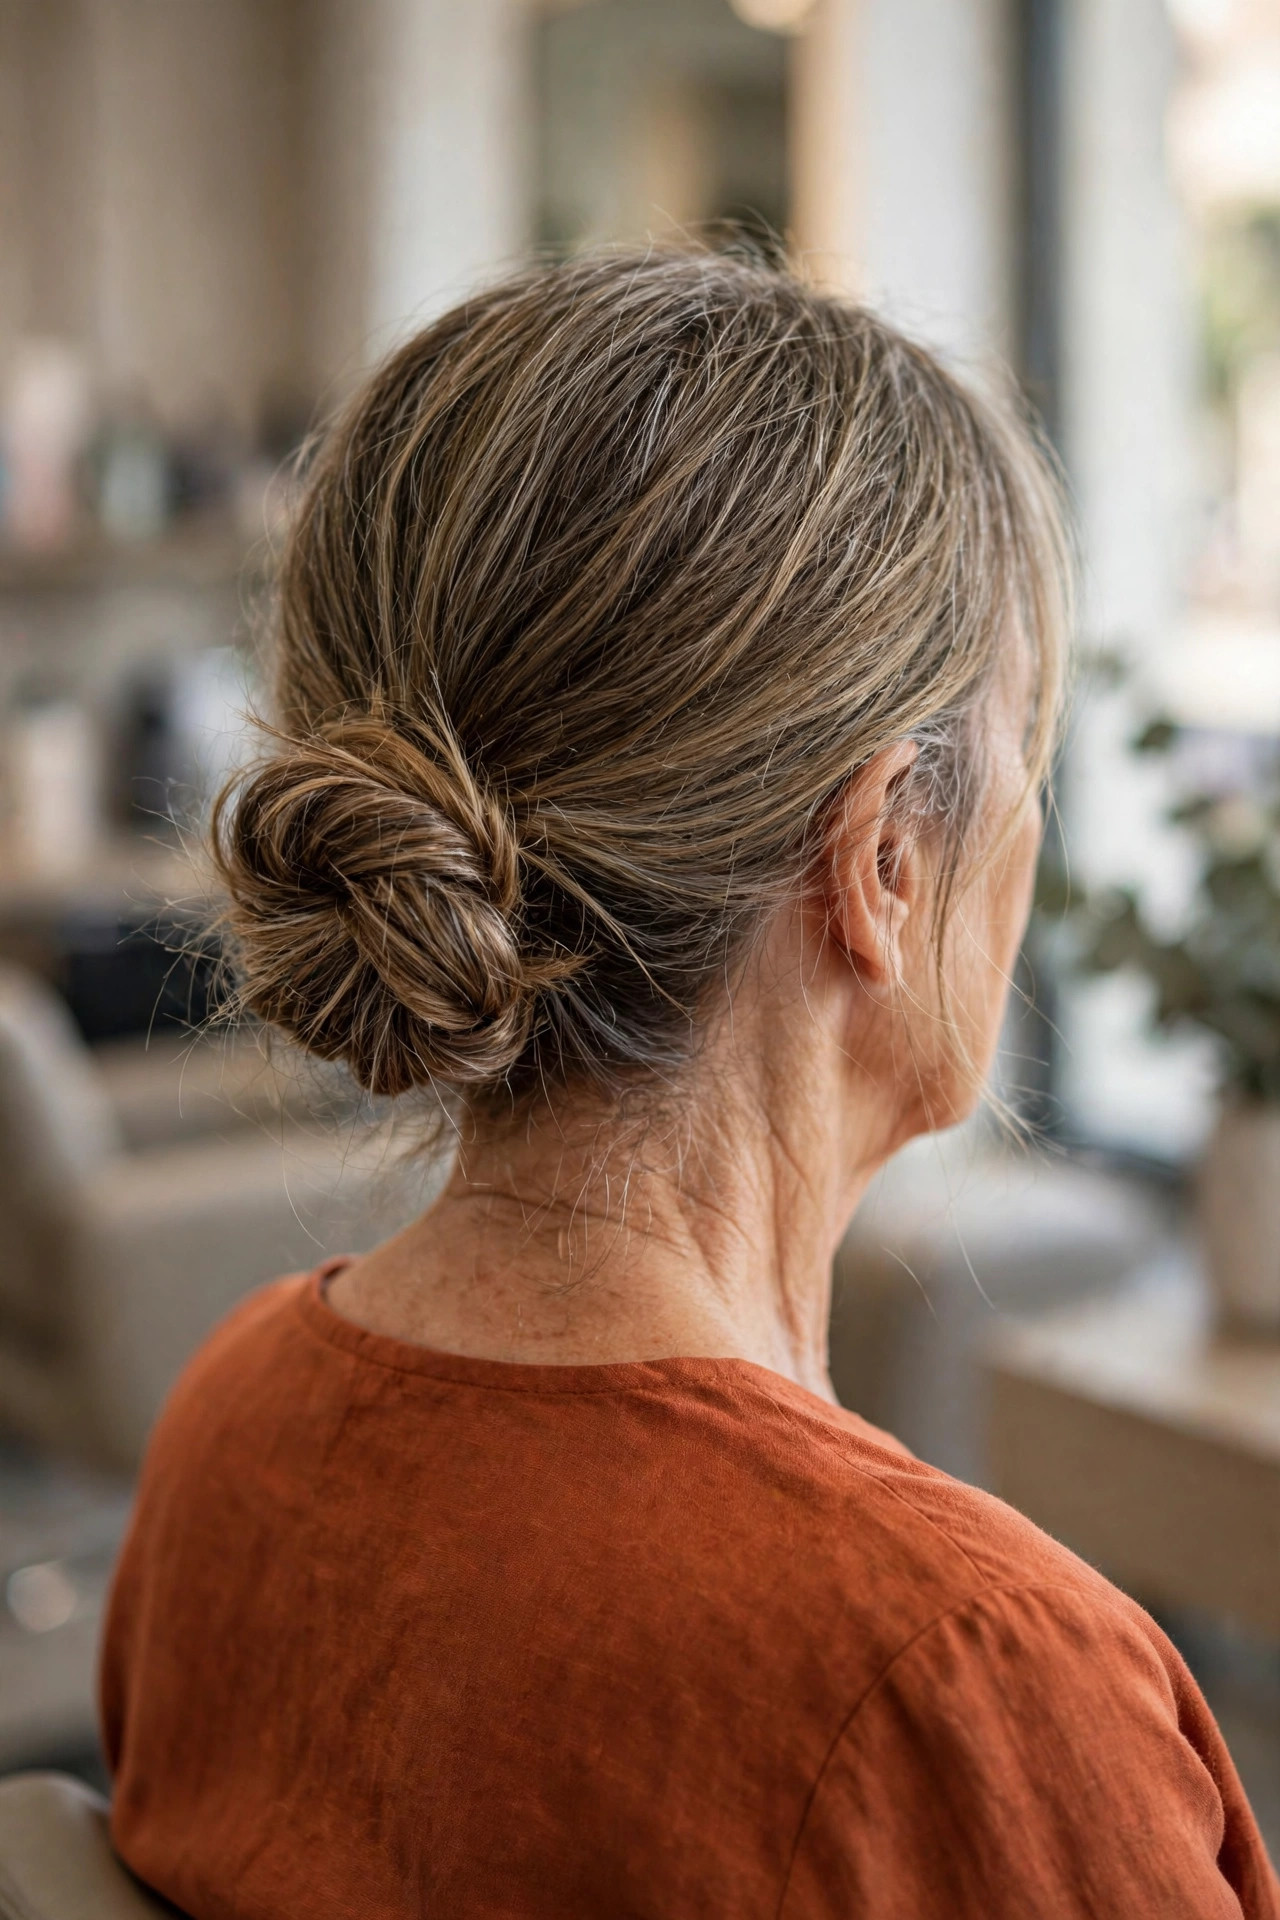
Yes, you can literally tie your hair in a knot — and on medium hair it holds better than you would expect, because the texture of day-two hair grips itself. The result is an undone, modern bun that looks styled rather than accidental.
How to do it: work on unwashed or dry-shampooed hair for grip. Split a low ponytail (untied) into two sections and tie them in a simple knot, then knot again if your length allows. Wrap the ends around the base, pin everything firmly, and pull a few pieces loose at the edges. If the knot slips, your hair is too clean — texture is the fix, not more pins.
16. The Fishtail Braid Bun
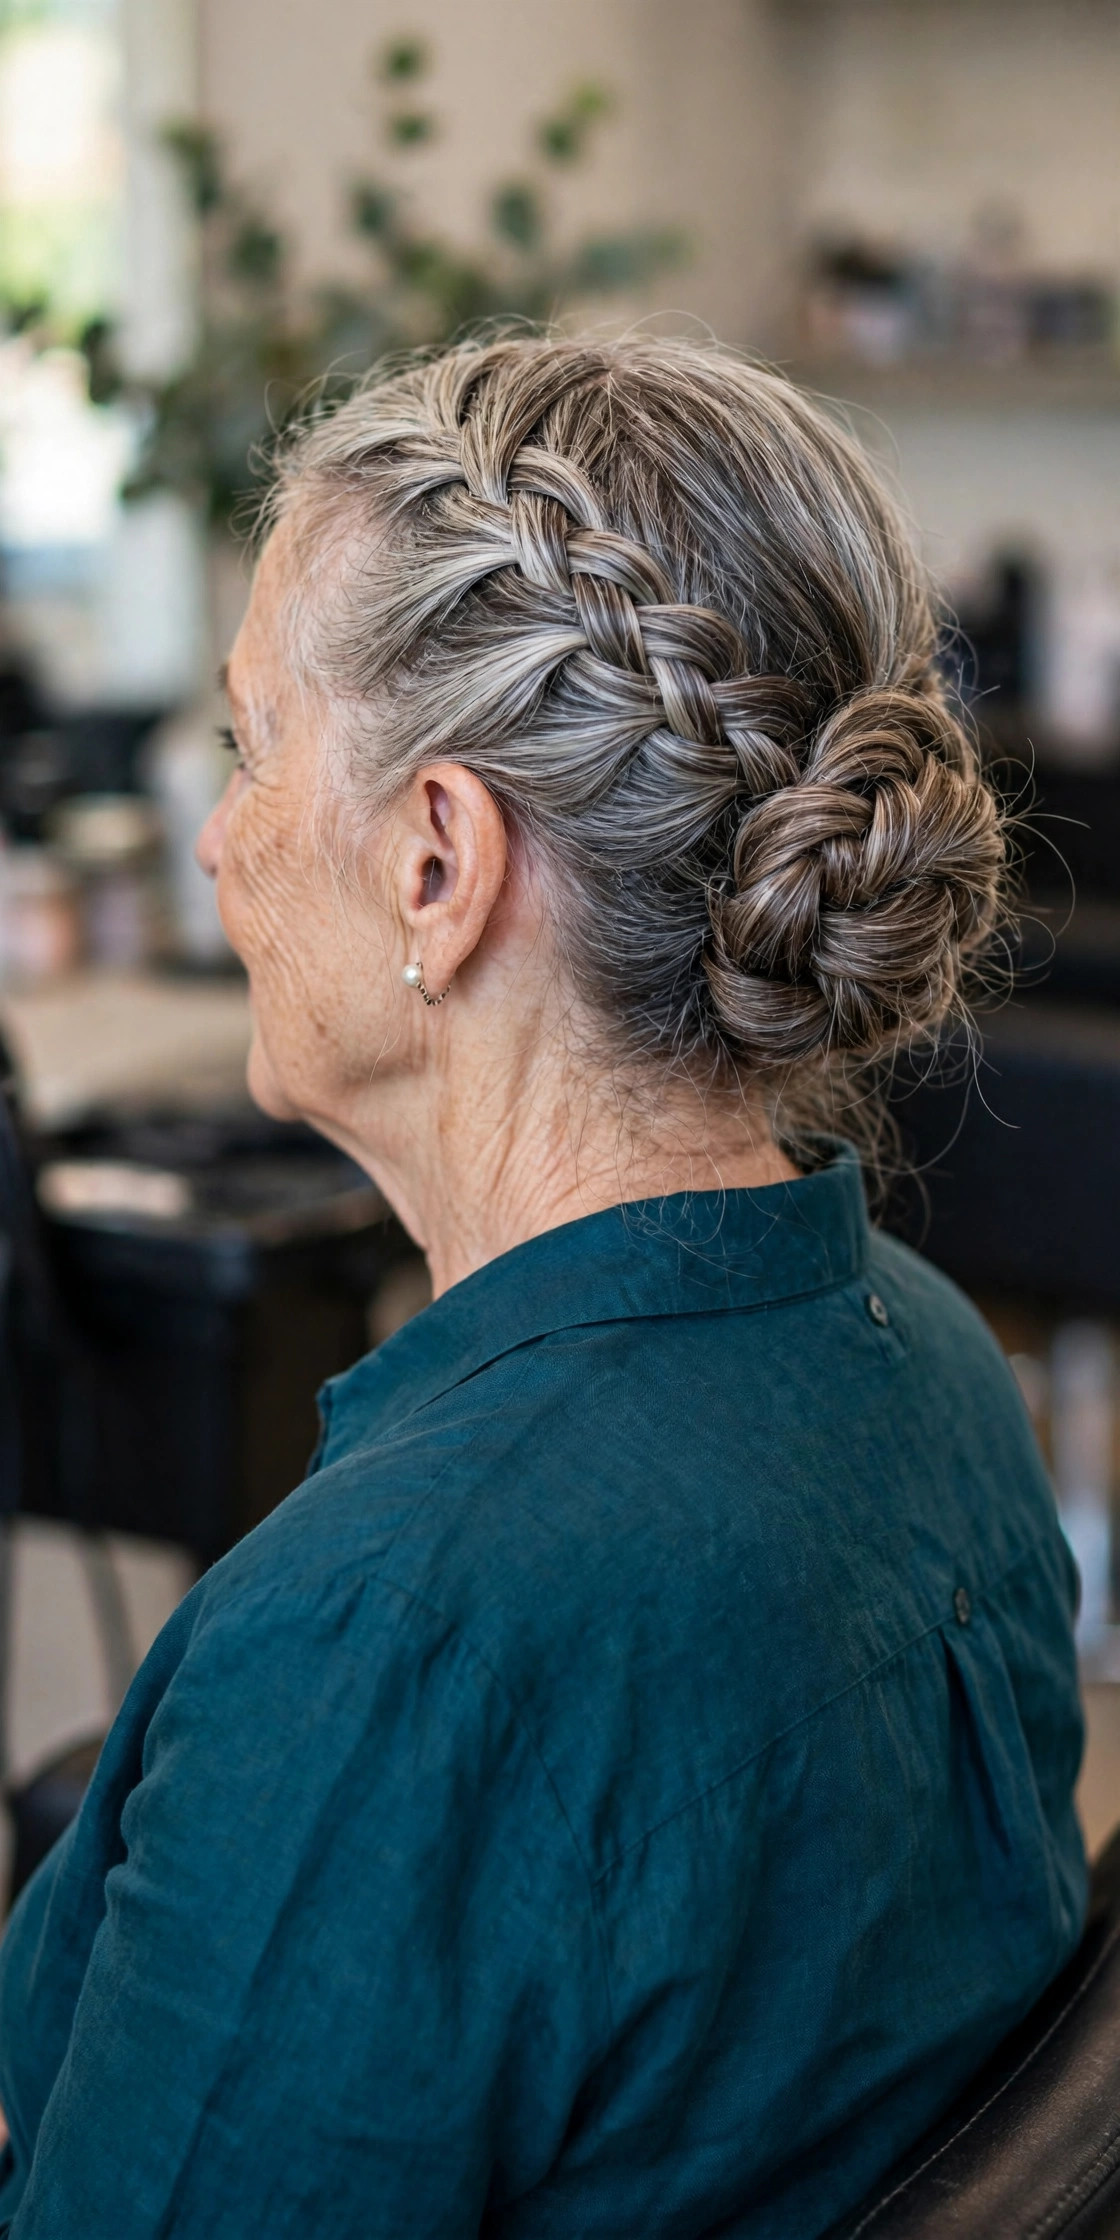
A fishtail braid looks intricate because of its fine woven pattern, but the technique is just two sections with small pieces crossed over. Wrapped into a bun, it becomes the updo that draws compliments and questions all evening.
How to do it: tie a low ponytail, split it in two, and repeatedly cross a small piece from the outside of one section into the other until you reach the ends. Gently pull the braid’s edges apart to pancake it wider — this is where the fullness comes from — then wrap it into a bun and pin. A sea-salt texture spray beforehand helps the small pieces hold their grip.

17. The Twisted Halo Updo
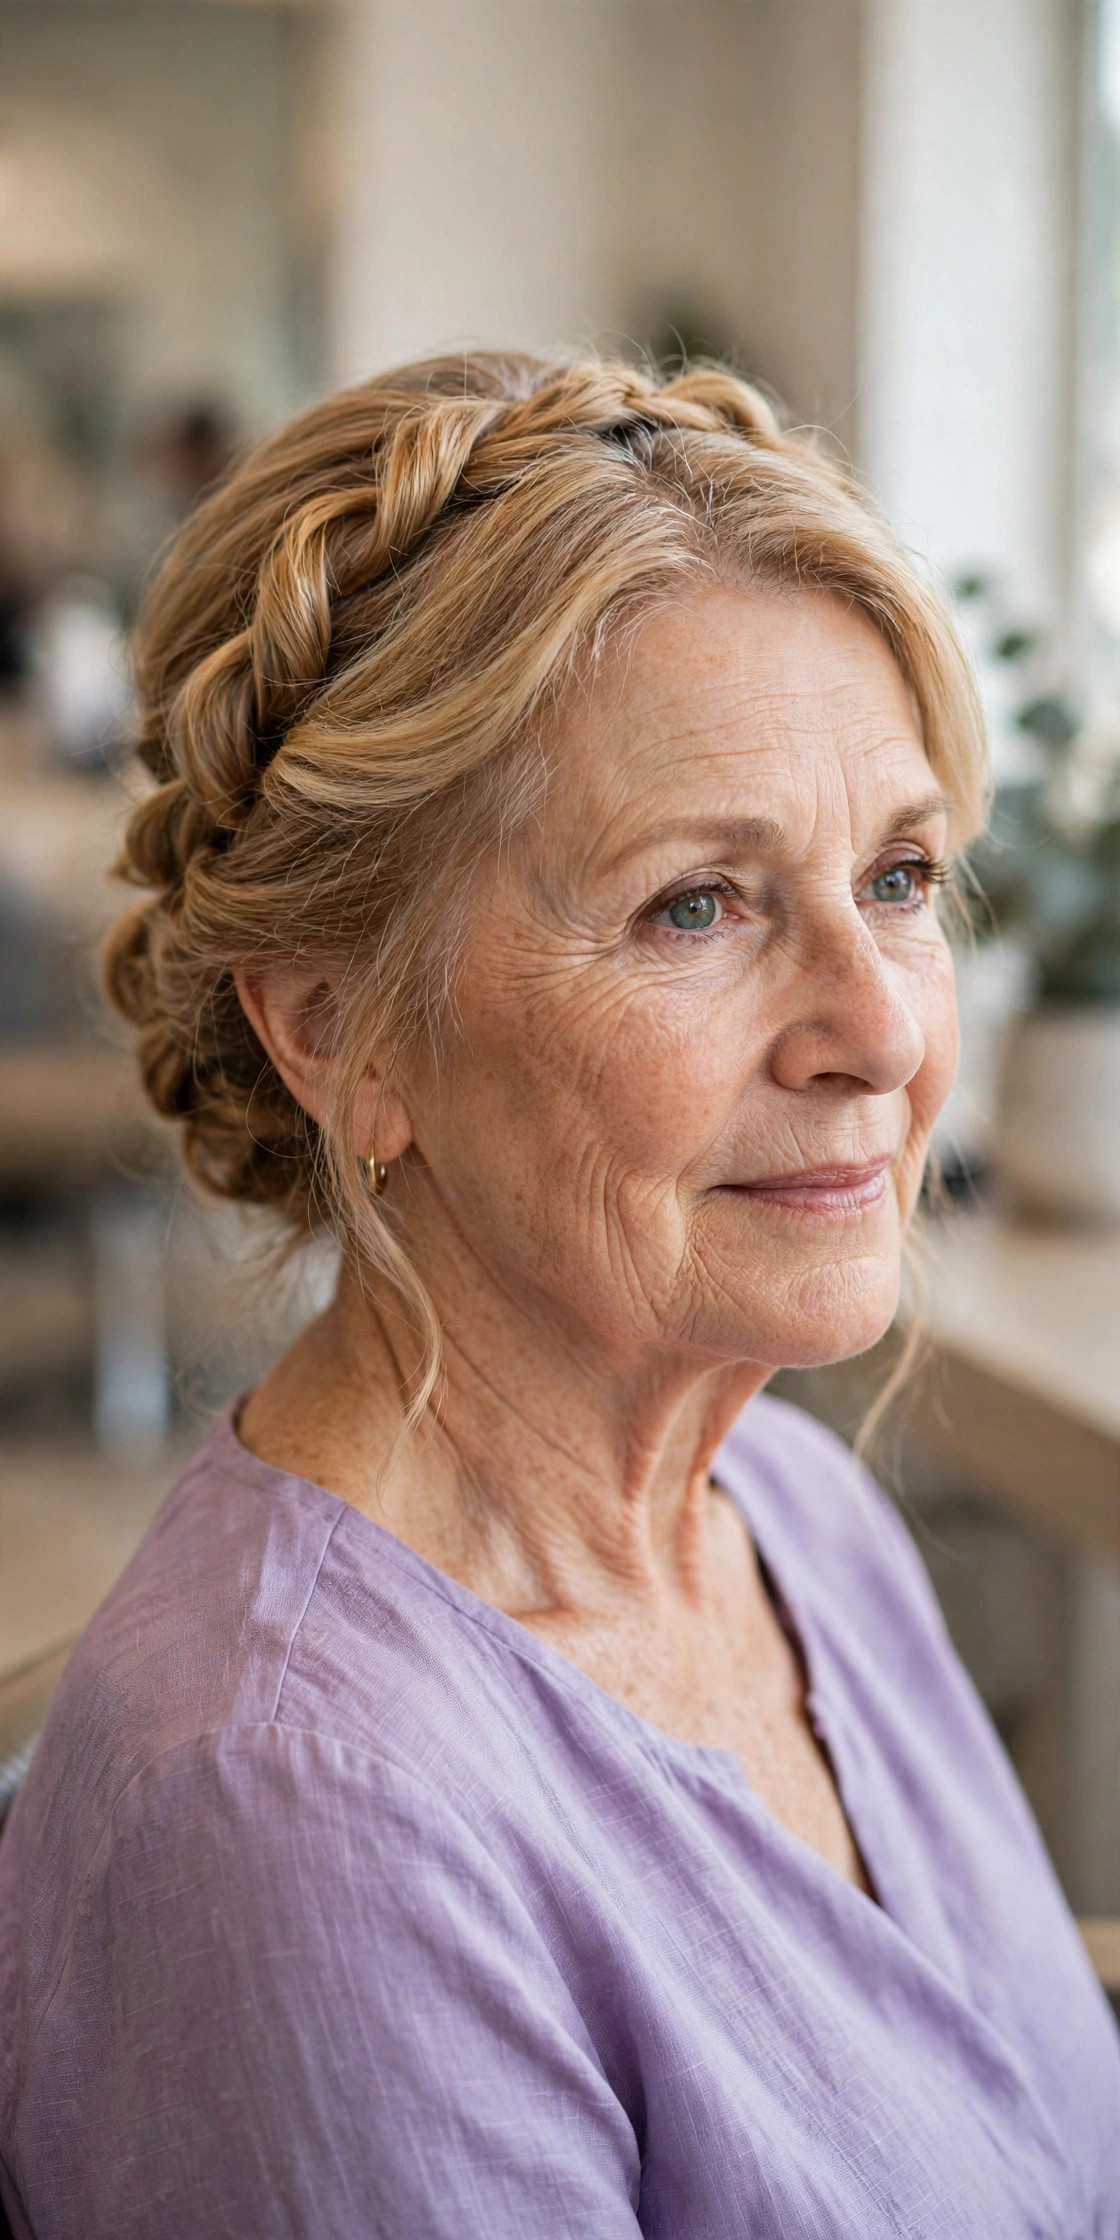
The halo version sweeps two soft twists back from the hairline, framing the face like a gentle headband while the rest of the hair disappears into a low bun. It is especially kind to a softening hairline, because the twists sit exactly where coverage is wanted.
How to do it: work a little mousse through damp or dry hair for control. Take the front section on each side, twist it loosely away from your face as you travel back toward the ear, and pin. Gather everything left at the back — twists included — into a low bun and pin. Keep the twists loose; tight twists flatten the face, soft ones flatter it.

18. The Sleek High Bun
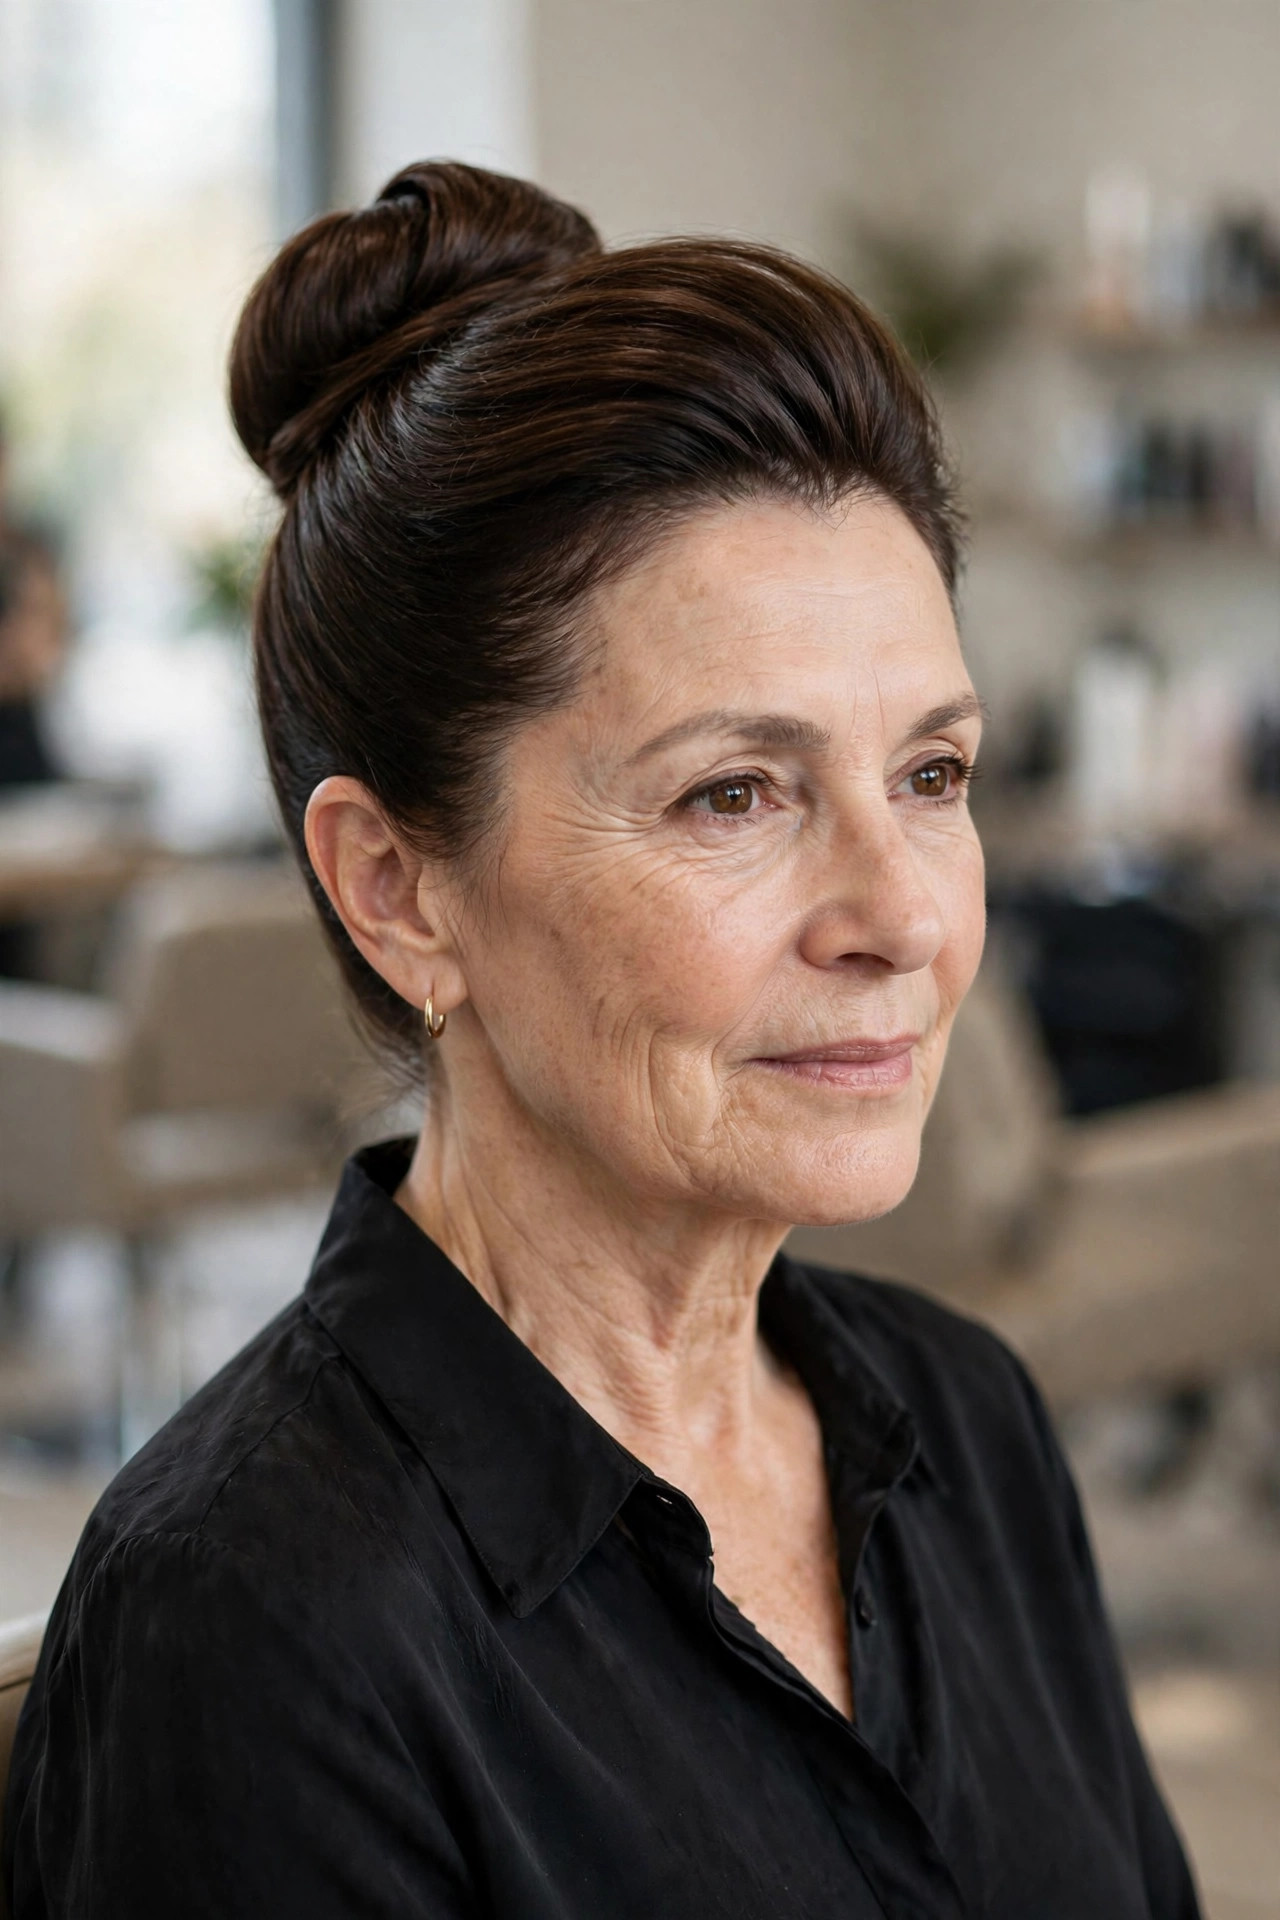
A sleek high bun is pure polish: it draws the eye upward, gives the impression of a mini face-lift, and turns a simple black top into an outfit. The key after 50 is to keep a whisper of volume at the front so the look stays elegant rather than severe.
How to do it: smooth hair into a high ponytail at the crown, using a brush and a drop of anti-frizz serum on the surface only. Twist the ponytail, wrap it into a neat bun, and pin the base all around. If the front feels too flat, gently push a fingertip under the hair at the hairline and lift before you spray.
19. The Curly Pinned-Up Updo
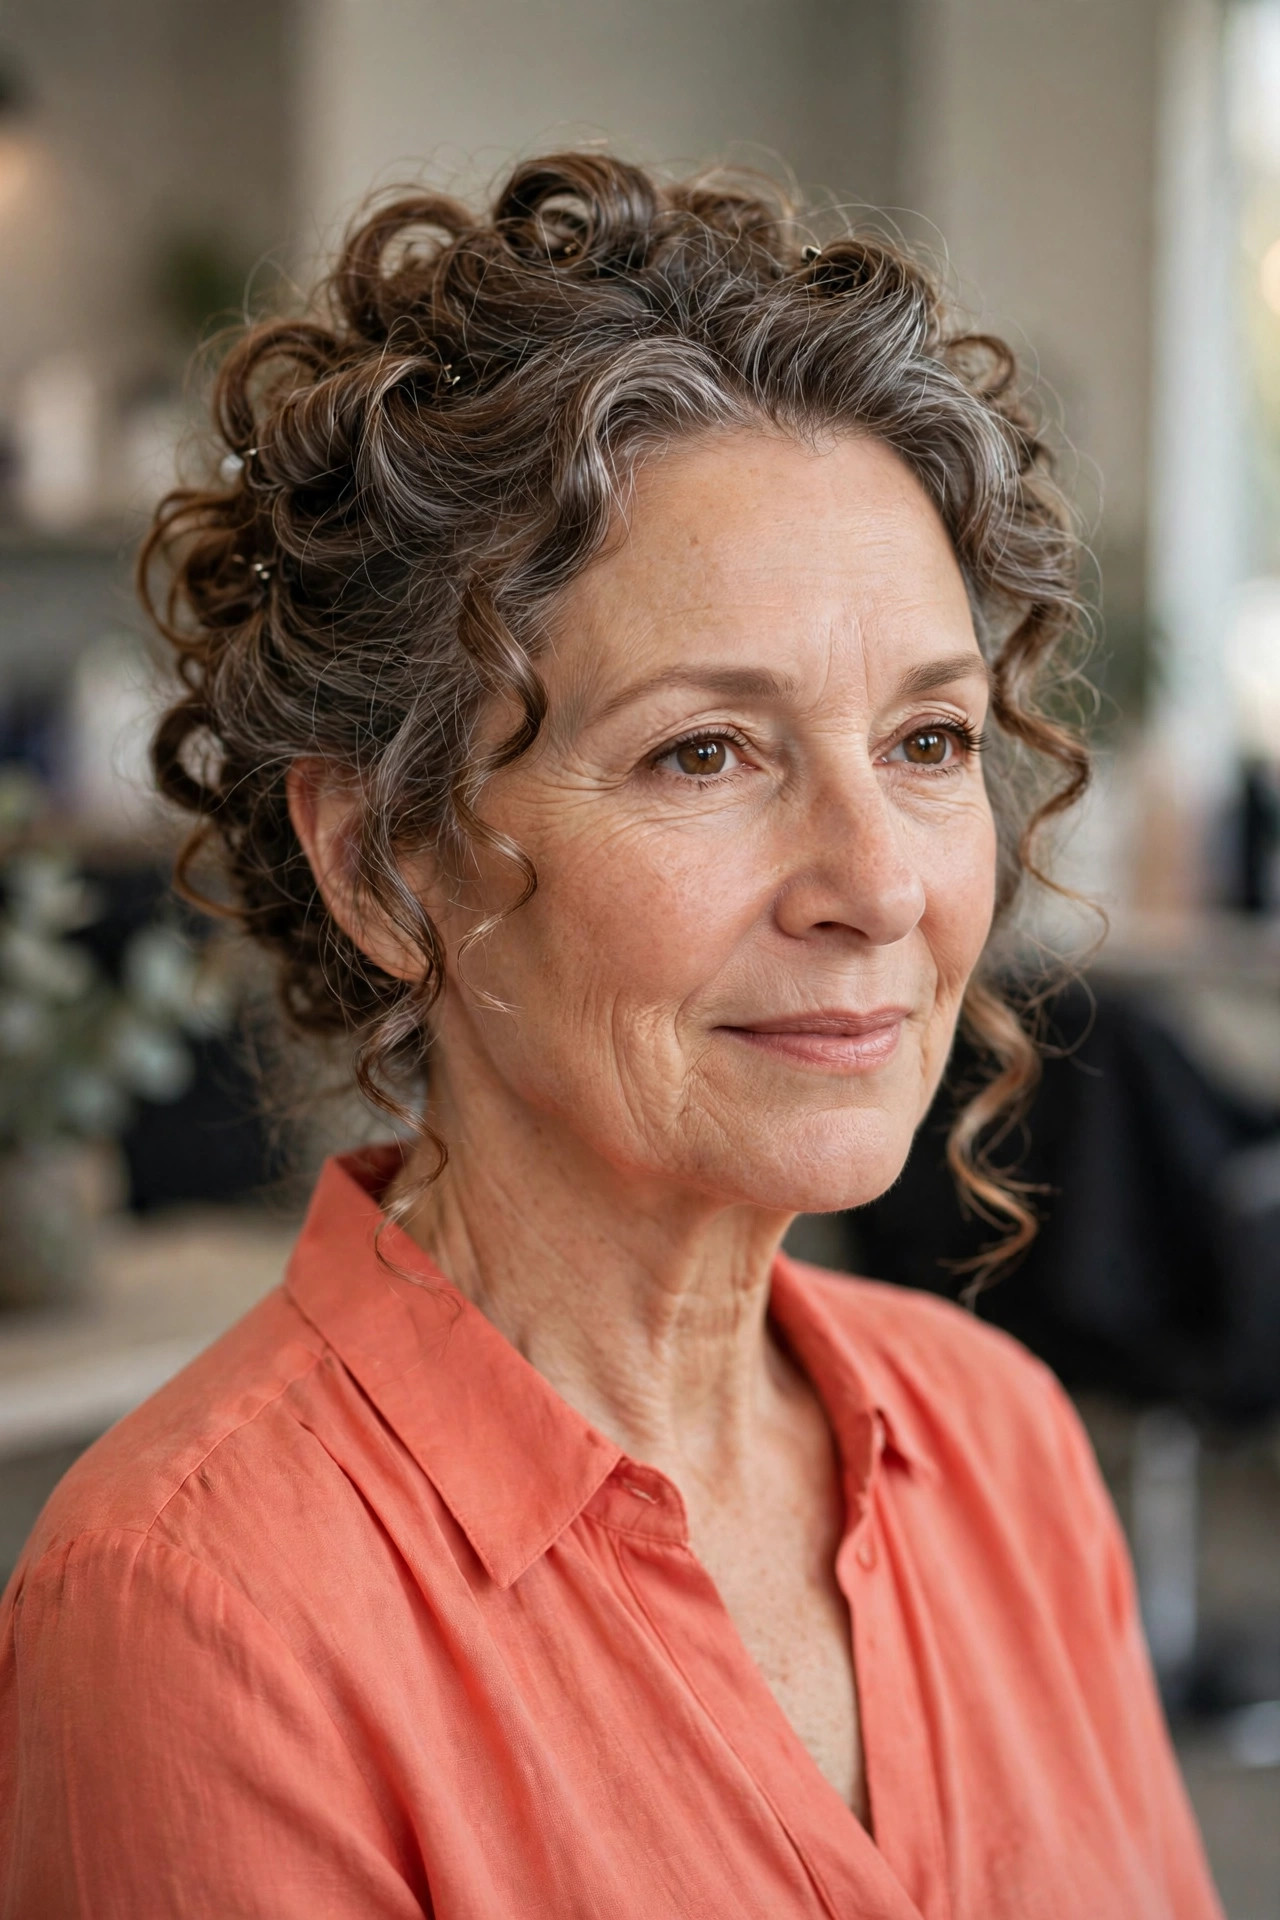
Curly hair does not need to be straightened to go up — in fact, curls pin up more easily than straight hair because the texture grips the pins. This loose, gathered style celebrates silver-streaked curls instead of flattening them into submission.
How to do it: work with dry, defined curls and skip the brush entirely. Gather the back hair loosely upward with your fingers, twist once, and pin the mass at the crown and back, then go curl by curl, pinning any that droop until the shape pleases you. Leave two or three curls free at the front. A dab of texturizing putty on the ends keeps the free curls defined all day.

20. The Banana Clip Fold
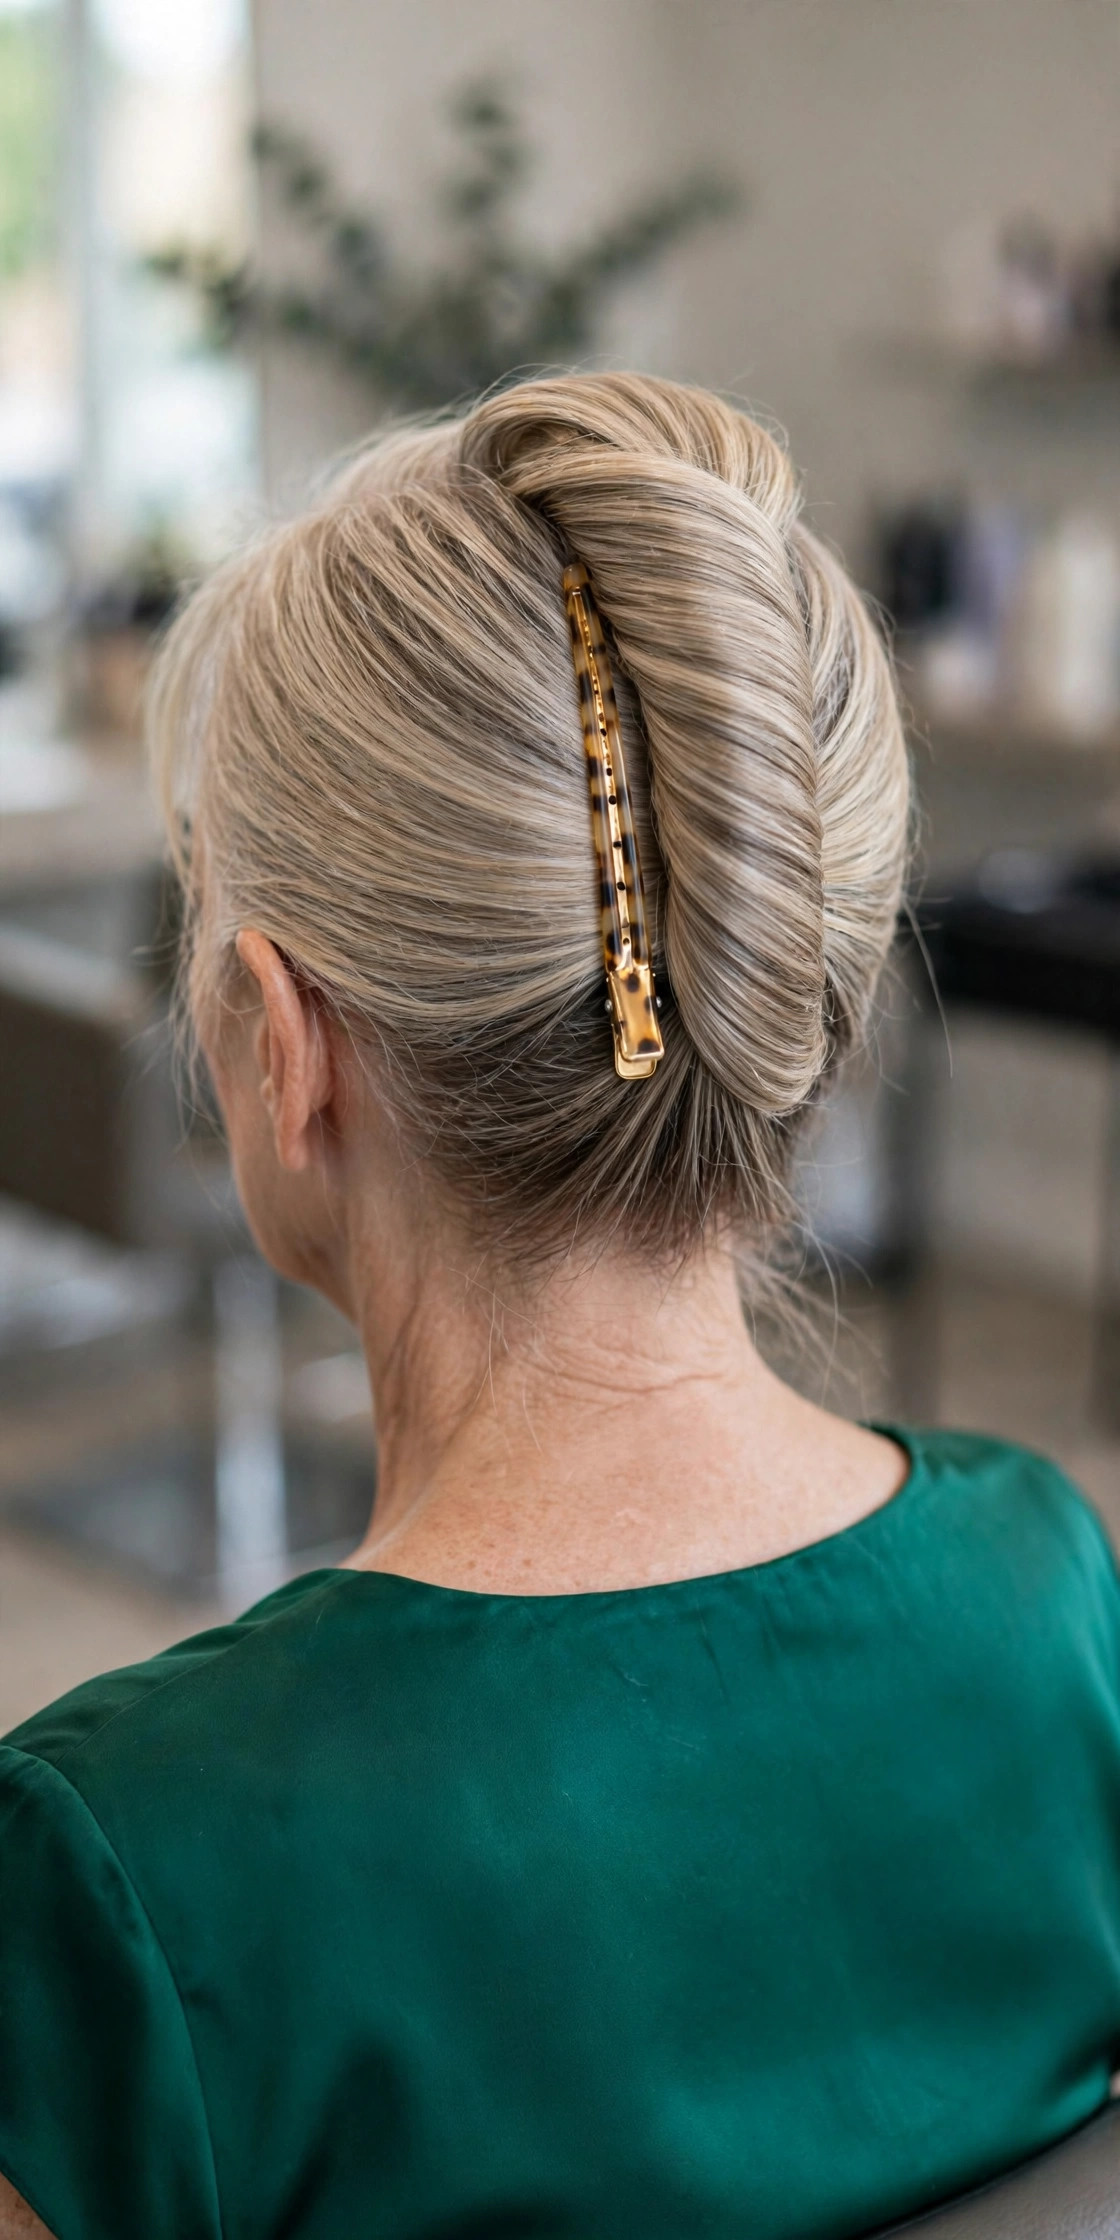
The banana clip is back, and it earns its return: one clip creates a smooth vertical fold that mimics a French twist with none of the pinning. For anyone whose hands or shoulders make pinning difficult, this may be the easiest elegant updo of all.
How to do it: gather your hair at the back as a low ponytail held in one hand, twist it upward once so it lies flat against the back of your head in a vertical fold, then open the banana clip and clamp it vertically over the fold from top to bottom. Adjust the top so a little soft volume puffs above the clip, and pull a strand or two loose at the front.
Recommended Products
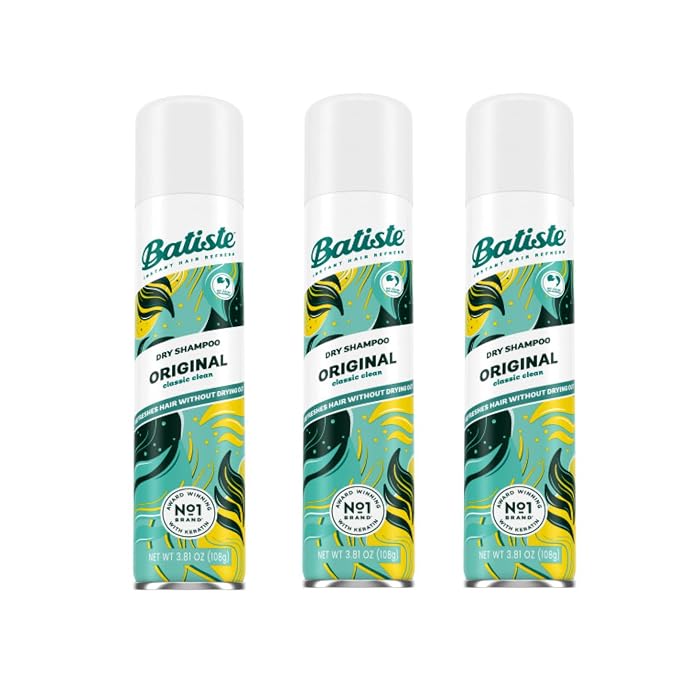
Twenty updos, one small kit. These six products cover every style in this guide — pins and a bun maker for structure, a flat claw clip for the two-minute days, and the grip and finishing products that make medium hair cooperate.
- Style on day-two hair whenever you can — clean hair is slippery hair.
- Add grip first: dry shampoo, mousse, or texture spray before you pin anything.
- Pin with U-pins for buns and twists; slide them in at an angle and wiggle slightly to lock.
- Cross two pins in an X at any point that feels loose instead of adding five more.
- Keep it comfortable: if you feel pulling at the hairline, it is too tight — redo it looser.
- Take pins out gently at night and never sleep in a tight updo.
- Rotate your bun position through the week to avoid stressing the same strands.
Frequently Asked Questions
What is the easiest updo for medium hair over 50?
The claw clip twist is the easiest: gather, twist up, fold, and clip — under two minutes with a single tool. The tucked low ponytail and the knotted low bun are close seconds because they need no braiding skill and only a couple of pins.
How do I make an updo stay up in fine or thinning hair?
Grip is everything. Style on day-two hair or add dry shampoo or mousse before you start, choose U-shaped pins over straight bobby pins for buns and twists, and cross two pins in an X wherever the style feels loose. A donut bun maker also adds the appearance of fullness without any teasing.
Are updos damaging for hair over 50?
Not when they are done gently. Avoid pulling hair tight enough to feel a tug at the hairline, rotate where your bun sits so the same strands are not stressed daily, use snag-free elastics, and take your updo down before bed. Loose, low styles like the Gibson tuck and low chignon are the kindest options.
Can I do an updo if my hair is layered?
Yes — layers are actually helpful in soft updos because the shorter pieces create natural face-framing. For sleeker styles, tuck stray layers in with pins, or choose a style like the braided crown or French braid tuck that gathers layers in as it goes.
How long does medium hair need to be for an updo?
Most of these styles work from just below the chin downward. Collarbone length is the sweet spot for chignons, twists, and tucked styles; if your hair is on the shorter side of medium, start with the claw clip twist, the Gibson tuck, and the double twist, which need the least length.
What products do I really need for easy updos?
A small kit covers all twenty styles: U-shaped pins, a donut bun maker set, a flat claw clip, a flexible-hold hairspray, and a dry shampoo or mousse for grip. Everything else — serum for sleek finishes, texture spray for braids — is a nice extra rather than a necessity.
An updo is not a special-occasion costume — with medium hair and a five-product kit, it can be your easiest everyday option. Start with the claw clip twist this week, graduate to the low chignon when you want polish, and let the braided and twisted styles carry you through every wedding, lunch, and warm afternoon in between. If a shorter cut is calling instead, our bob haircuts for women over 50 guide is a lovely next read.