Easy Updos for Women Over 60 You Can Do Yourself
This post contains affiliate links. As an Amazon associate, I earn from qualifying purchases. I only recommend products that are of high quality and that I would use myself.
Somewhere along the way, updos picked up a reputation they never earned: that they belong to salons, weddings and other people’s hands. In truth, most classic updos were household skills long before they were salon services — a chignon, a twist and a tucked roll were how women put their hair up every ordinary morning. Nothing about turning 60 changes your eligibility. What changes is the method: shorter sessions, lower placements, fewer pins, and styles designed so tired arms and less-flexible shoulders are part of the plan, not an afterthought.
Below are 20 easy updos for women over 60 that you can genuinely do yourself, each with an honest difficulty note — including which ones to skip on a stiff-shoulder day and which tricks make fine, slippery hair hold a pin. Every one works on the hair you already have, whether you wear it long like the styles in our guide to long hairstyles for women over 60 or a little shorter. You need four things to start: U-pins, a few bobby pins, two elastics, and ten unhurried minutes.
Table of Contents
- 1. Classic Low Chignon at the Nape
- 2. Simple French Twist
- 3. Donut Bun for Instant Fullness
- 4. Soft Messy Topknot
- 5. Braided Crown Updo
- 6. Gibson Tuck
- 7. Twisted Low Bun
- 8. Rolled Headband Tuck
- 9. Claw Clip Twist
- 10. Sleek High Bun with a Lifted Crown
- 11. Side-Swept Low Bun
- 12. Pinned-Up Curls for Naturally Curly Hair
- 13. French Braid into a Low Bun
- 14. Double Twist Updo
- 15. Scarf-Wrapped Bun
- 16. Simple Knotted Bun
- 17. Beehive-Lite with a Soft Lifted Crown
- 18. Romantic Low Bun with Two Tendrils
- 19. Twisted Halo Updo
- 20. Two-Minute Loop Bun
- Recommended Products
- FAQs
- Arms or shoulders protest? Gibson tuck (6), headband tuck (8), claw clip twist (9) and loop bun (20) — everything happens at or below ear level.
- Fine or thinning hair? Donut bun (3) for borrowed fullness, knotted bun (16) over padding, beehive-lite (17) for crown lift.
- Formal occasion? French twist (2), side-swept bun (11), romantic low bun (18).
- Curly hair? Pinned-up curls (12) — no smoothing required, ever.
- Total beginner? Loop bun (20) first, messy topknot (4) second, chignon (1) third. That order builds every skill the rest use.
- Long day, no touch-ups? Braided crown (5) or French braid into a bun (13) — braids hold themselves.
1. Classic Low Chignon at the Nape
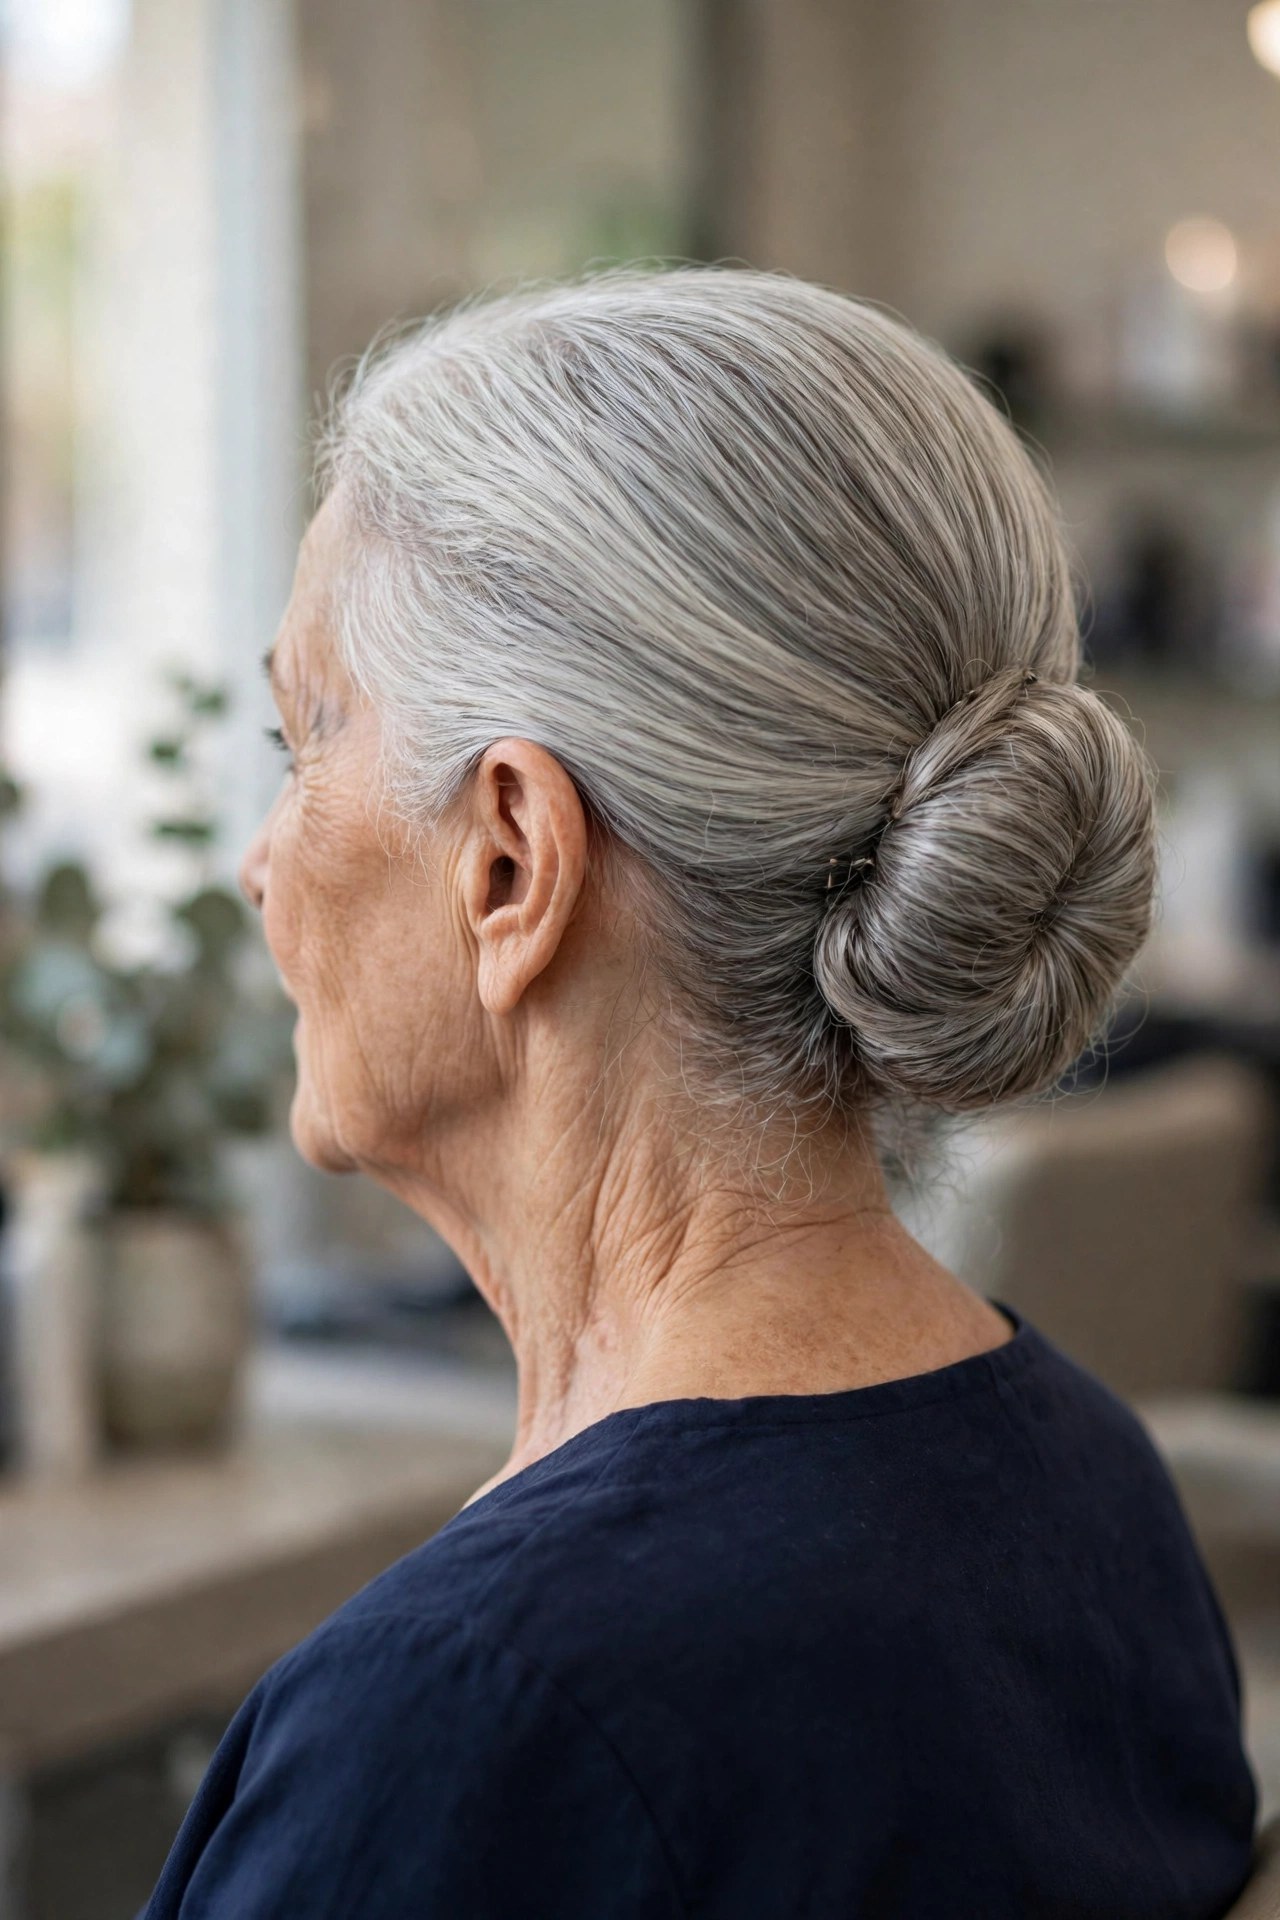
If you learn only one updo from this list, make it this one. Gather your hair into a low ponytail at the nape, twist the tail until it coils against your head, and pin the coil flat. The chignon sits low, which matters more than it sounds: there is almost no sustained overhead arm work, and the weight of the style rests where your hands can reach comfortably. It is the updo that has carried women through weddings, funerals, christenings and job interviews for a century because it always looks intentional.
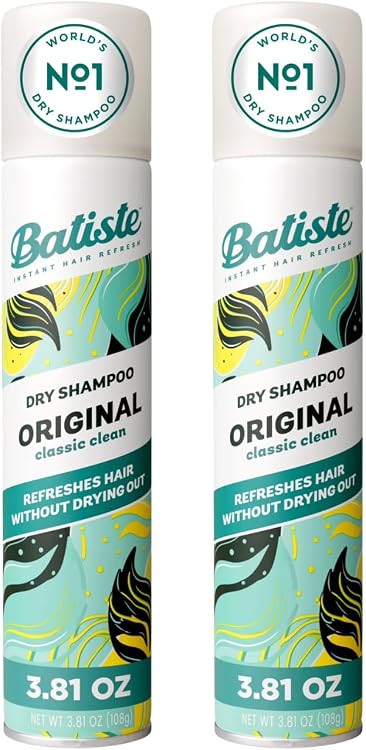
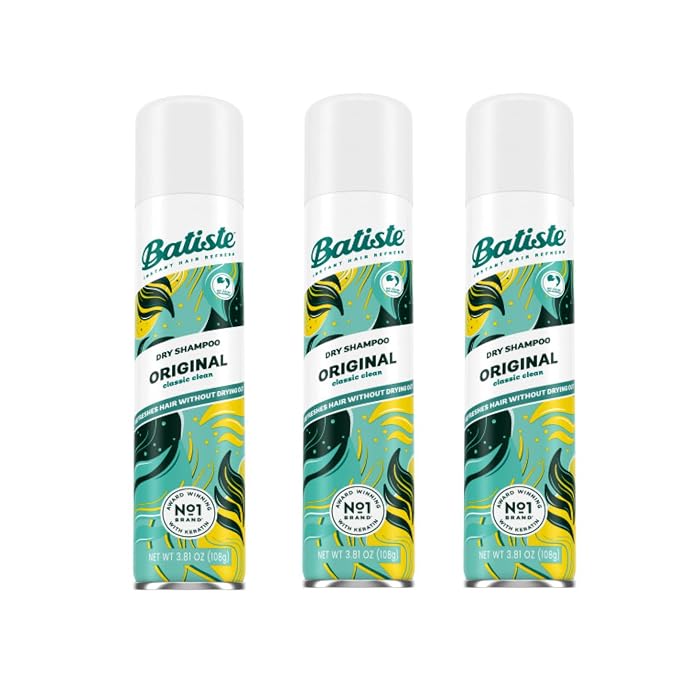
Step-lite version: ponytail, twist, coil, four U-pins pushed in at the compass points of the bun, done. Fine or slippery hair holds better in a chignon on second-day hair, or with a mist of dry shampoo through the lengths before you start — clean, silky hair is actually the enemy here. Difficulty honestly rated: easy after two practice runs, and the first try genuinely does not count.


2. Simple French Twist
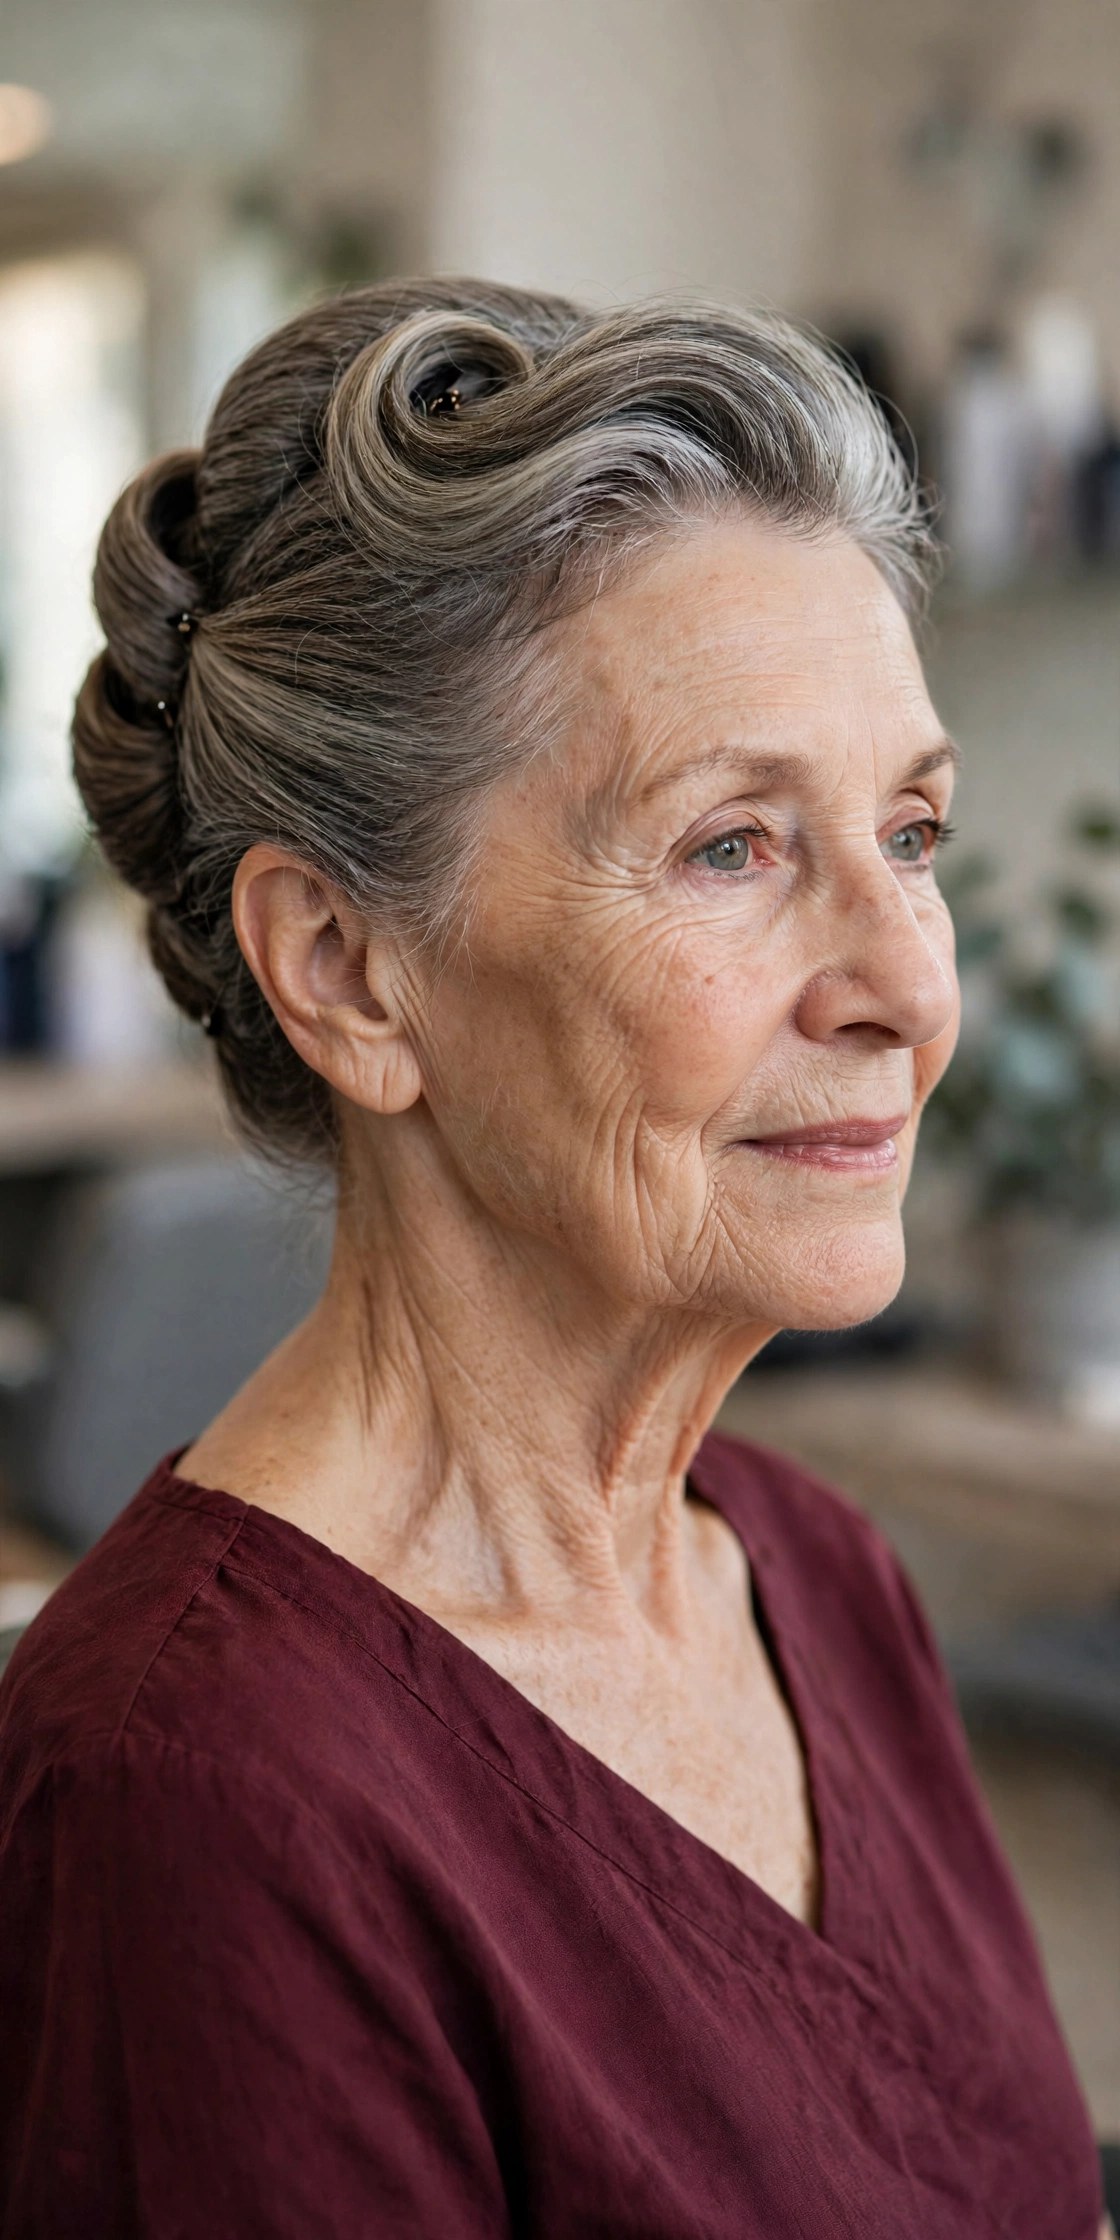
The French twist has a reputation for being difficult that it does not deserve. Sweep all your hair to one side, pin a vertical line of bobby pins up the back of your head, then roll the hair back across those pins toward the center and tuck the ends in. That pin line is the whole secret — it is a ladder your twist leans on, and once it is in place the rolling takes seconds.
Our Over-50 readers call its sister styles in easy updos for women over 50 with medium hair their formal-occasion staples, and the twist is the star of that family. Honest notes: it is the most arm-intensive style in this guide, so sit down to do it, and expect the first attempts to lean — a slightly off-center twist still reads elegant. A dab of anti-frizz serum through the lengths first keeps the roll smooth instead of fuzzy.

3. Donut Bun for Instant Fullness
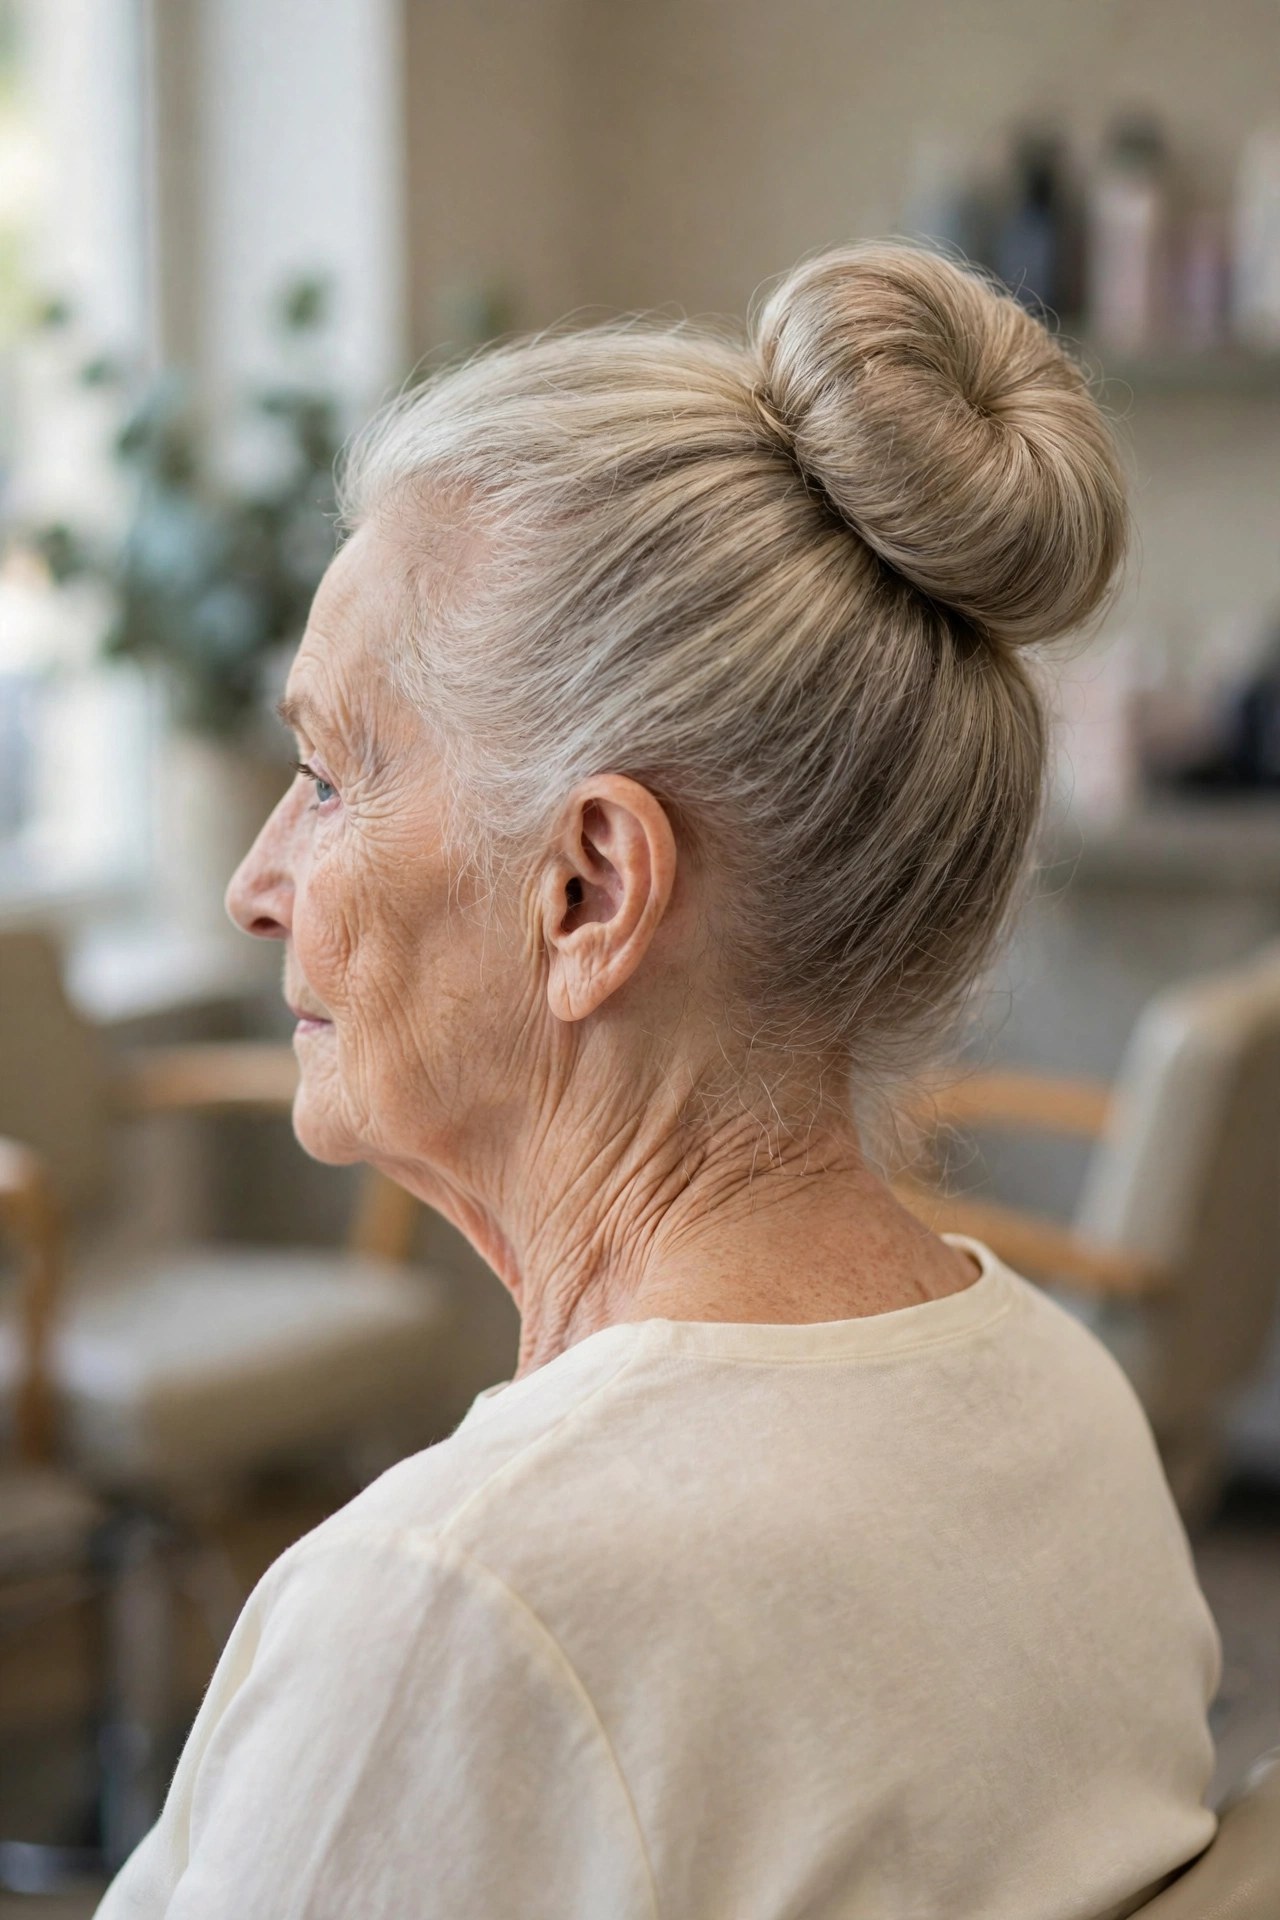
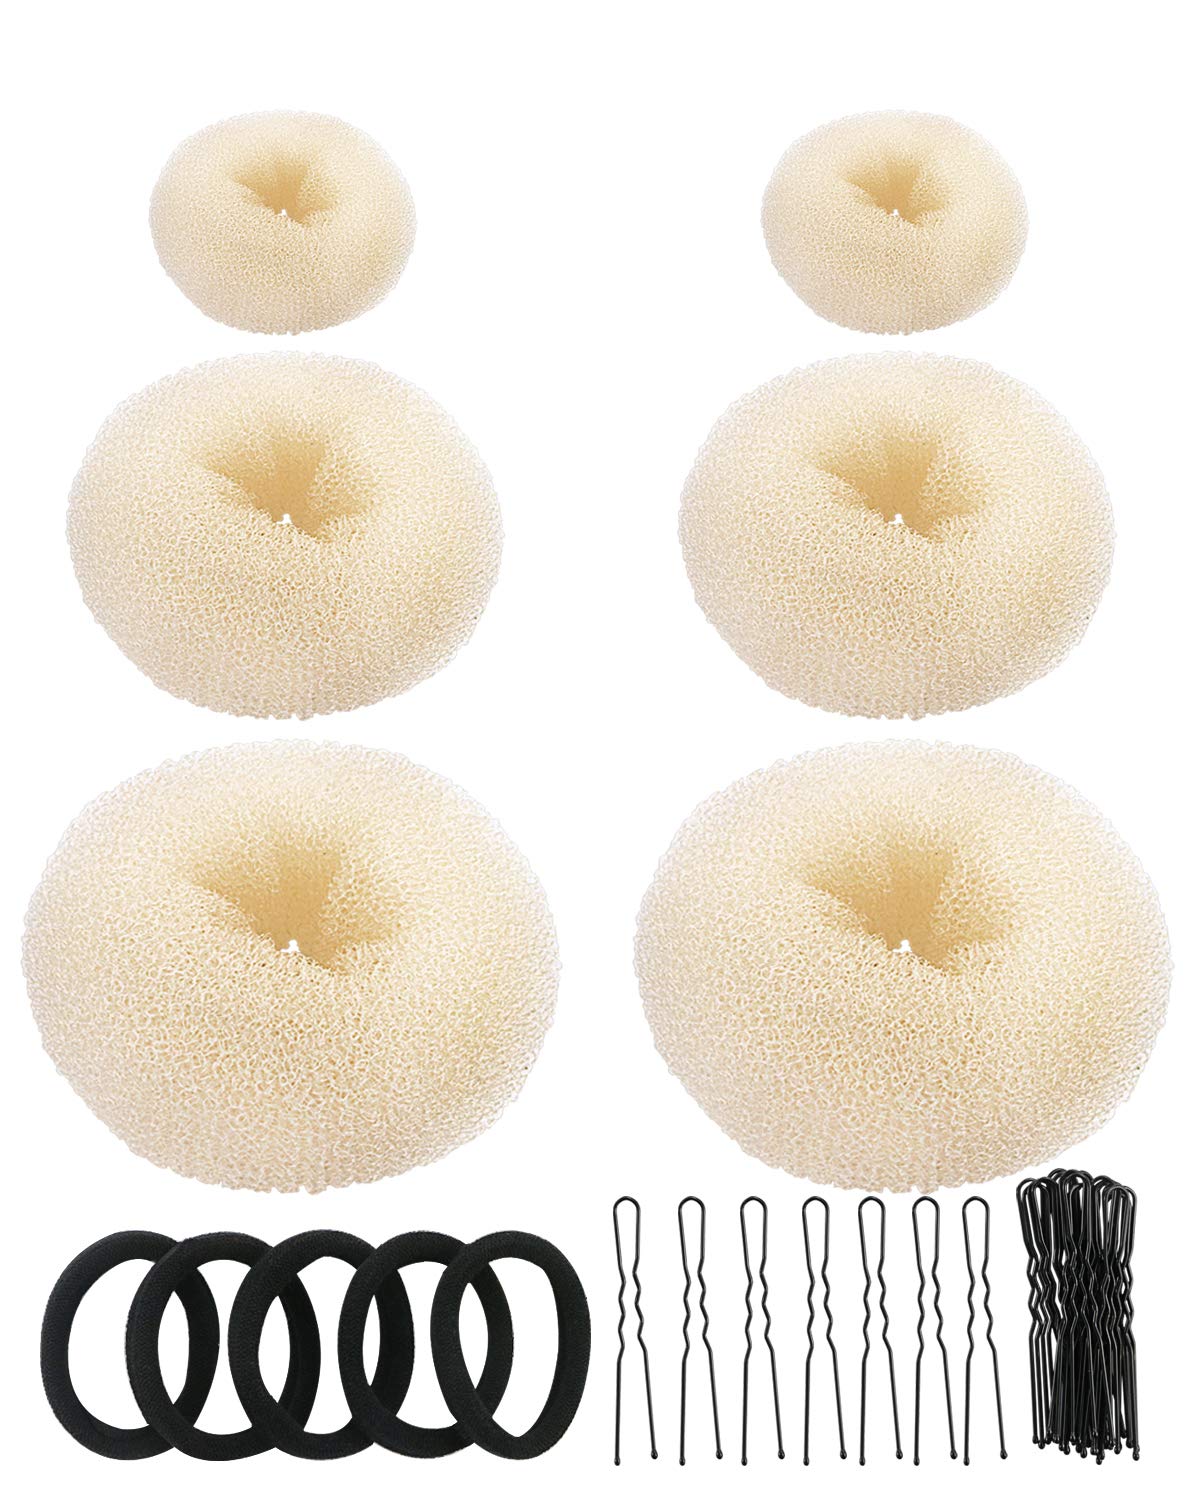
Fine hair’s best friend in this entire guide. Make a ponytail, pull the tail through a foam donut bun maker, spread the hair evenly over the donut so the foam disappears, and tuck the ends under with pins. The donut does the work your hair no longer does — it supplies the body, the roundness and the diameter, and nobody can tell where the foam ends and your hair begins.
Choose the donut size honestly: a large donut on very fine hair can peek through, while the small and medium sizes in a multi-size set cover almost every head over 60. Match the donut color to your hair (the beige set suits gray-blondes and silver hair surprisingly well). Difficulty: the easiest full-looking bun in this list, genuinely five minutes once you have done it twice, and kind to your arms because the ponytail can sit low.
4. Soft Messy Topknot
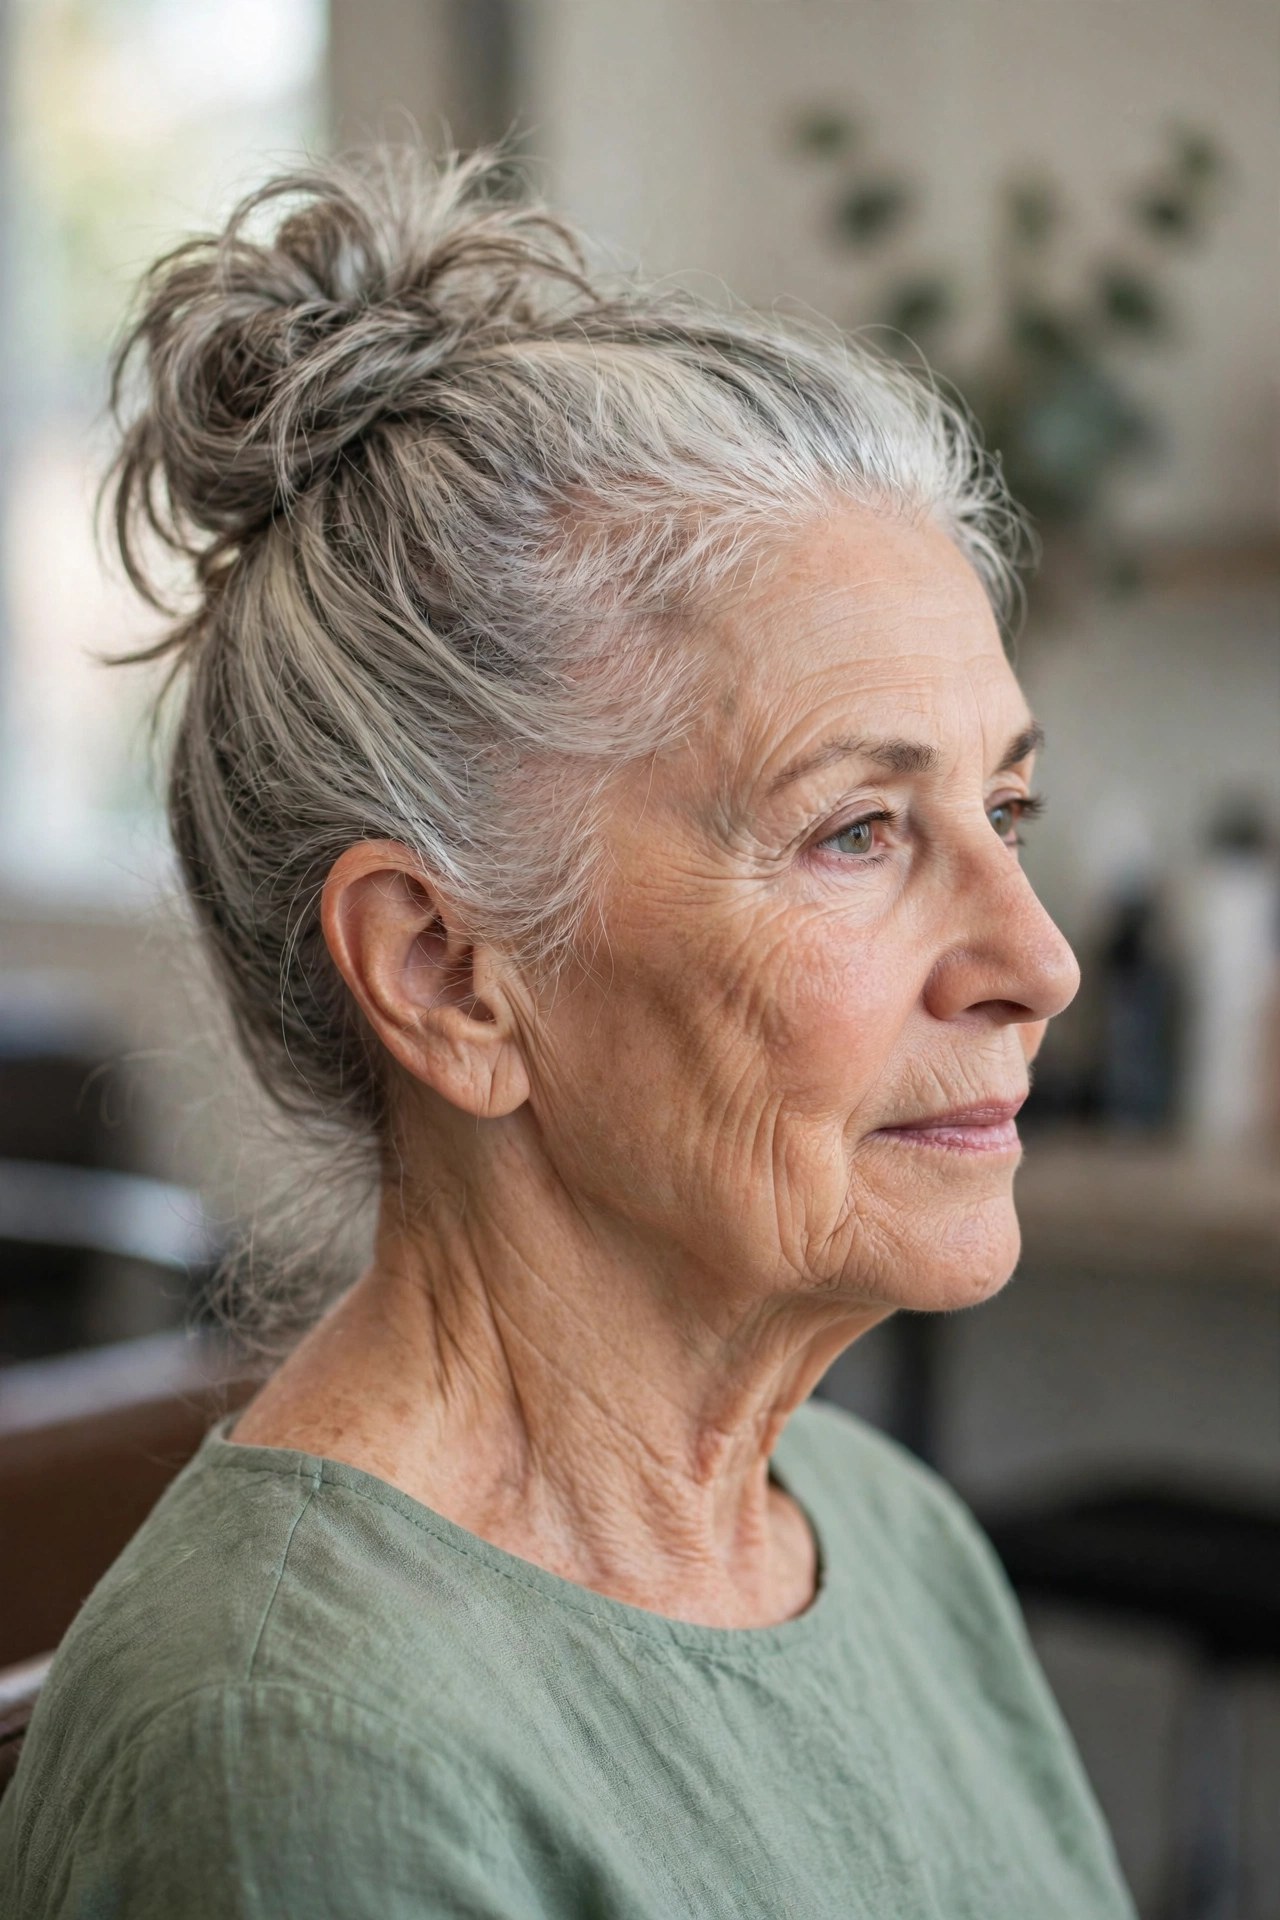
The topknot is the everyday hero: flip your head forward or simply gather everything high, twist loosely, wrap it into a bun on the crown and pin or elastic it in place — imperfectly, on purpose. The deliberate softness means strays and bumps are part of the design, which makes this the most forgiving updo for beginners and for days when your hands or shoulders are not cooperating.
It is also a kind silhouette after 60, because the height on top lifts the whole face visually. If your topknots keep sliding, the fix is texture, not tightness: work dry shampoo or texturizing putty through the lengths first so the hair grips itself. More relaxed bun variations live in our guide to messy bun and low chignon ideas. Difficulty: easy, two minutes, minimal pinning.

5. Braided Crown Updo
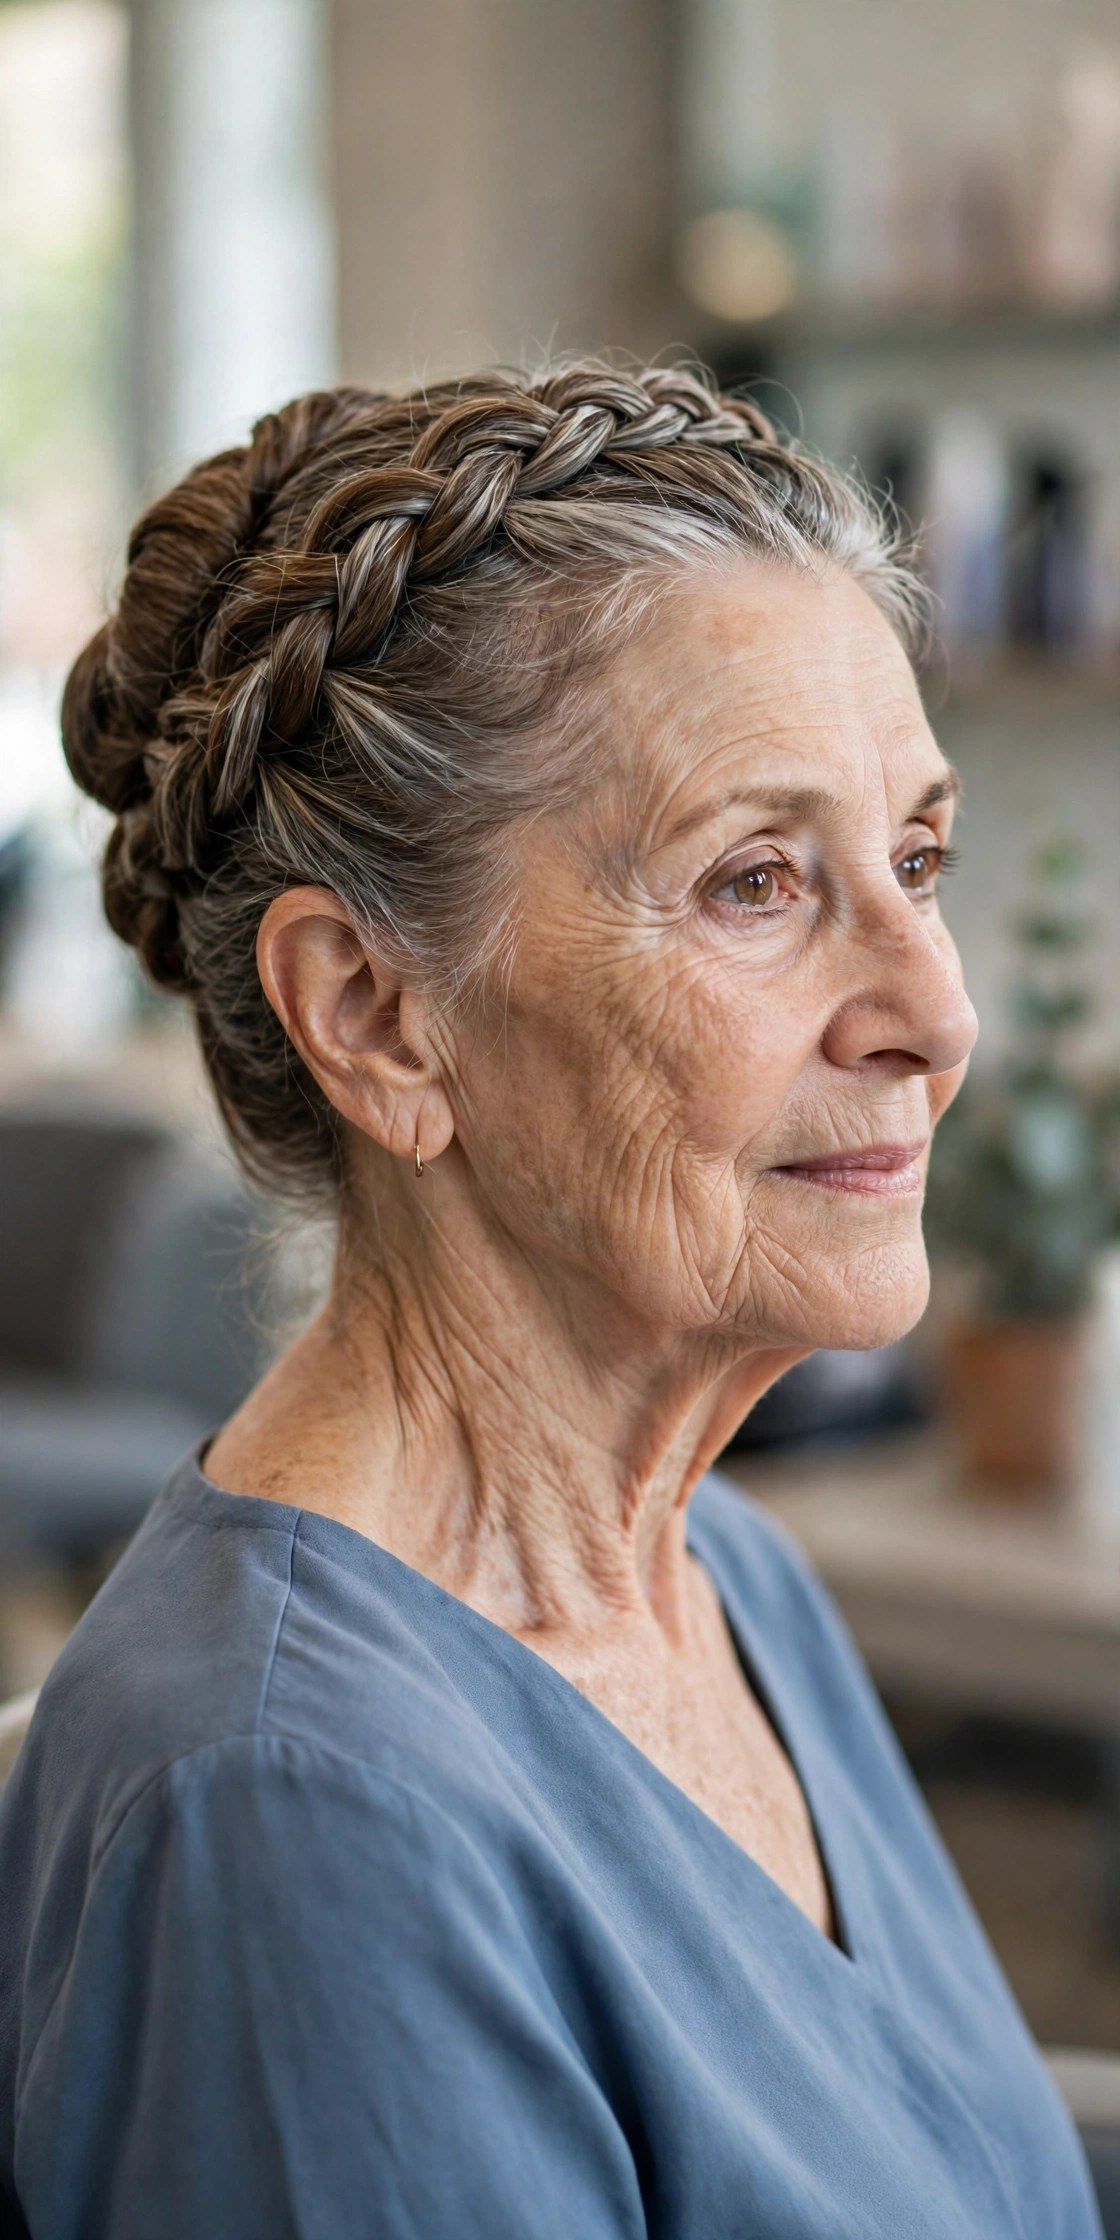
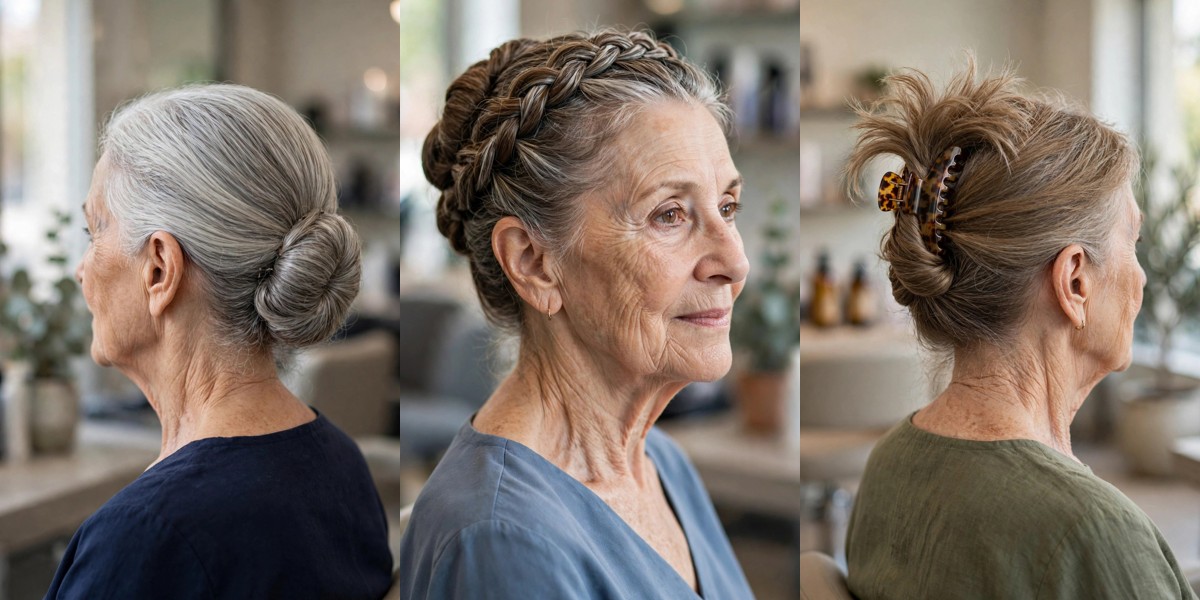
A braid that travels around the hairline like a crown, with the tail tucked and pinned at the back. It looks like the hardest style here and is secretly one of the most practical: a braid holds itself together, so the finished updo needs very few pins, survives a full day, and keeps every wisp off your face and neck. On silver-streaked hair the braid pattern shows up beautifully, strand by strand.
Do it the low-effort way: make one simple three-strand braid starting behind one ear — or even a plain side braid — wrap it up and over, and pin as you go. You do not need a true Dutch crown braid for the effect. Honest difficulty: medium, only because braiding behind your own head takes practice; do it seated, in stages, and let your arms rest between sections. A light finishing spray keeps the crown tidy without stiffness.
6. Gibson Tuck
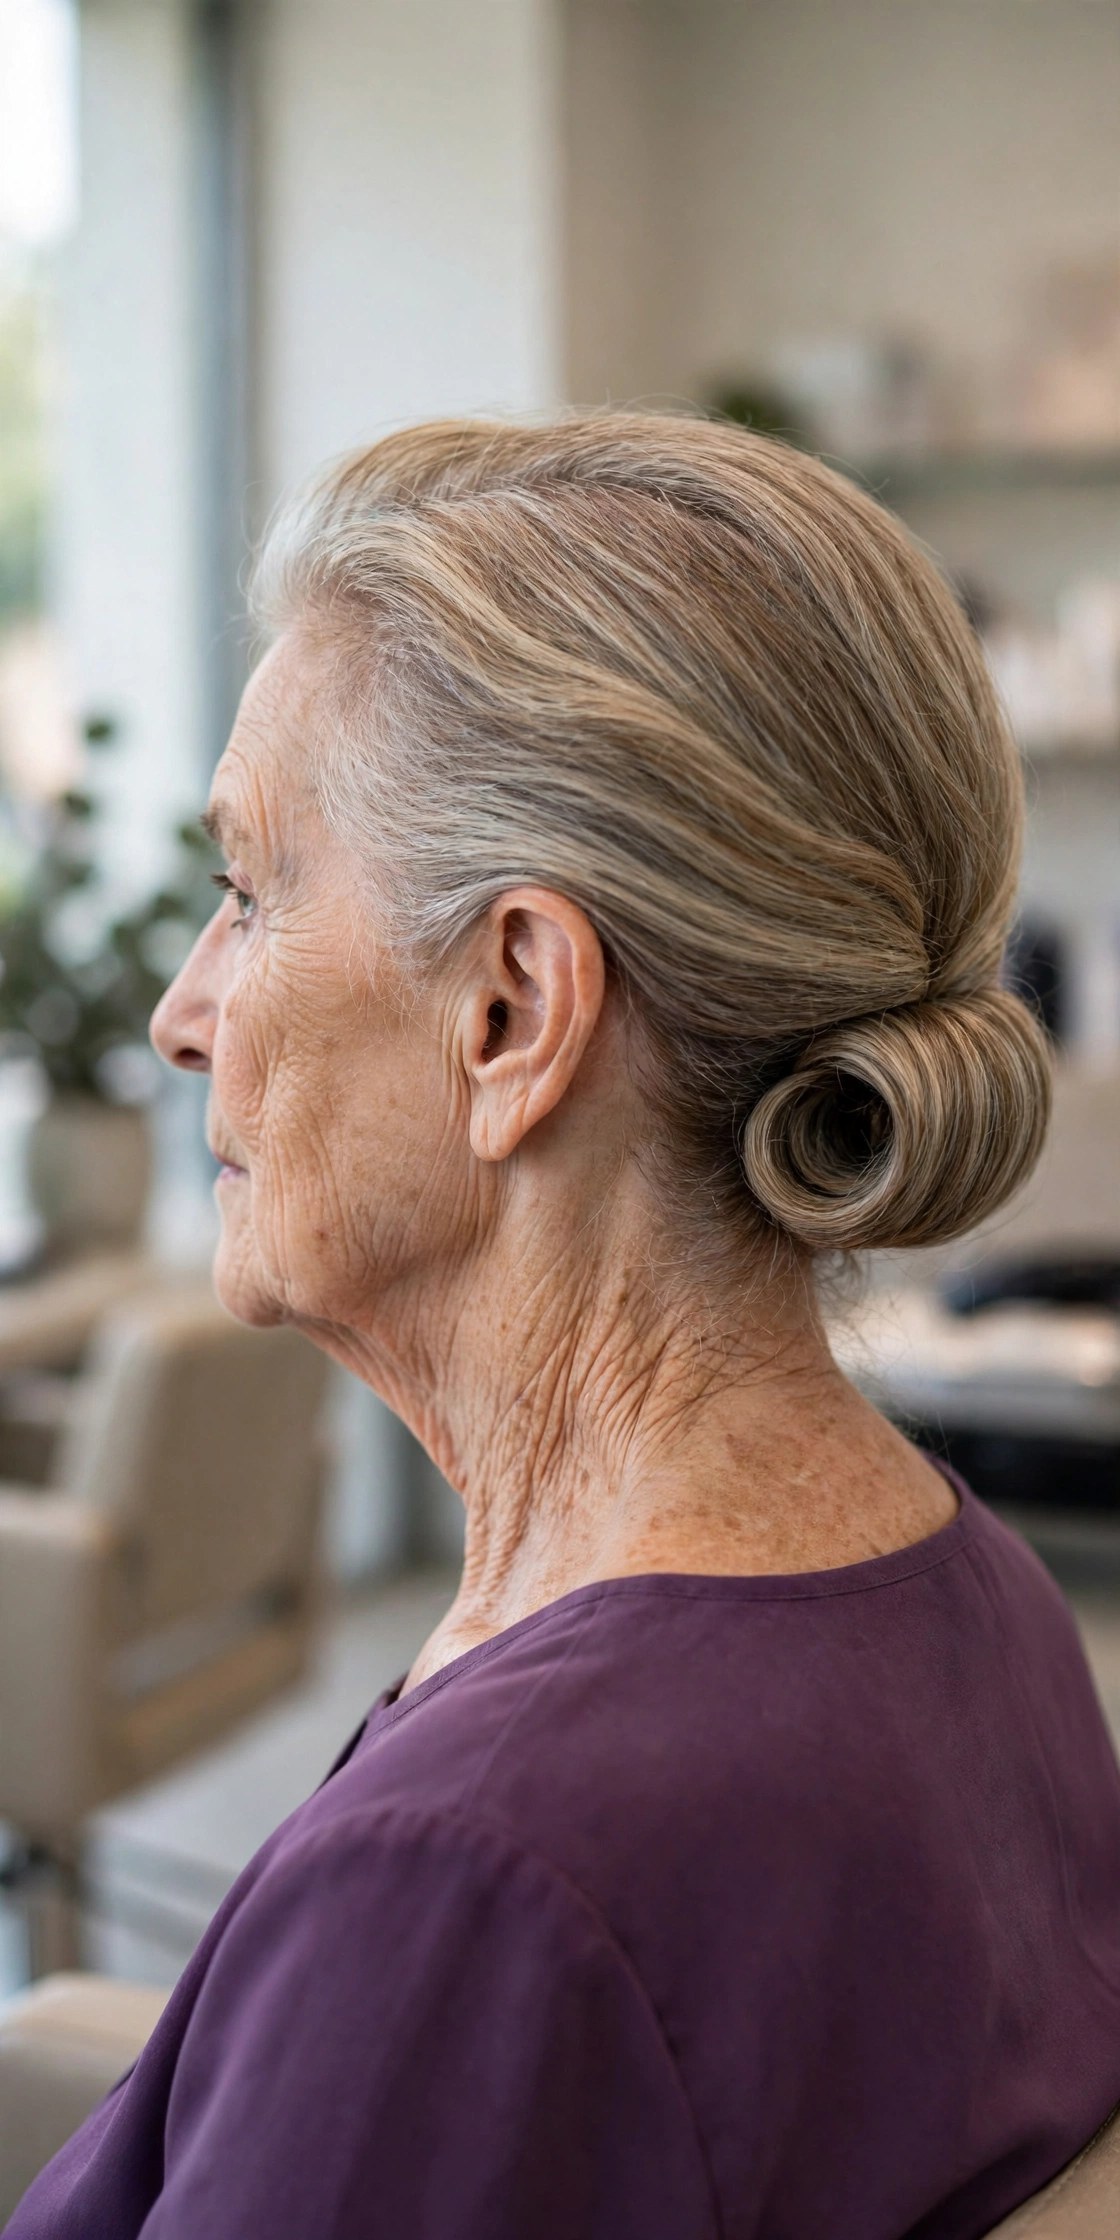
The Gibson tuck is a gift from the 1900s that modern hair forgot: make a low ponytail, push a gap in the hair just above the elastic, and tuck the whole tail up and through that pocket so it rolls into a smooth horizontal roll at the nape. That is the complete technique — no pins strictly required, nothing to braid, nothing overhead. It produces a soft rolled updo that looks far more elaborate than it is.
It works best on shoulder-to-mid-back hair that is not heavily layered, because very short layers can poke out of the roll; a quick pass of anti-frizz serum tames the pokers. If the roll feels loose, slide two U-pins up into it from underneath — invisible, and it will hold through an evening. Difficulty: very easy, and the kindest style here for tired shoulders, since all the work happens at the nape.
7. Twisted Low Bun
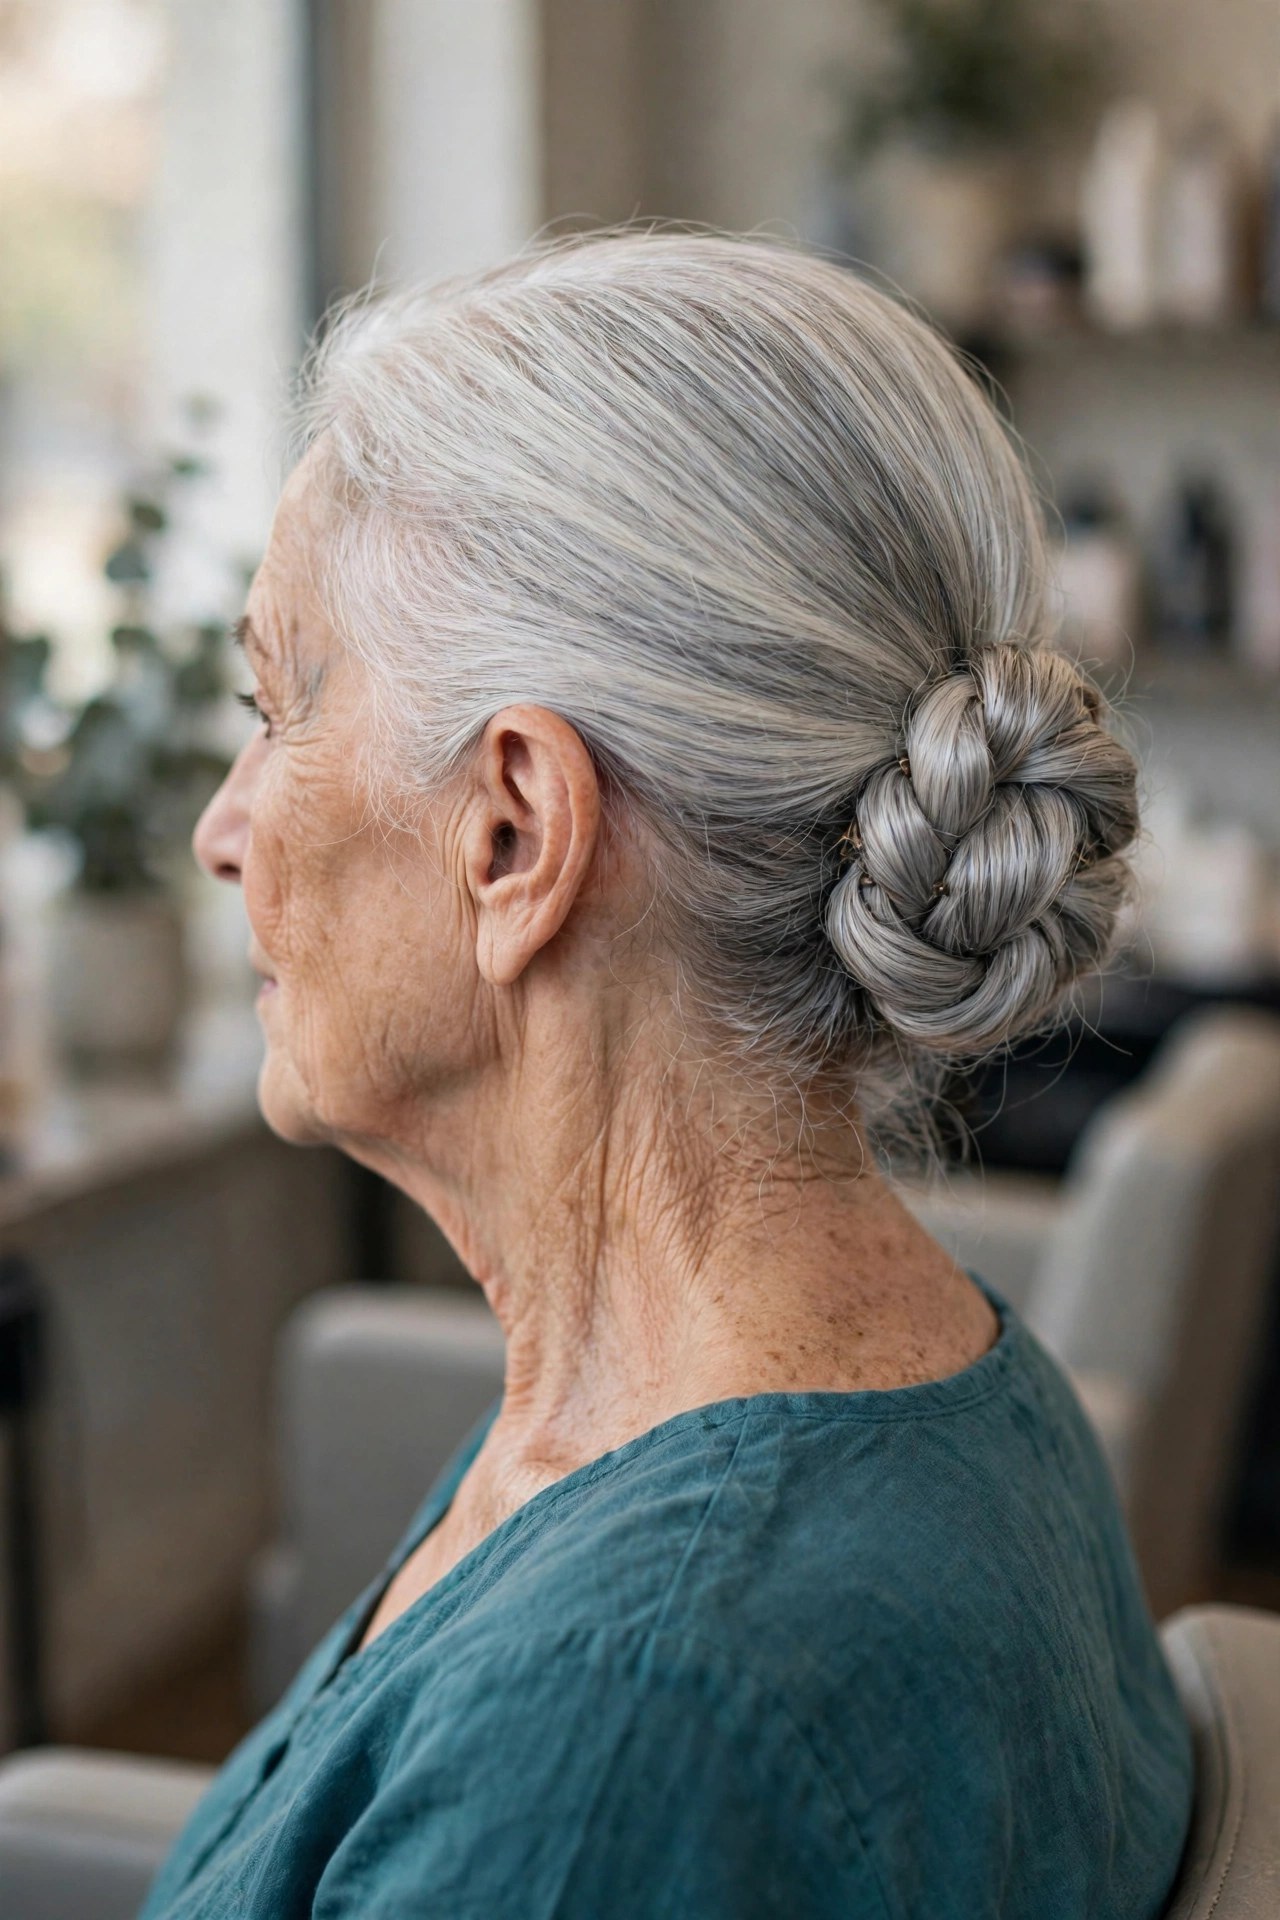
Take the chignon and soften it. Instead of one coil, split the low ponytail into two sections, twist each one, then wrap them around each other and pin. The rope-like twist gives a low bun texture and detail that plain buns lack, and the two smaller sections are easier to control than one thick tail — a real advantage if your grip is not what it was.
A pea-sized amount of texturizing putty rubbed between your palms before twisting stops the two ropes from unravelling mid-wrap. Pin each twist as you lay it, rather than holding everything and pinning at the end — that one habit halves the difficulty of every bun in this guide. Finish with a brushable spray so the detail stays soft. Difficulty: easy-to-medium, about six minutes.
8. Rolled Headband Tuck
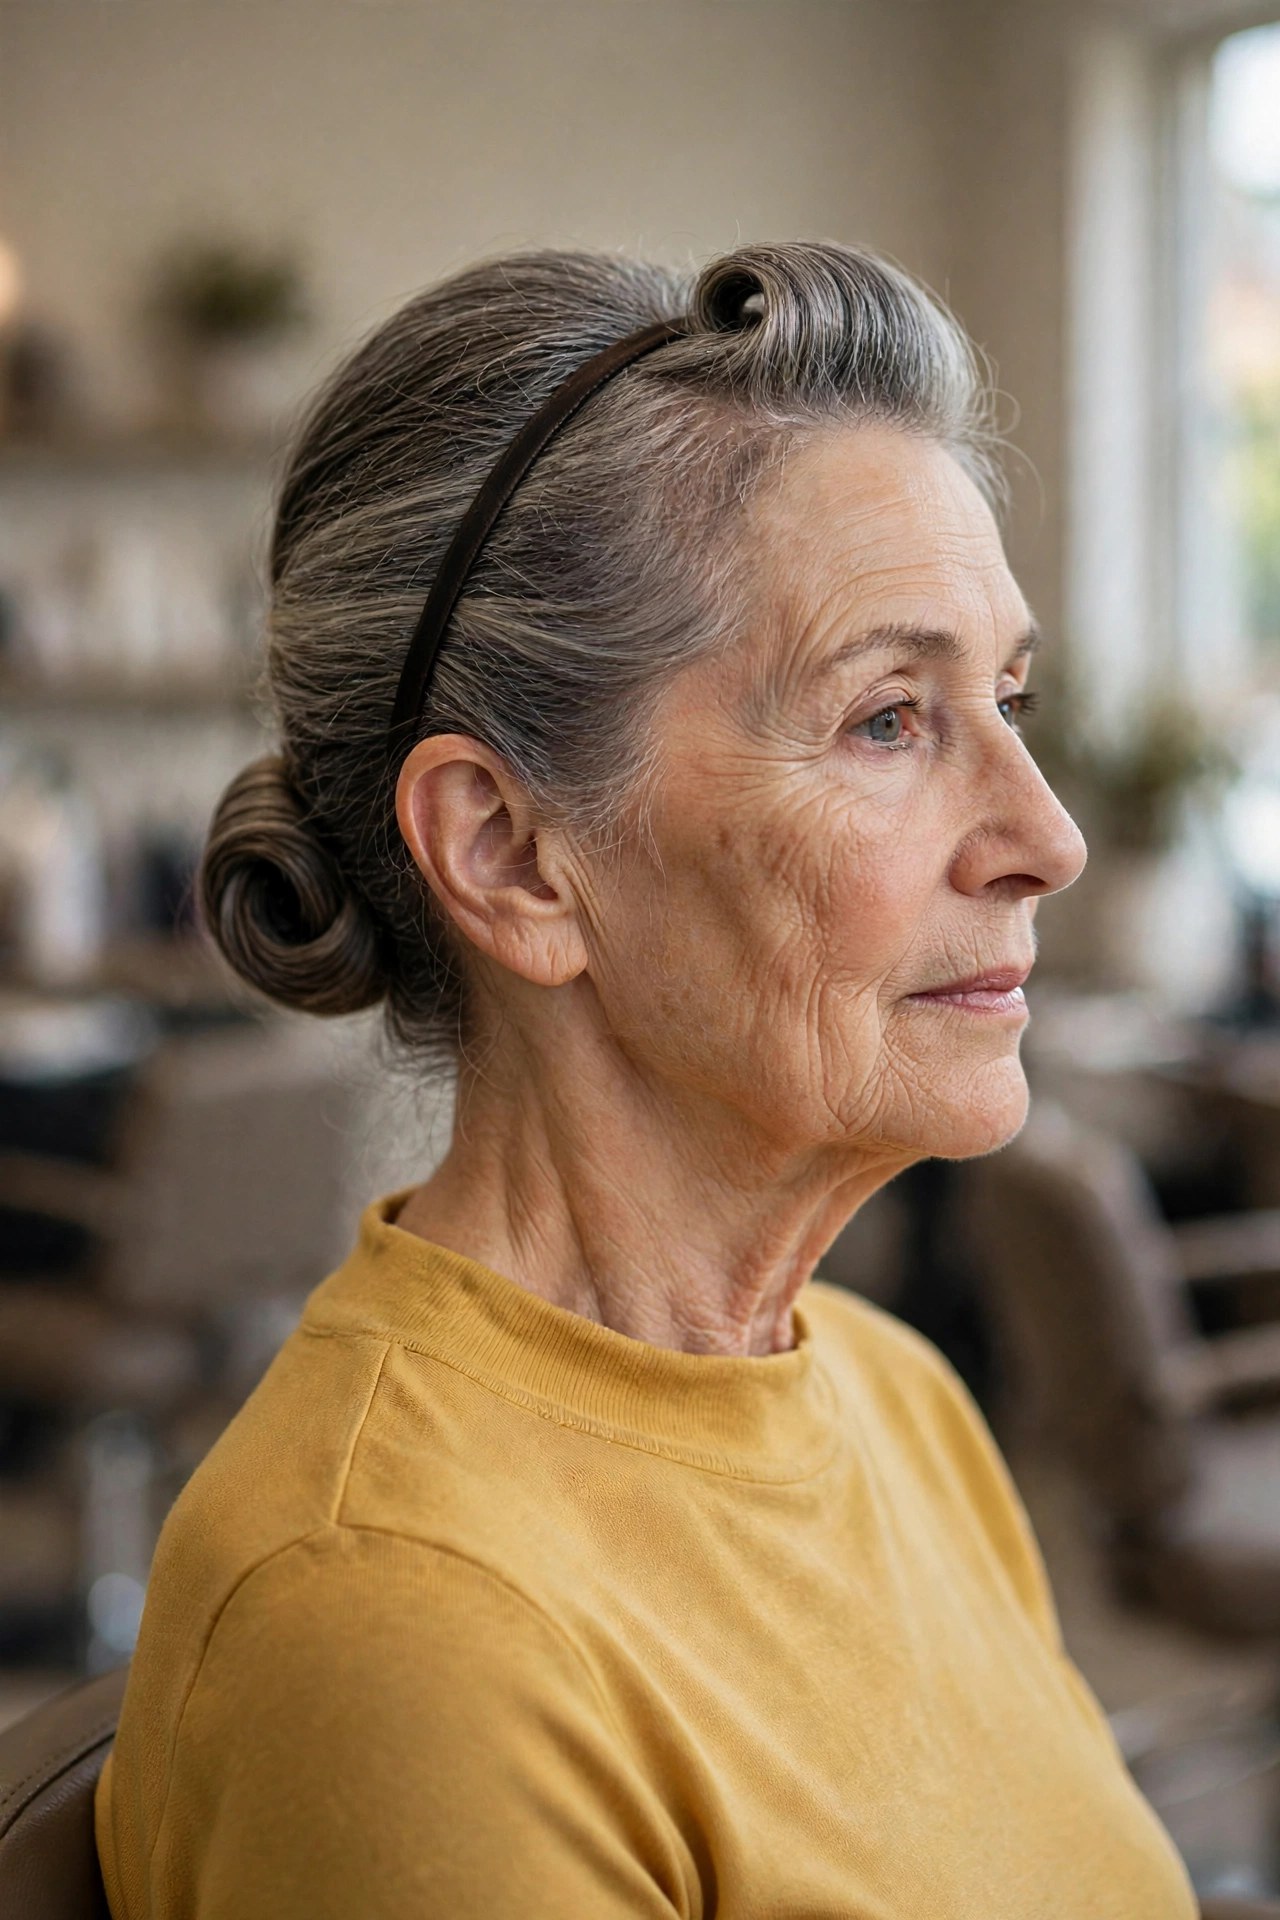
Put on a plain elastic headband over your hair, then tuck the lengths up and over the band, section by section, working from ear to ear until all the hair is rolled into the band at the back. The result is a soft rolled updo with a vintage feel — and the band does the holding, so this is the one style where pins are genuinely optional.
Honest notes: it suits hair from chin length to mid-back, and the roll can loosen on very silky hair, so start with day-old hair or a little texture spray and add two safety pins crossed under the roll if you are going out. The band itself stays hidden under the roll at the back and reads as a simple accessory at the front. Difficulty: very easy, and completely seated-friendly — everything happens at or below ear level.
9. Claw Clip Twist
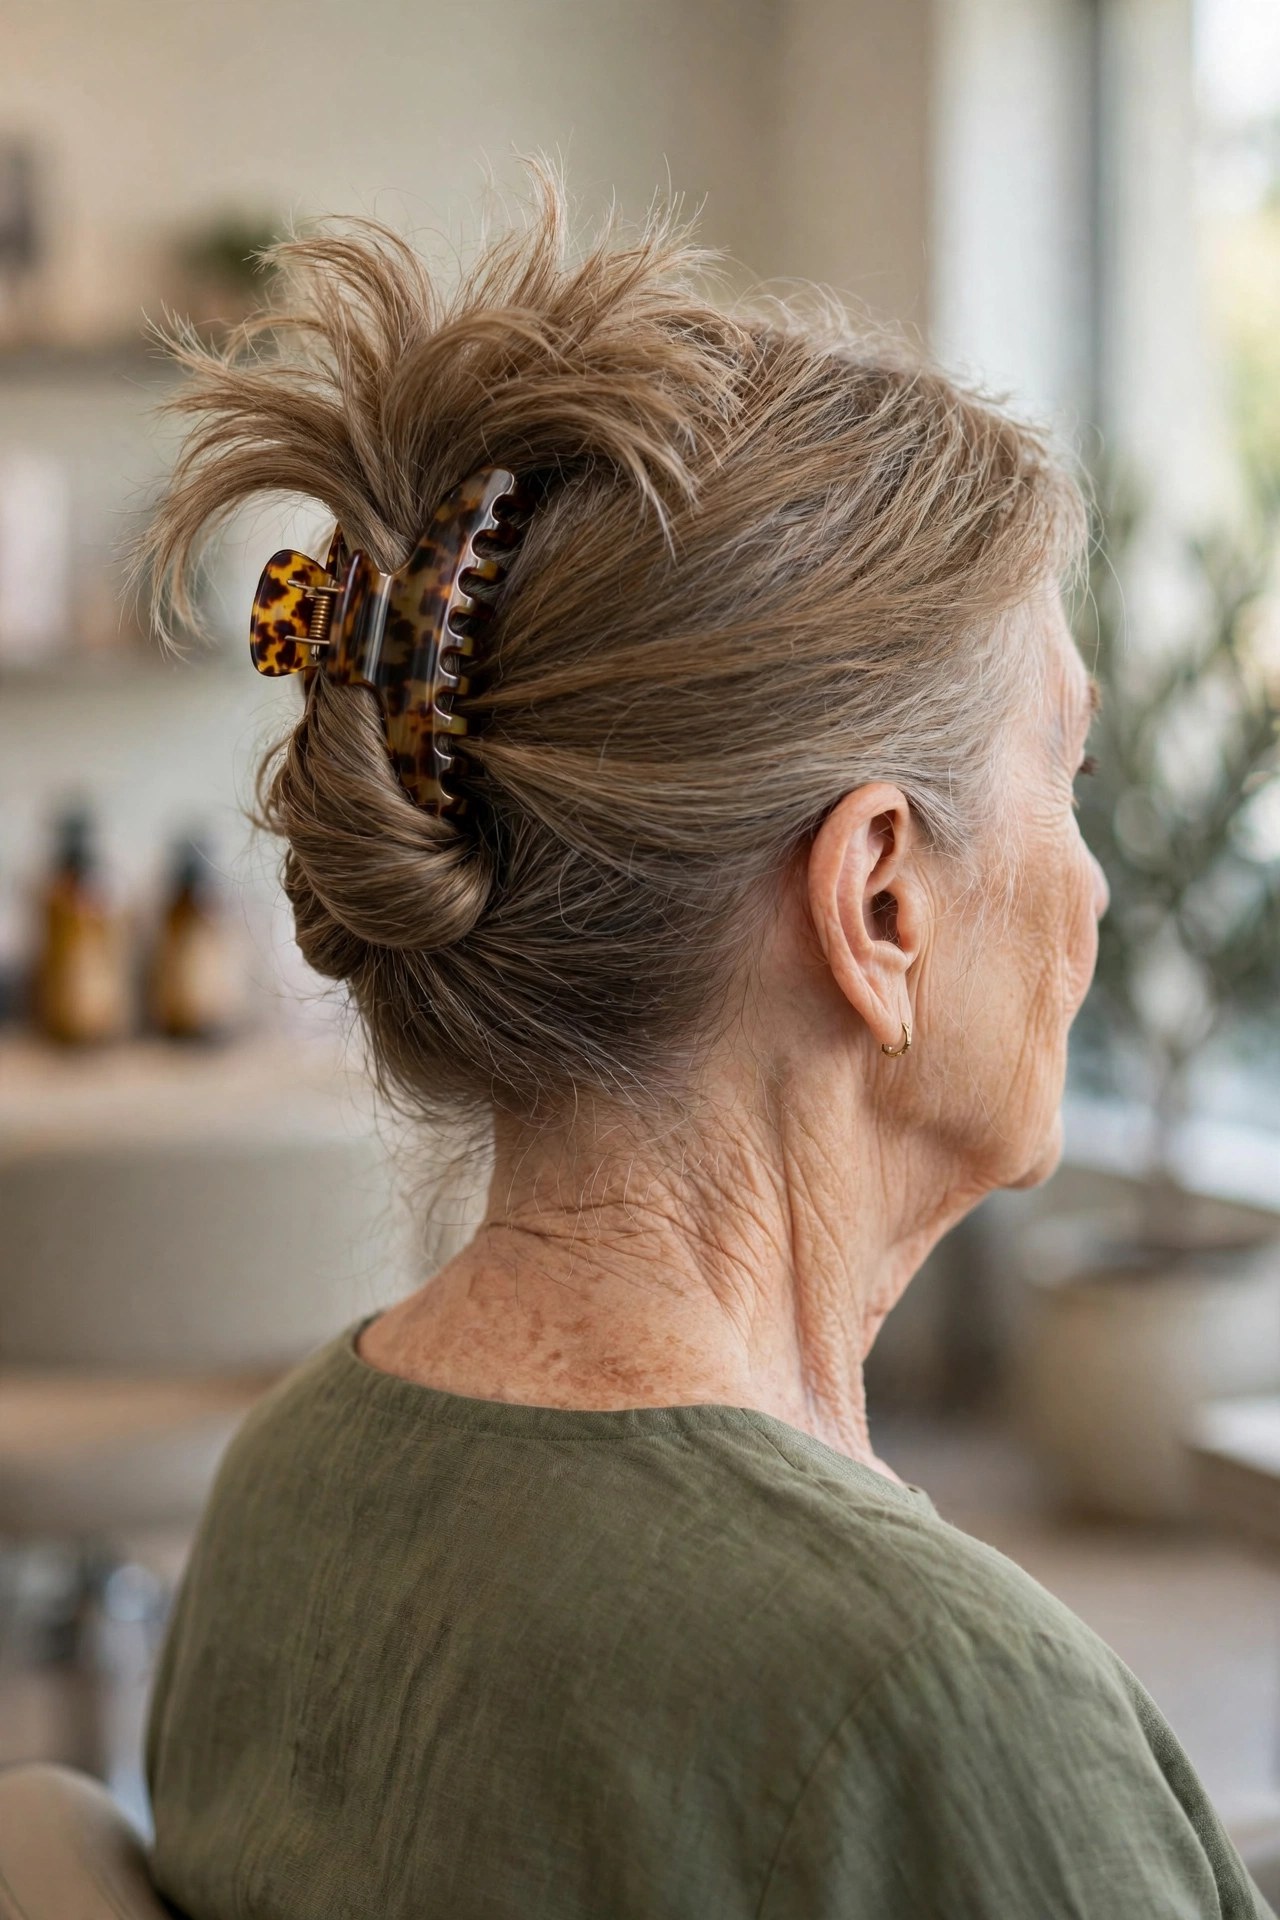
Gather, twist upward at the back, fold the ends down, and clamp the whole twist with a large claw clip. Thirty seconds, one tool, no pins at all. The claw clip twist is the updo for women who have decided — reasonably — that life is too short for bobby pins on a Tuesday, and flat claw clips are the comfortable modern version because they do not dig into your head against a headrest or a car seat.
Choose a clip sized for your hair’s thickness and look for flat designs that sit flush; fine hair does better with a medium clip it can actually fill. If the twist slips by afternoon, re-clamp it slightly higher where the hair is denser. Difficulty: the easiest in this guide, full stop — if your arms can reach a low twist for half a minute, you can do this one.

10. Sleek High Bun with a Lifted Crown
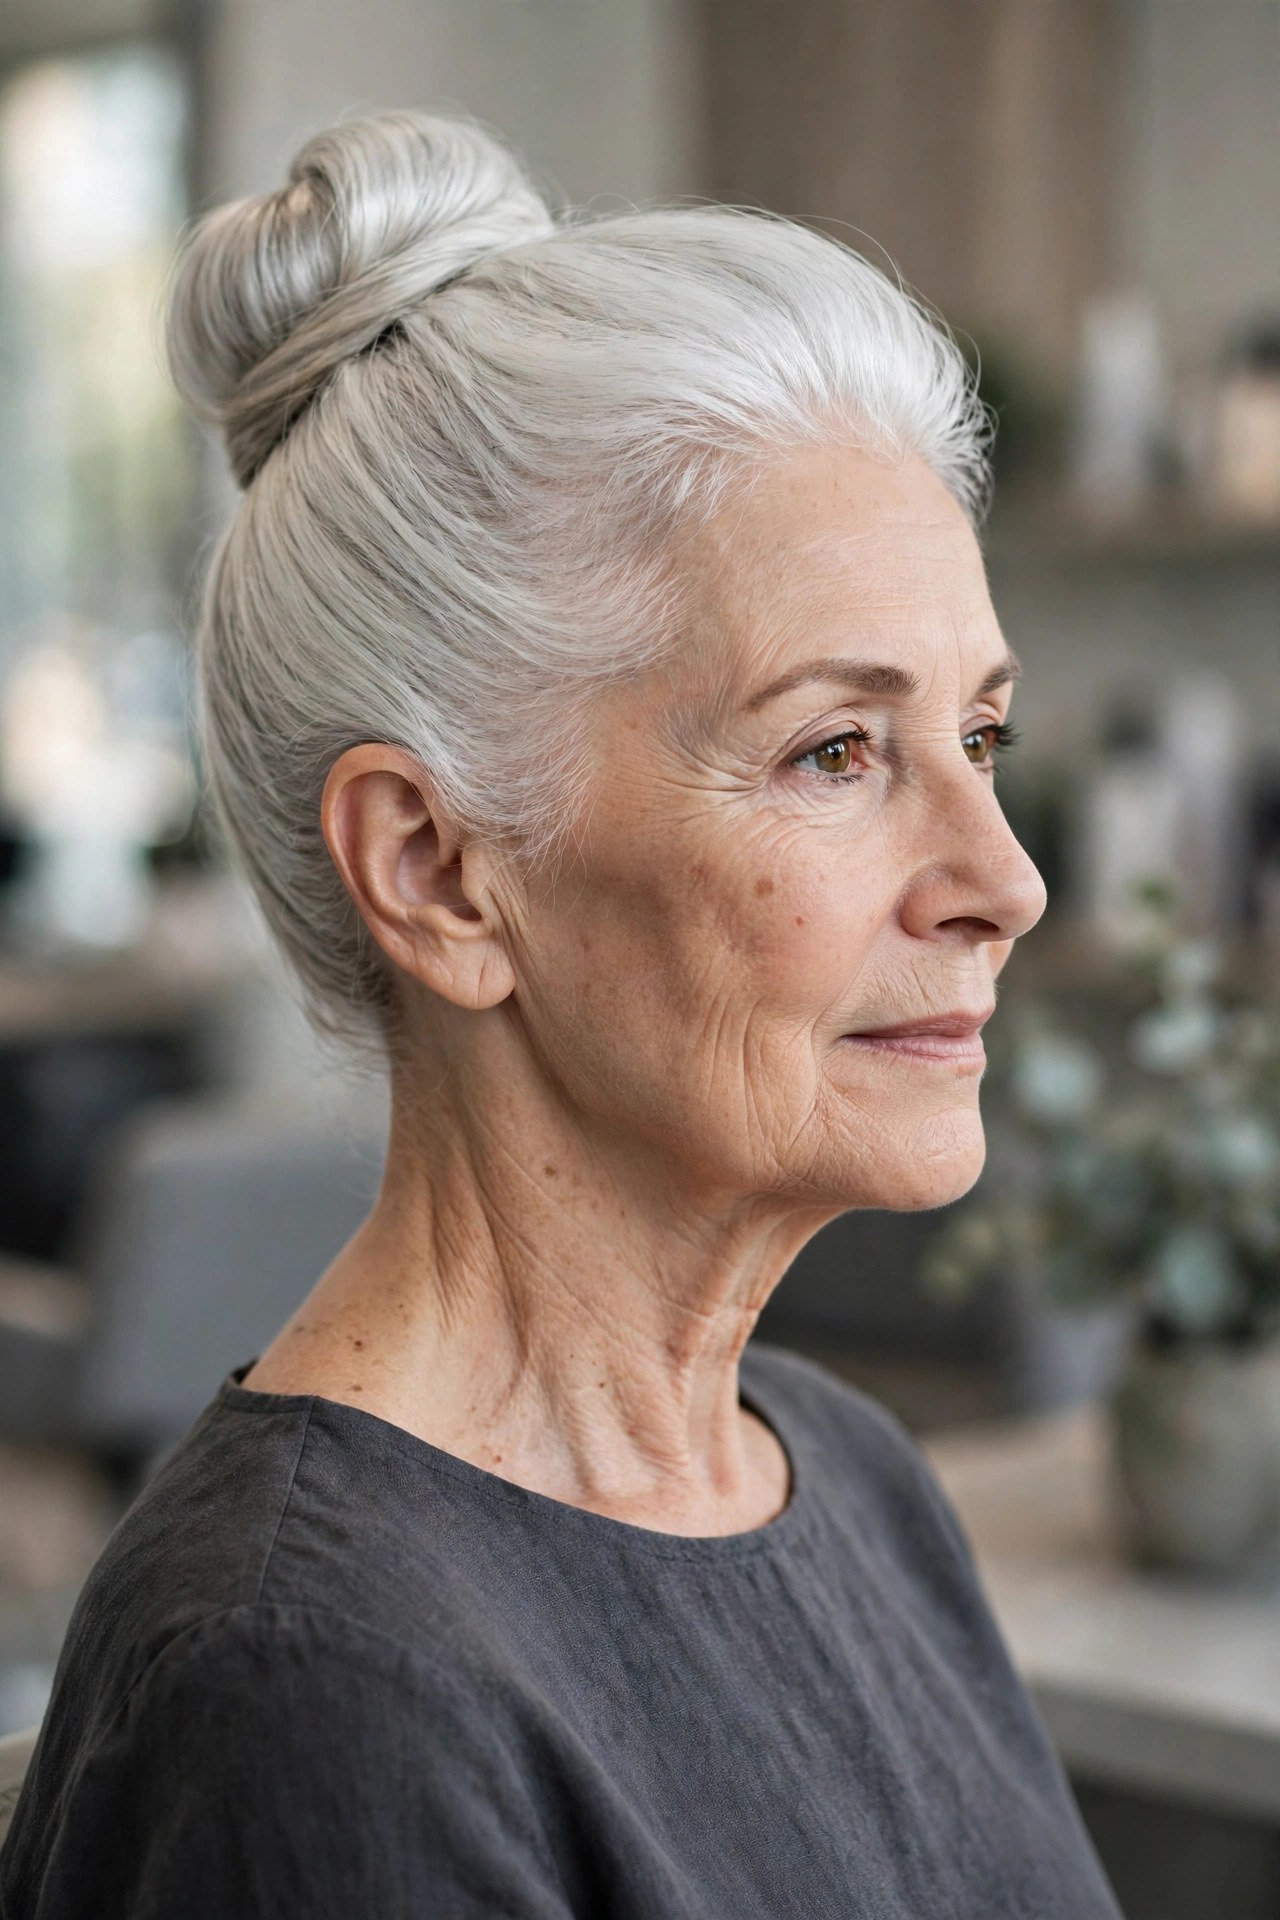
A high bun is the most face-lifting updo there is: the eye travels up to it, and features follow. Brush everything into a high ponytail, keeping a little softness rather than a scraped-back tightness, twist and wrap into a bun at the crown, and pin. Keeping the front slightly lifted — brush it up, not flat — is what makes this elegant rather than severe at 60+.
Fine hair should cheat here without shame: the ponytail over a small or medium donut gives the bun a diameter your own hair may not. A volumizing mousse through the roots before drying gives the crown the grip and body to stay lifted. Honest difficulty: medium, purely because of the overhead reaching — do the ponytail in two stages, resting your elbows on a surface between them, and tip your head forward to let gravity help the gathering.

11. Side-Swept Low Bun
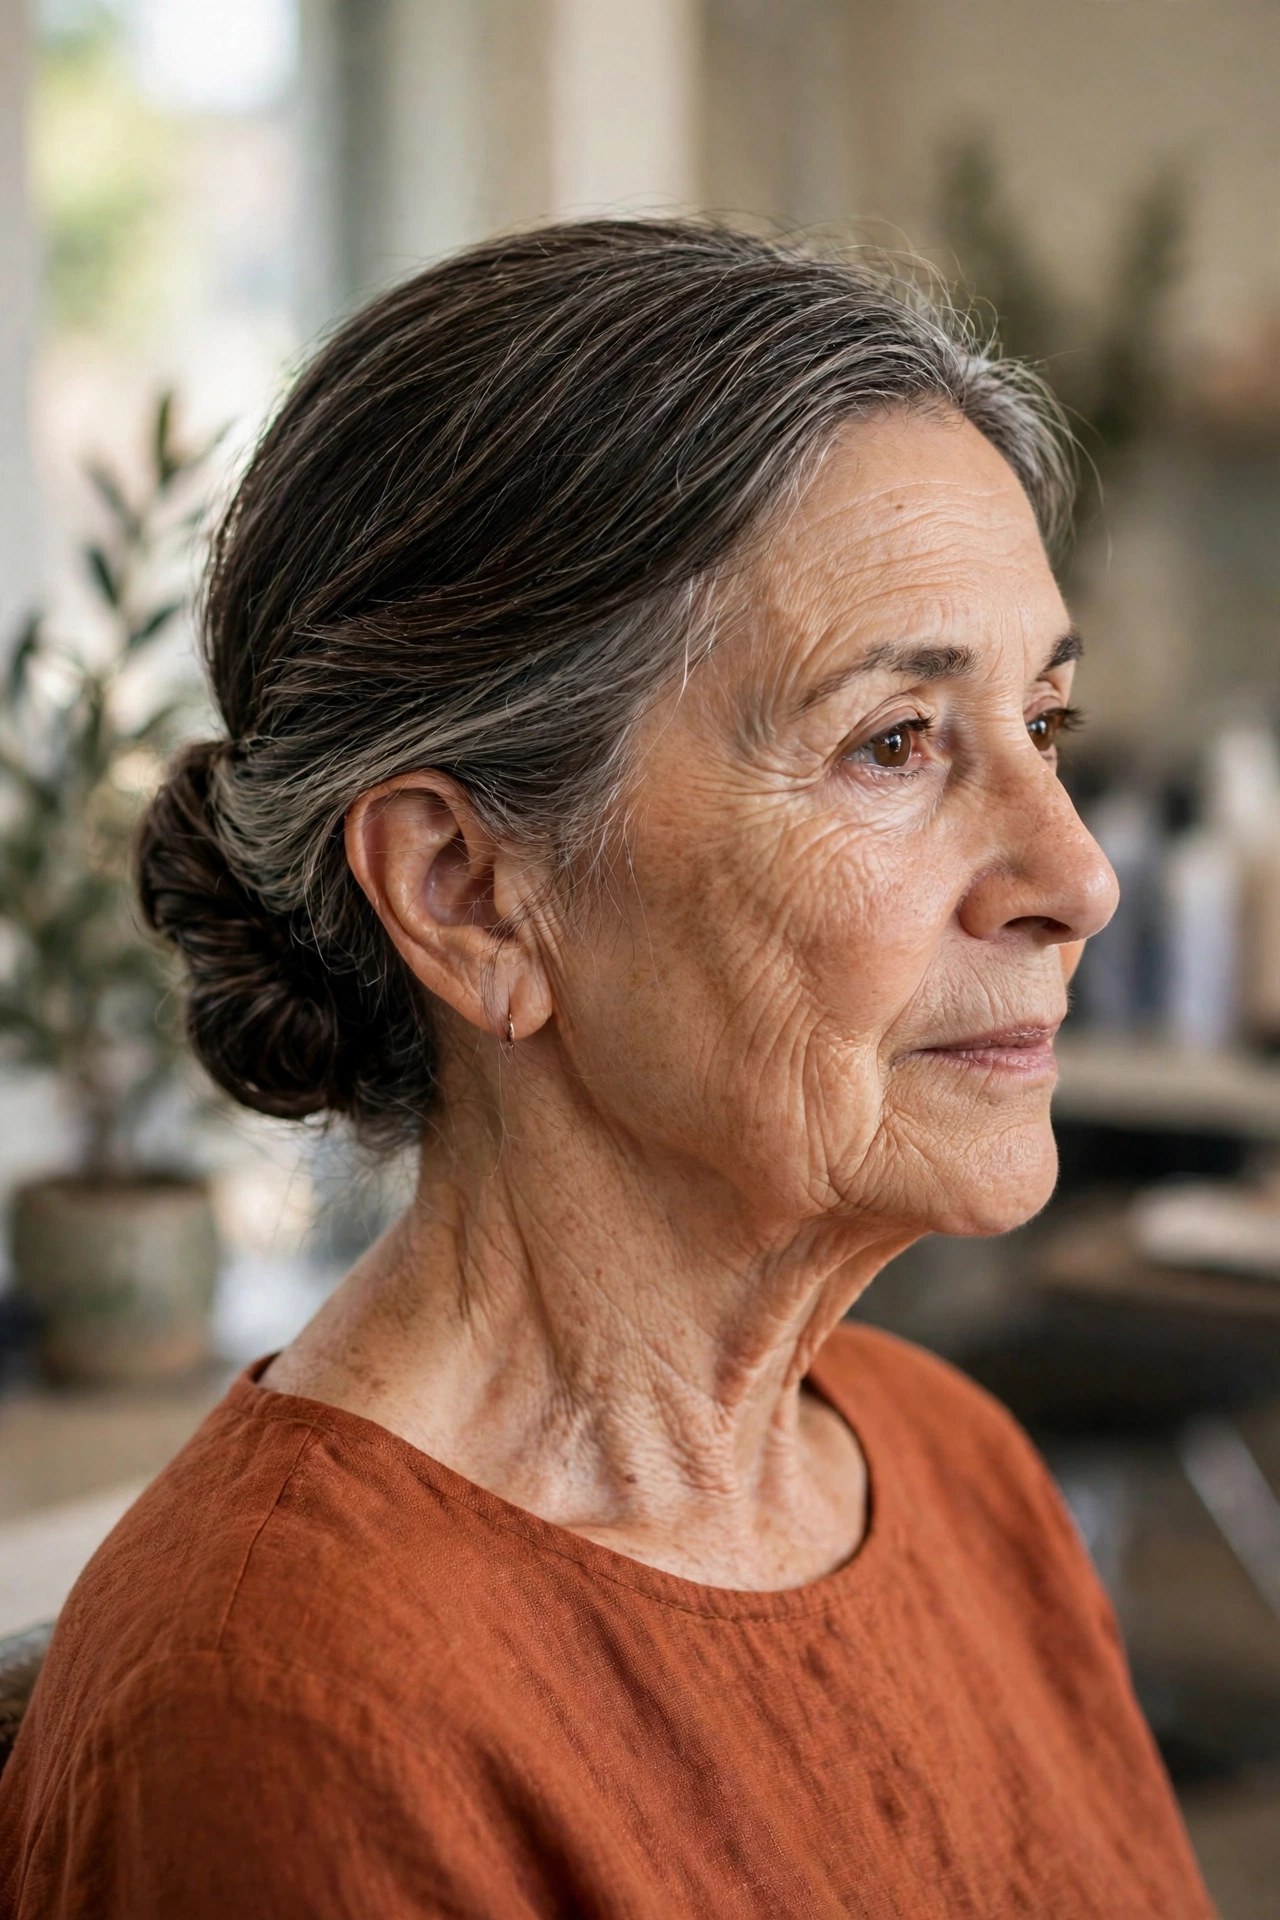
Part your hair deeply on one side, sweep everything across and down, and pin the bun low behind the opposite ear. The asymmetry is the point — it softens one side of the face, shows off an earring, and turns a plain bun into something that looks styled for an occasion. It is a particular friend to women who find centered styles harsh.
Because the bun sits behind one ear, most of the work happens on one reachable side, which stiff shoulders will appreciate. Secure it with pins pushed toward the center of the bun rather than across it, and let one soft piece fall at the front hairline if your hair offers one naturally — do not manufacture tendrils, this style’s polish is in its smoothness. A touch of putty keeps the sweep sleek. Difficulty: easy, five minutes.
12. Pinned-Up Curls for Naturally Curly Hair
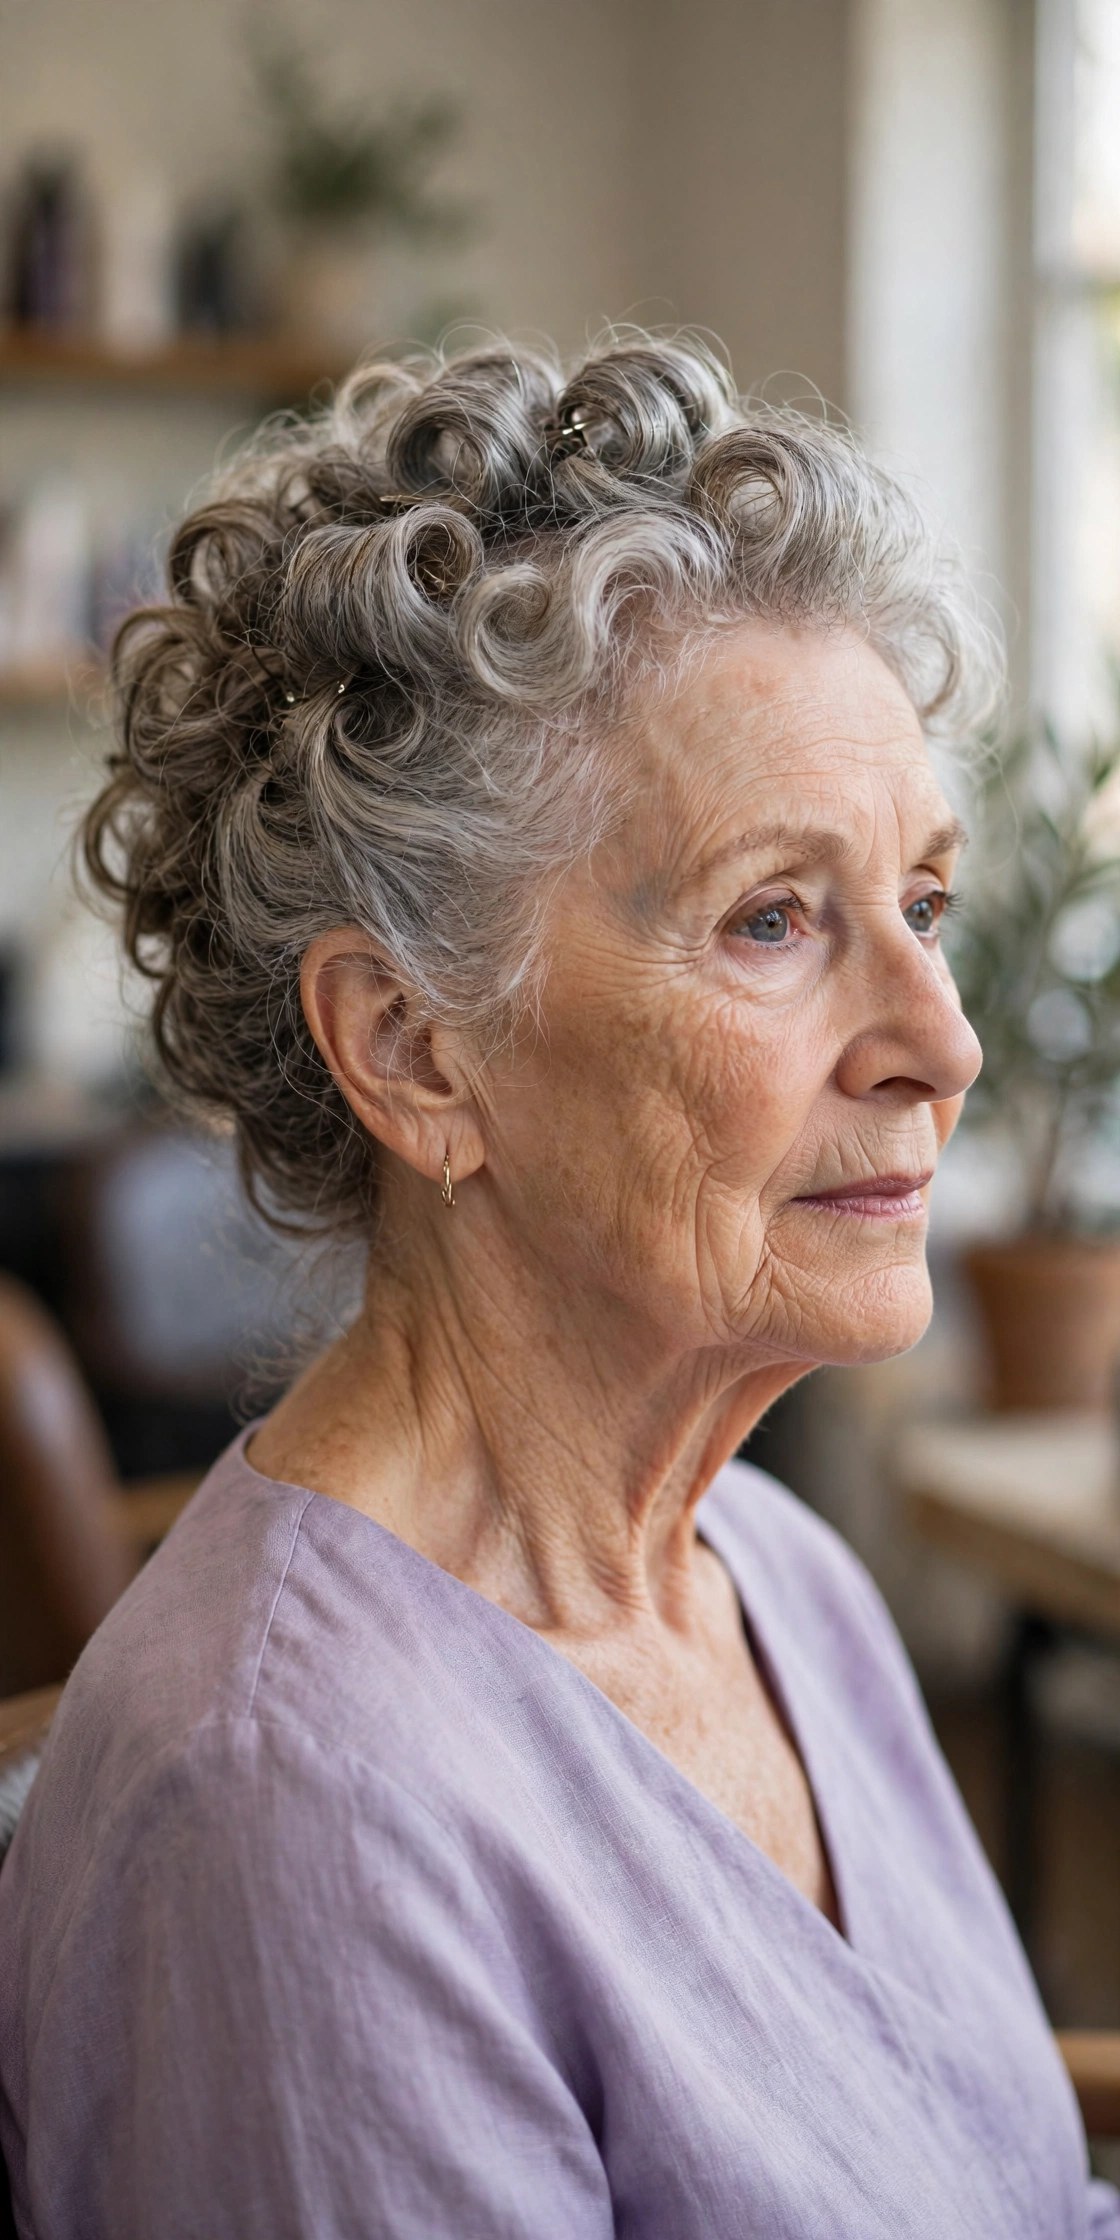
Curly hair does not need to be smoothed into an updo — it needs to be piled into one. Gather your curls loosely upward, and pin them in small clusters on the crown and back of the head, letting each curl keep its own shape. The result is a soft, full, curly mound that looks romantic and hides every pin inside the curl pattern.
This is the most forgiving updo in the guide for curly and wavy hair: no two attempts look alike, and that is correct. Work with dry, day-two curls, twist each cluster once before pinning so it has an anchor, and use U-pins, which glide between curls instead of crushing them. A sea-salt or texture spray revives flattened curls at the front. Difficulty: easy — if you can pin, you can do this; precision is neither possible nor required.

13. French Braid into a Low Bun
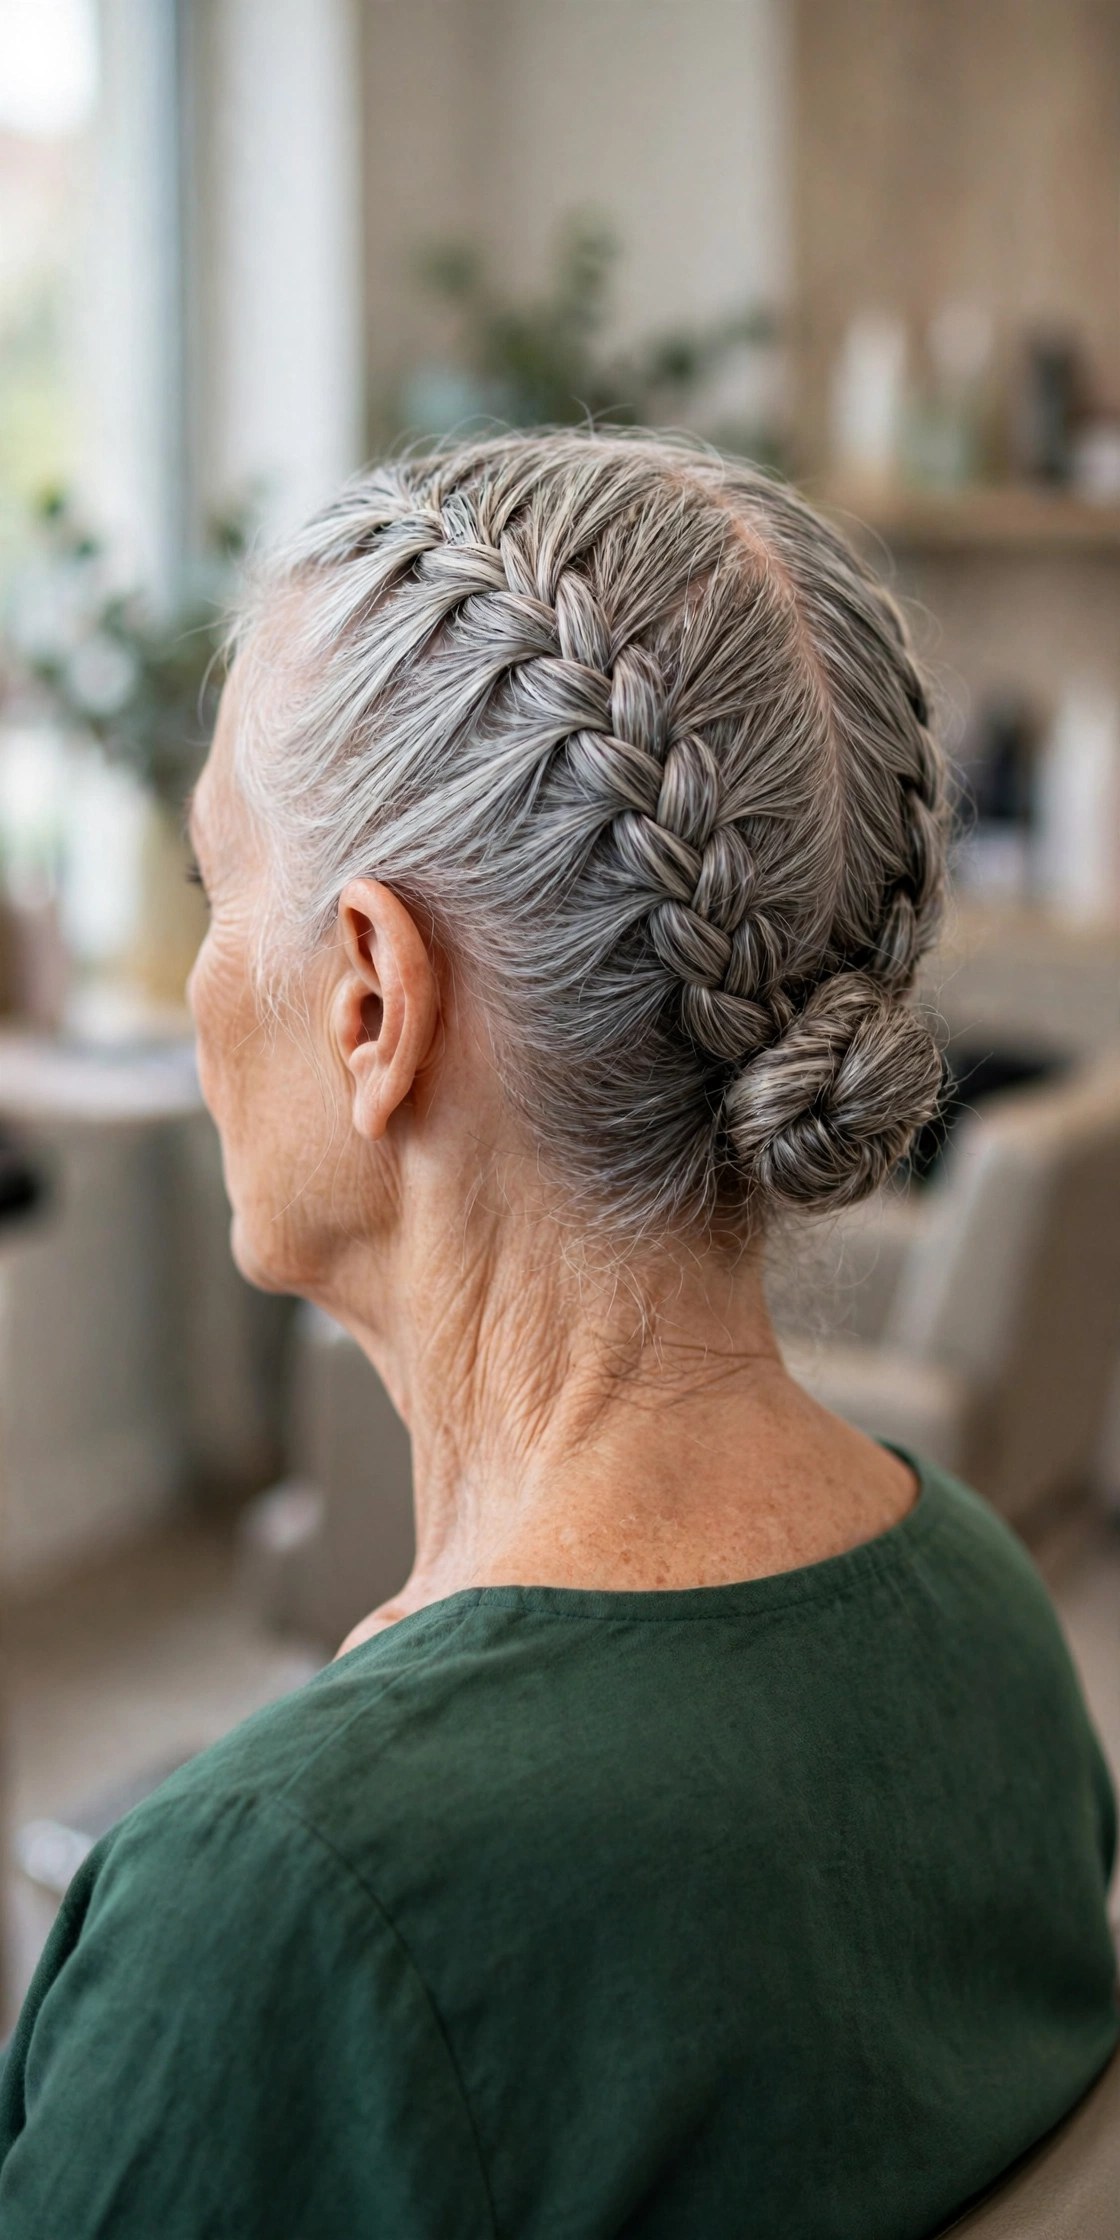
One braid down the back of the head that finishes in a small bun at the nape. The braid does the gathering for you as it travels, collecting the short layers and wispy pieces that escape from ordinary buns, which is why this style stays neat for hours longer than most. It is also unusually secure for active days — gardening, travel, grandchildren.
The honest route for stiff fingers: braid a regular three-strand plait from the crown instead of a true French braid, gathering a little hair as you go only if your hands allow. Texture is your assistant — dry shampoo through the hair first makes strands grip instead of slithering out of the braid. Tuck the braid’s tail into a bun and pin at the compass points. Difficulty: medium, and worth practicing once a week until your hands remember it.
14. Double Twist Updo
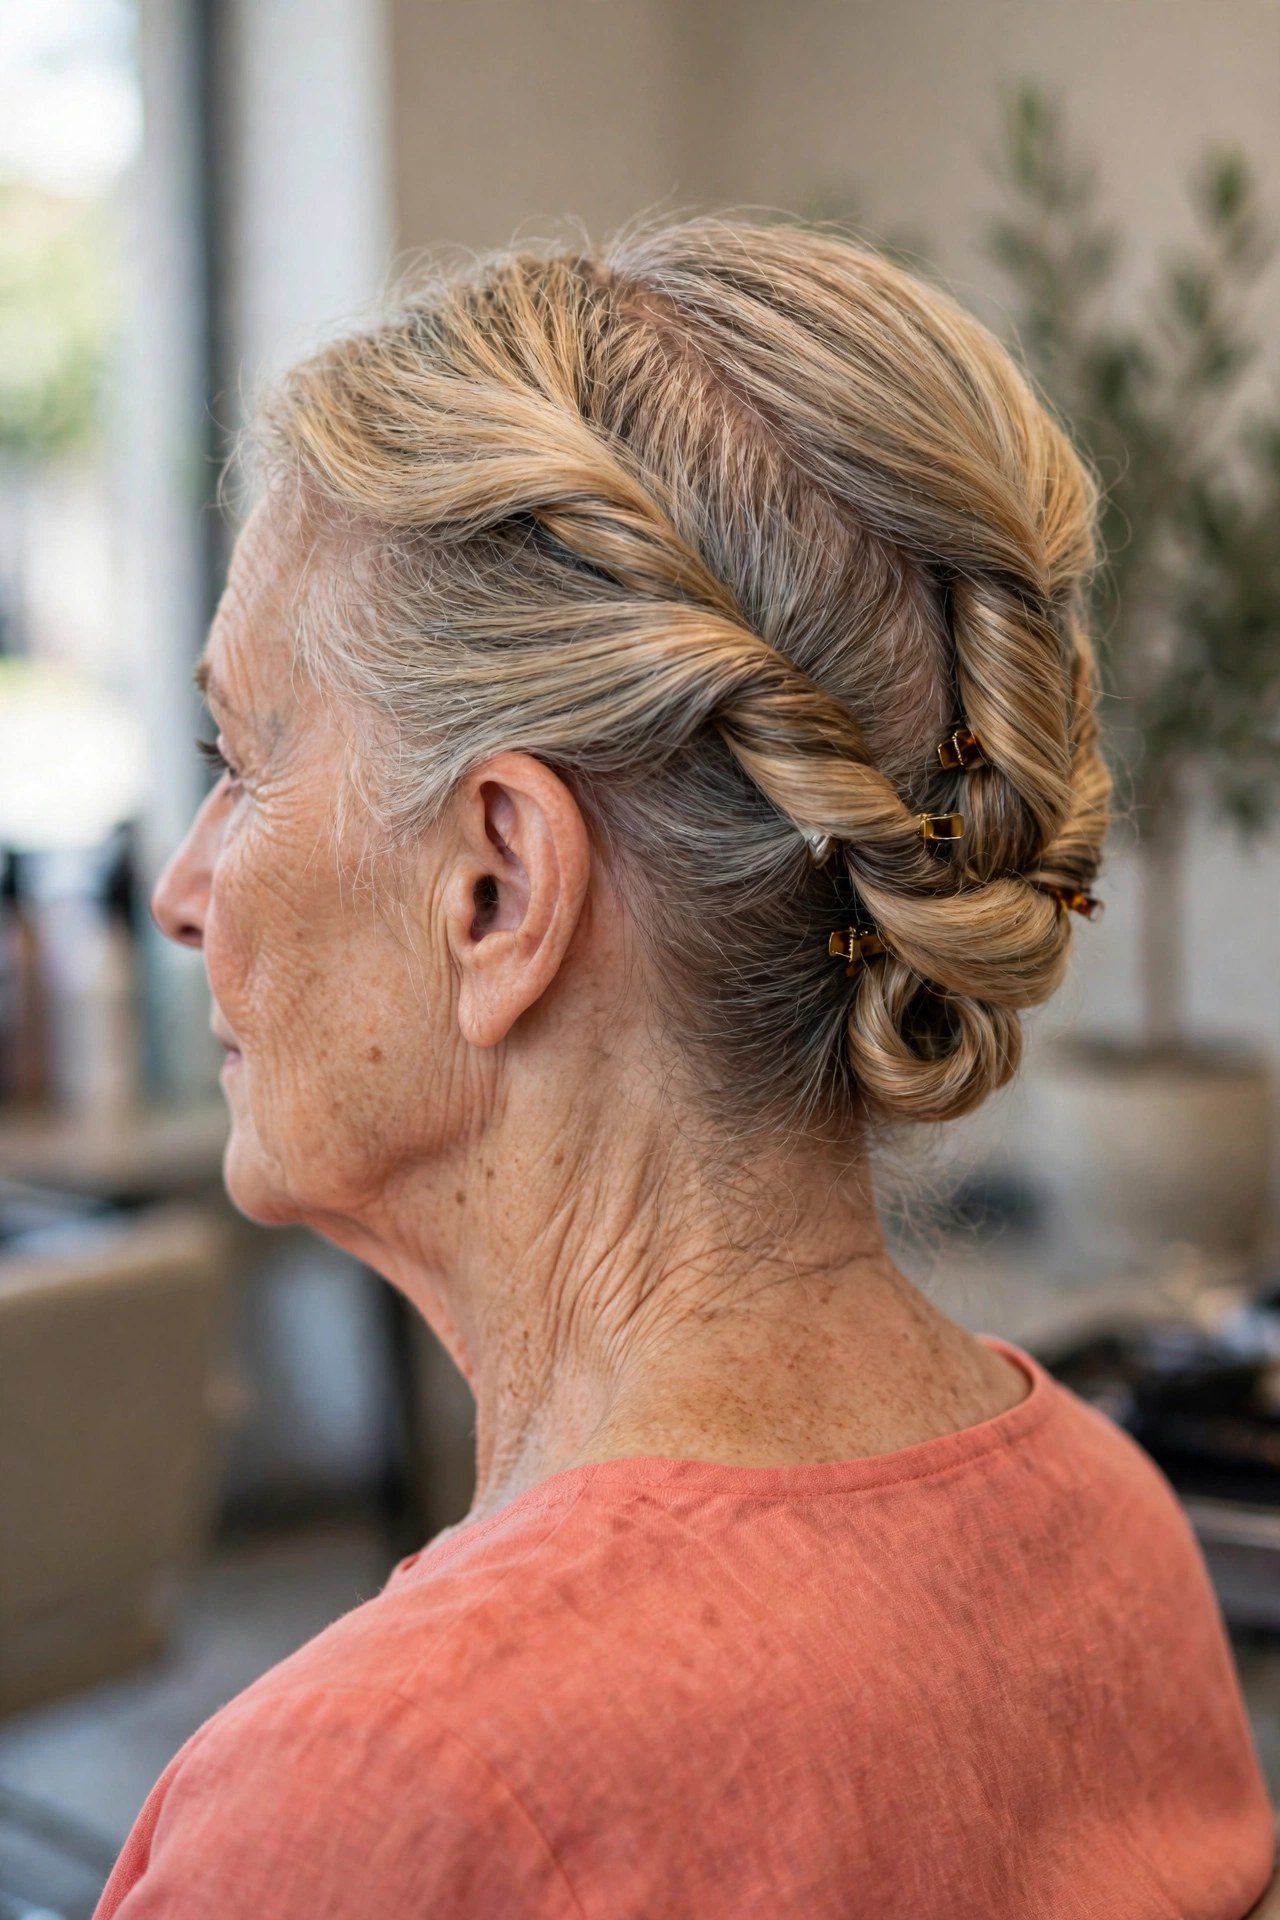
Twist the hair back from each temple, pin the two twists where they meet in the middle, then tuck and pin whatever length remains into a small roll below. Twists are kinder than braids for many women over 60 — they ask for two sections instead of three, they forgive uneven tension, and they can be done one side at a time with rest breaks in between.
Start each twist at the hairline and add hair as you travel back, the way a French braid gathers — or keep it simpler and twist only the front sections, joining them to a low bun made from the rest. Smooth a little serum over the finished twists to settle flyaways, which silver hair produces enthusiastically. Difficulty: easy-to-medium; the two-stage structure makes it one of the more shoulder-friendly formal styles here.
15. Scarf-Wrapped Bun
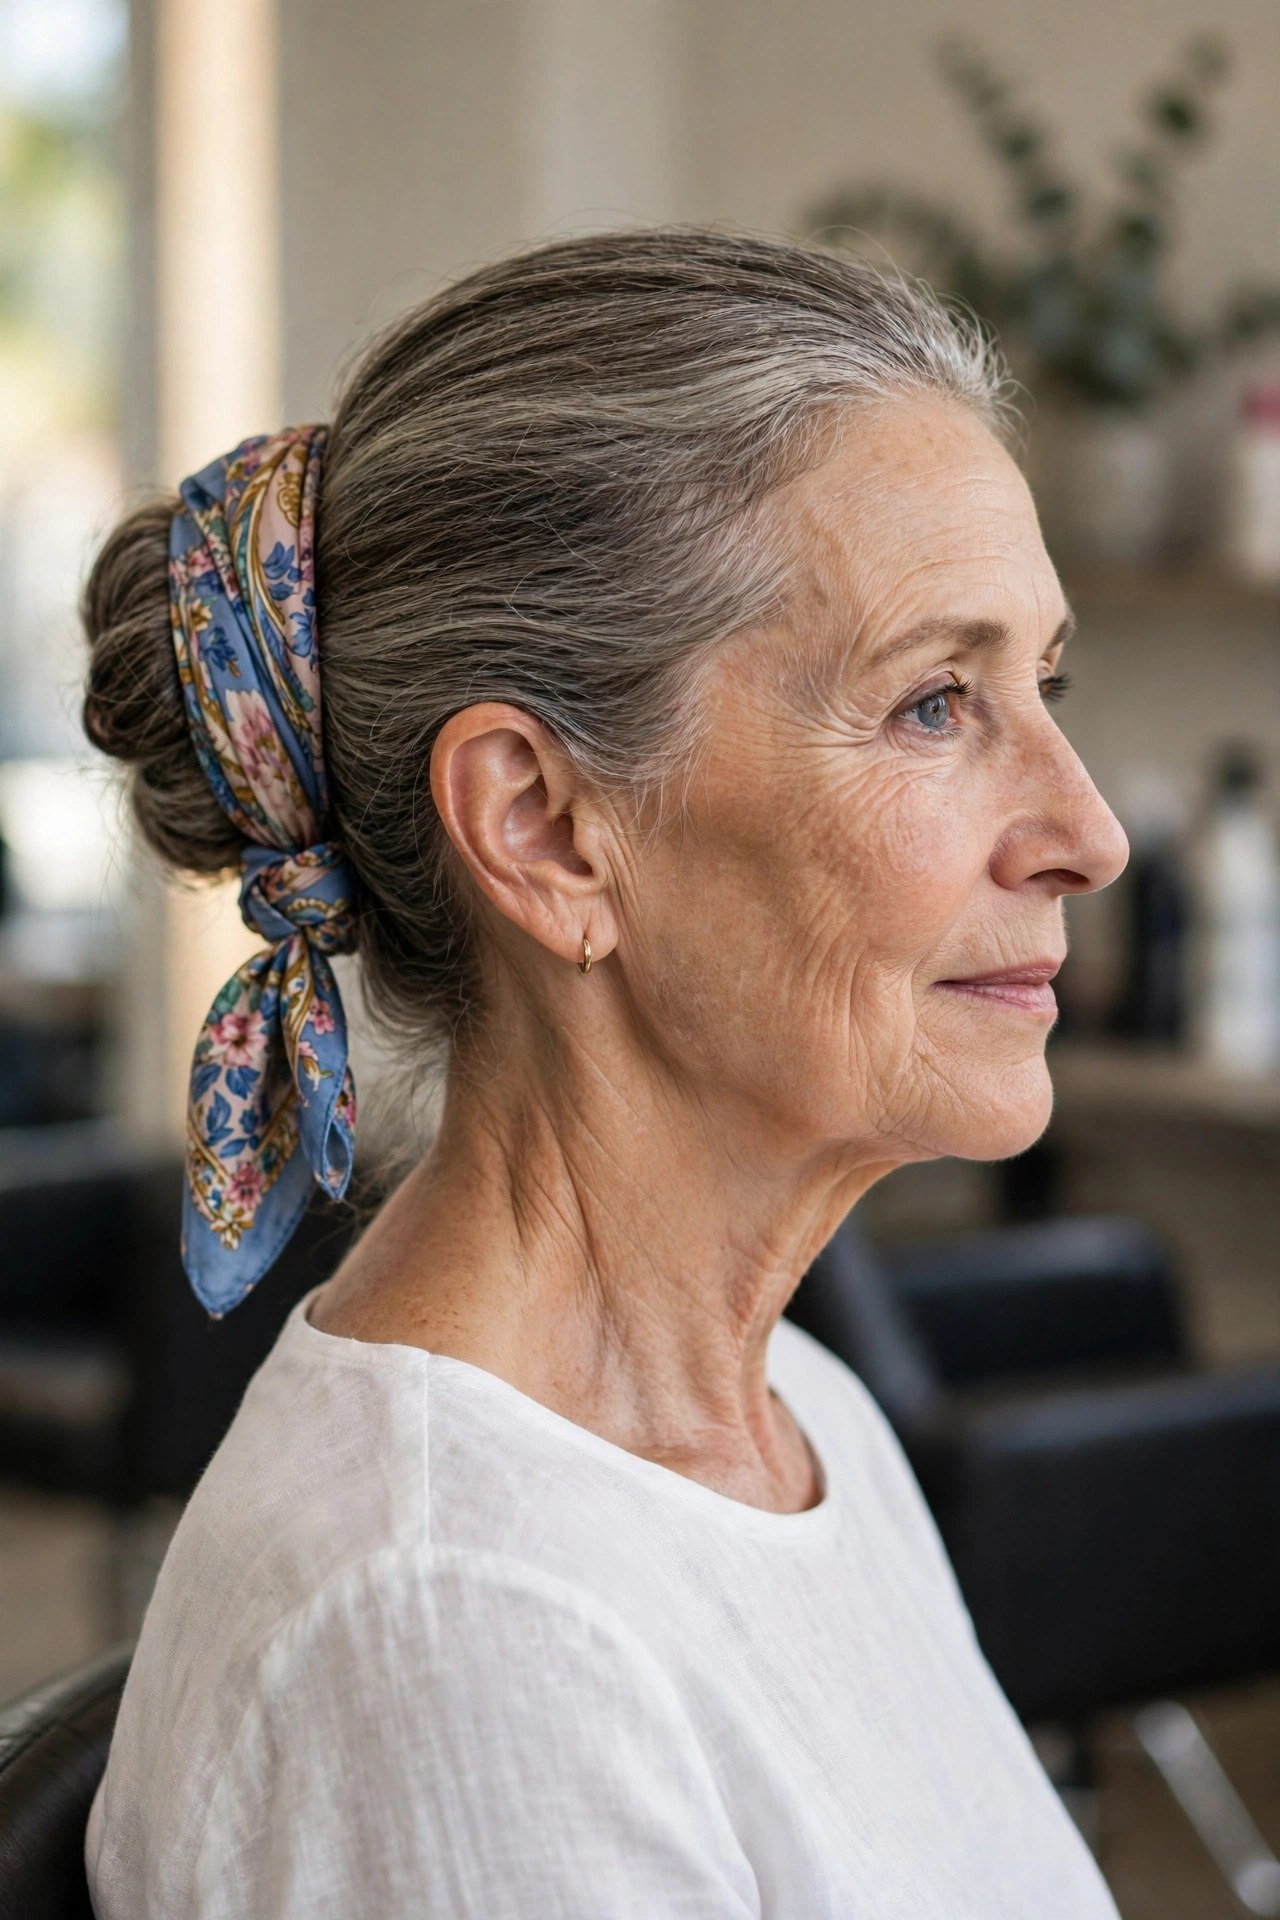
Make any simple bun — low or mid-height — then wrap a silk or satin scarf around its base and tie it neatly. The scarf does three jobs at once: it covers the pins and elastics completely, it makes a small bun look substantial, and it turns a two-minute hairstyle into an outfit. For women whose buns feel too modest, this is the prettiest camouflage in the guide.
Silk and satin are not just decoration: the smooth fabric does not snag or dry out mature hair the way cotton does, and sleeping in a satin pillowcase keeps the whole arrangement fresher for day two. Choose a scarf with some grip — dead-slippery silk slides; a light cotton-silk blend or a scarf tied twice stays put. Difficulty: very easy, because the bun underneath can be your roughest work.

16. Simple Knotted Bun
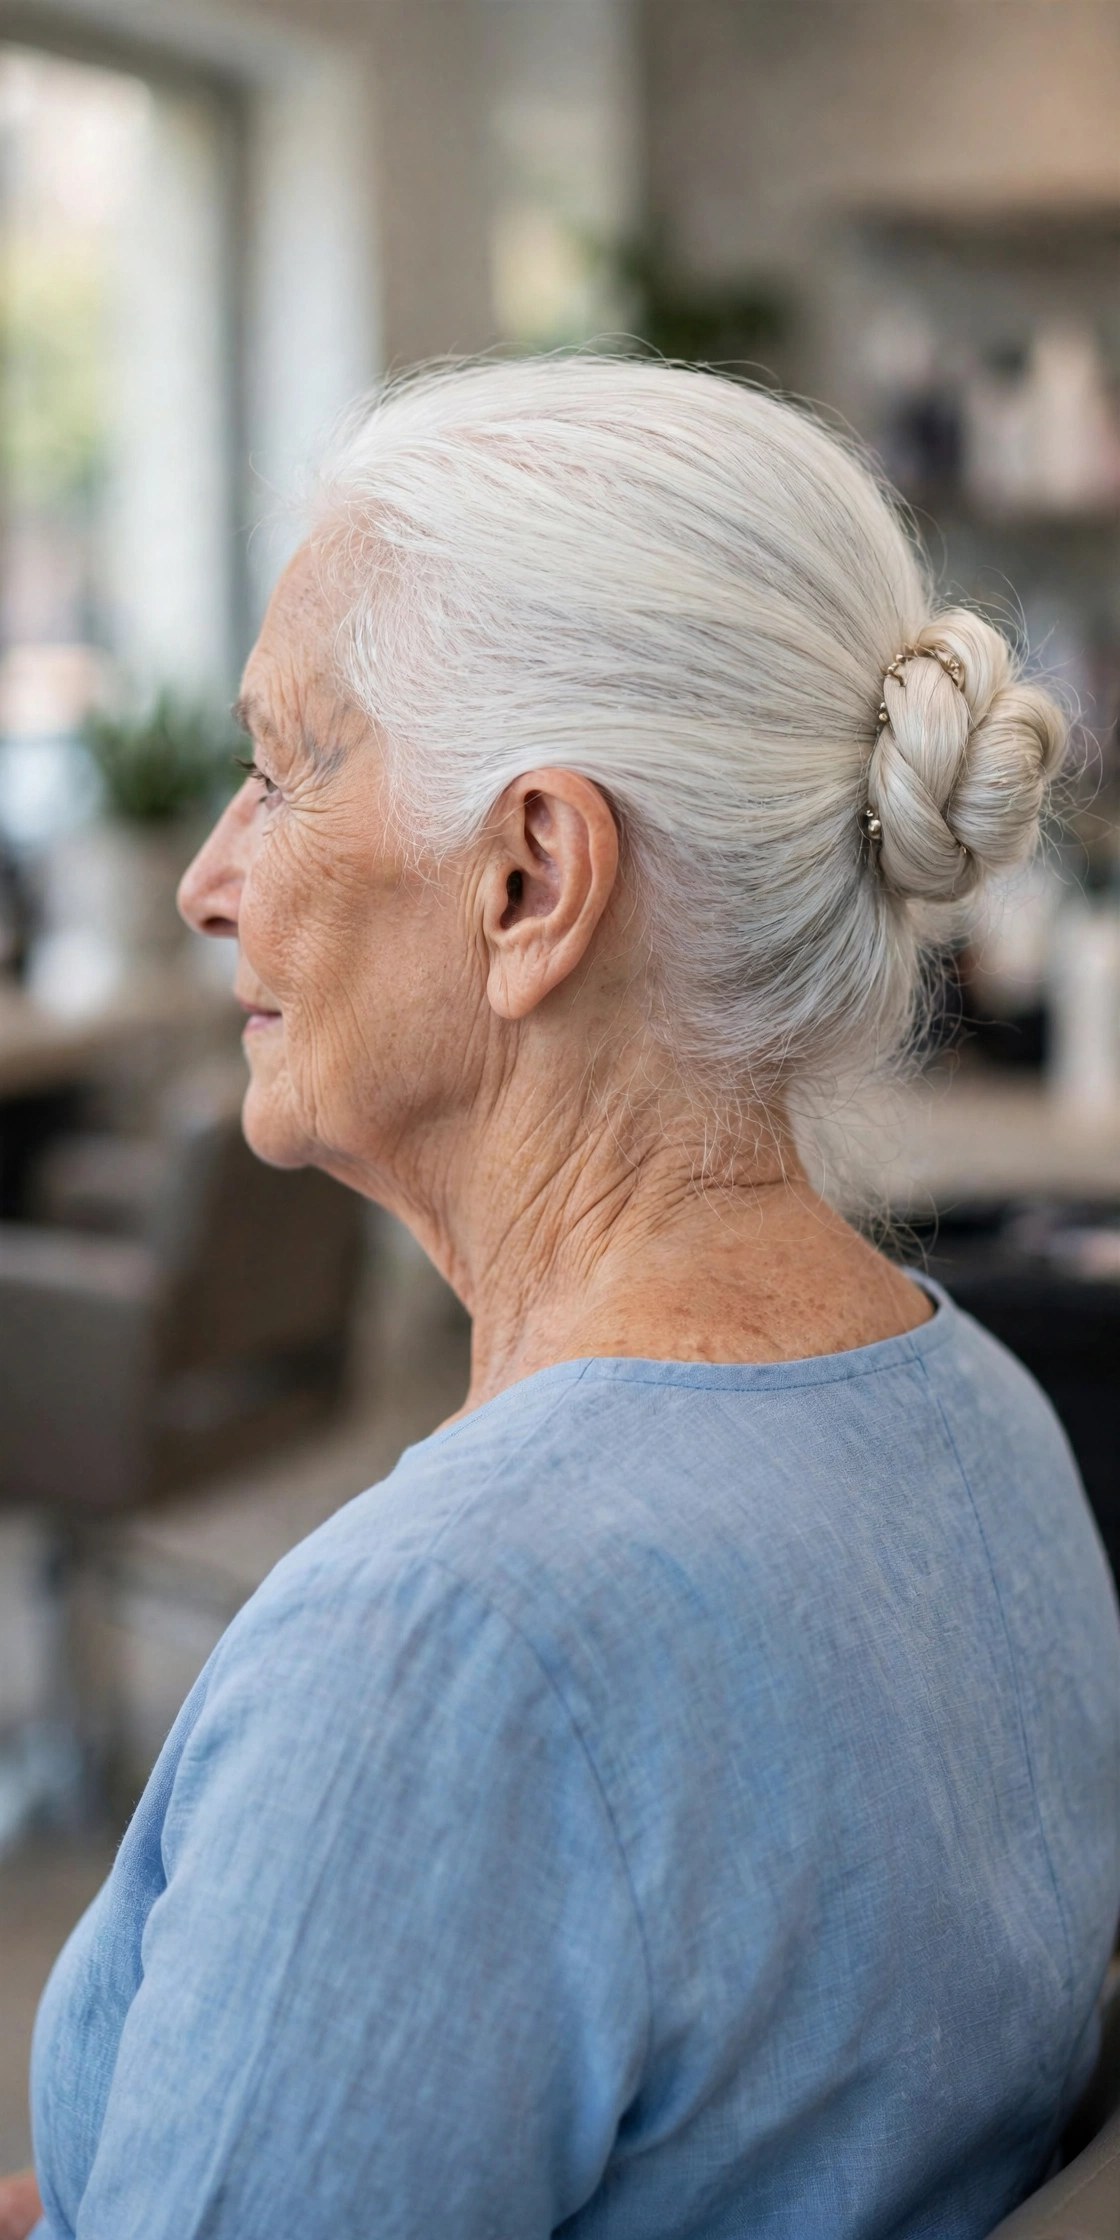
Tie your hair in a knot — literally. Gather a ponytail, split it in two, tie the sections in a single overhand knot the way you would tie a shoelace once, then pin the ends around the knot and tuck them in. The knot itself is the ornament: a soft, sculptural center that makes the simplest bun in this guide look like the most considered one.
It needs a little length to tie — shoulder-length or beyond is comfortable, shorter hair will fight you — and it holds best with a small donut or some padding behind it if your hair is fine, so the knot has something to sit against. Day-two texture matters here too; freshly washed hair slips out of the knot. Pin the ends generously and no one will know. Difficulty: easy, once the idea of tying your own hair stops feeling strange.
17. Beehive-Lite with a Soft Lifted Crown
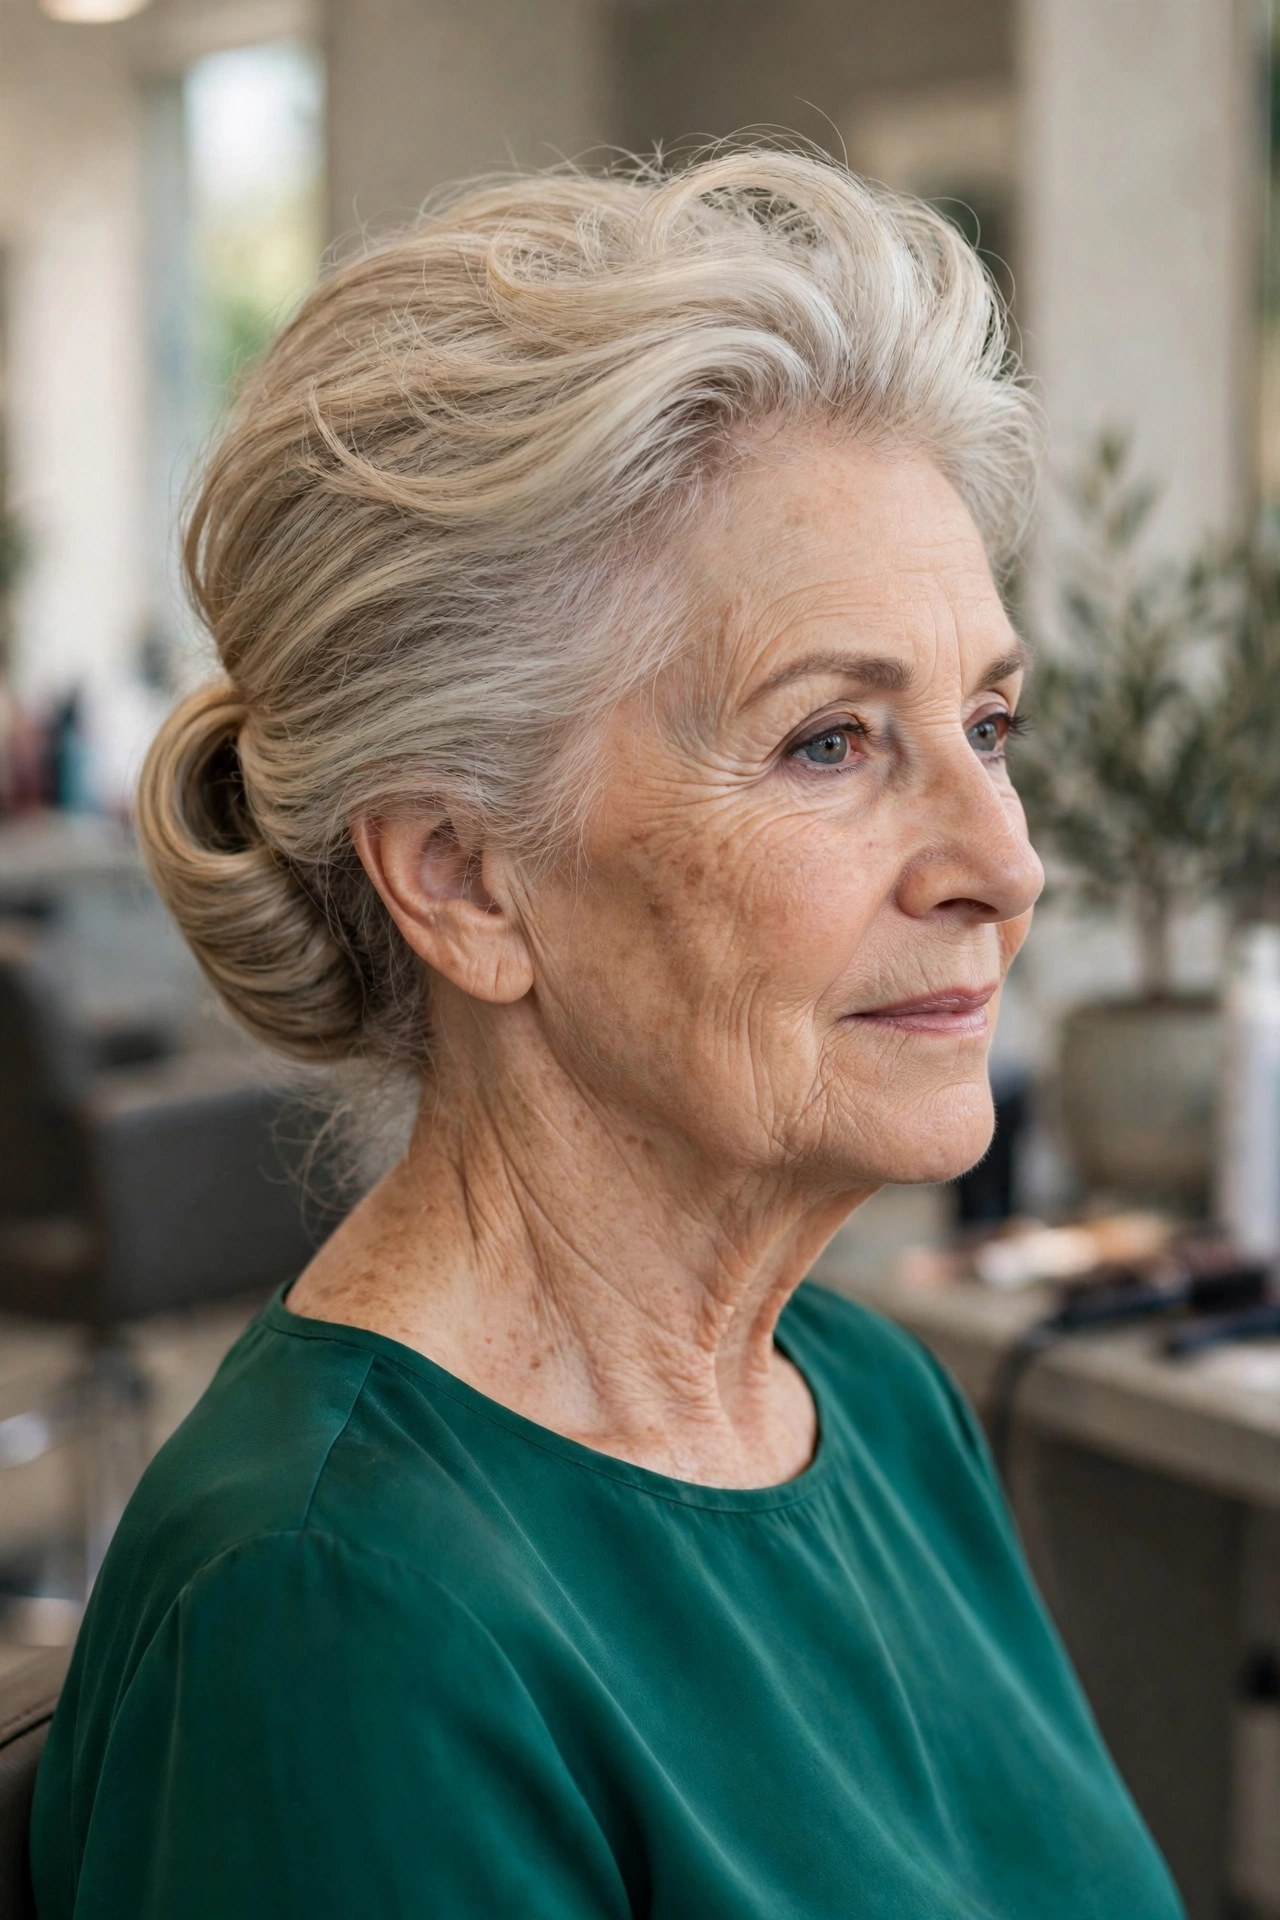
Not the towering beehive of the sixties — its polite granddaughter. Gently tease or back-brush just the crown section for a couple of inches of lift, smooth the surface hair over it, sweep everything back, and finish with a low roll or bun. That modest height at the top is the single most rejuvenating shape an updo can have, balancing the face and undoing the flat-crown look that fine hair drifts toward.
Build the lift with volumizing mousse and a round brush on a normal day, and the updo barely needs teasing at all — product-built volume is gentler on fragile mature hair than back-combing. If you do tease, use a soft brush, three strokes, and never tear it out dry later; condition first in the shower. A firm but brushable spray keeps the crown where you put it. Difficulty: medium, mostly for the crown work.
18. Romantic Low Bun with Two Tendrils
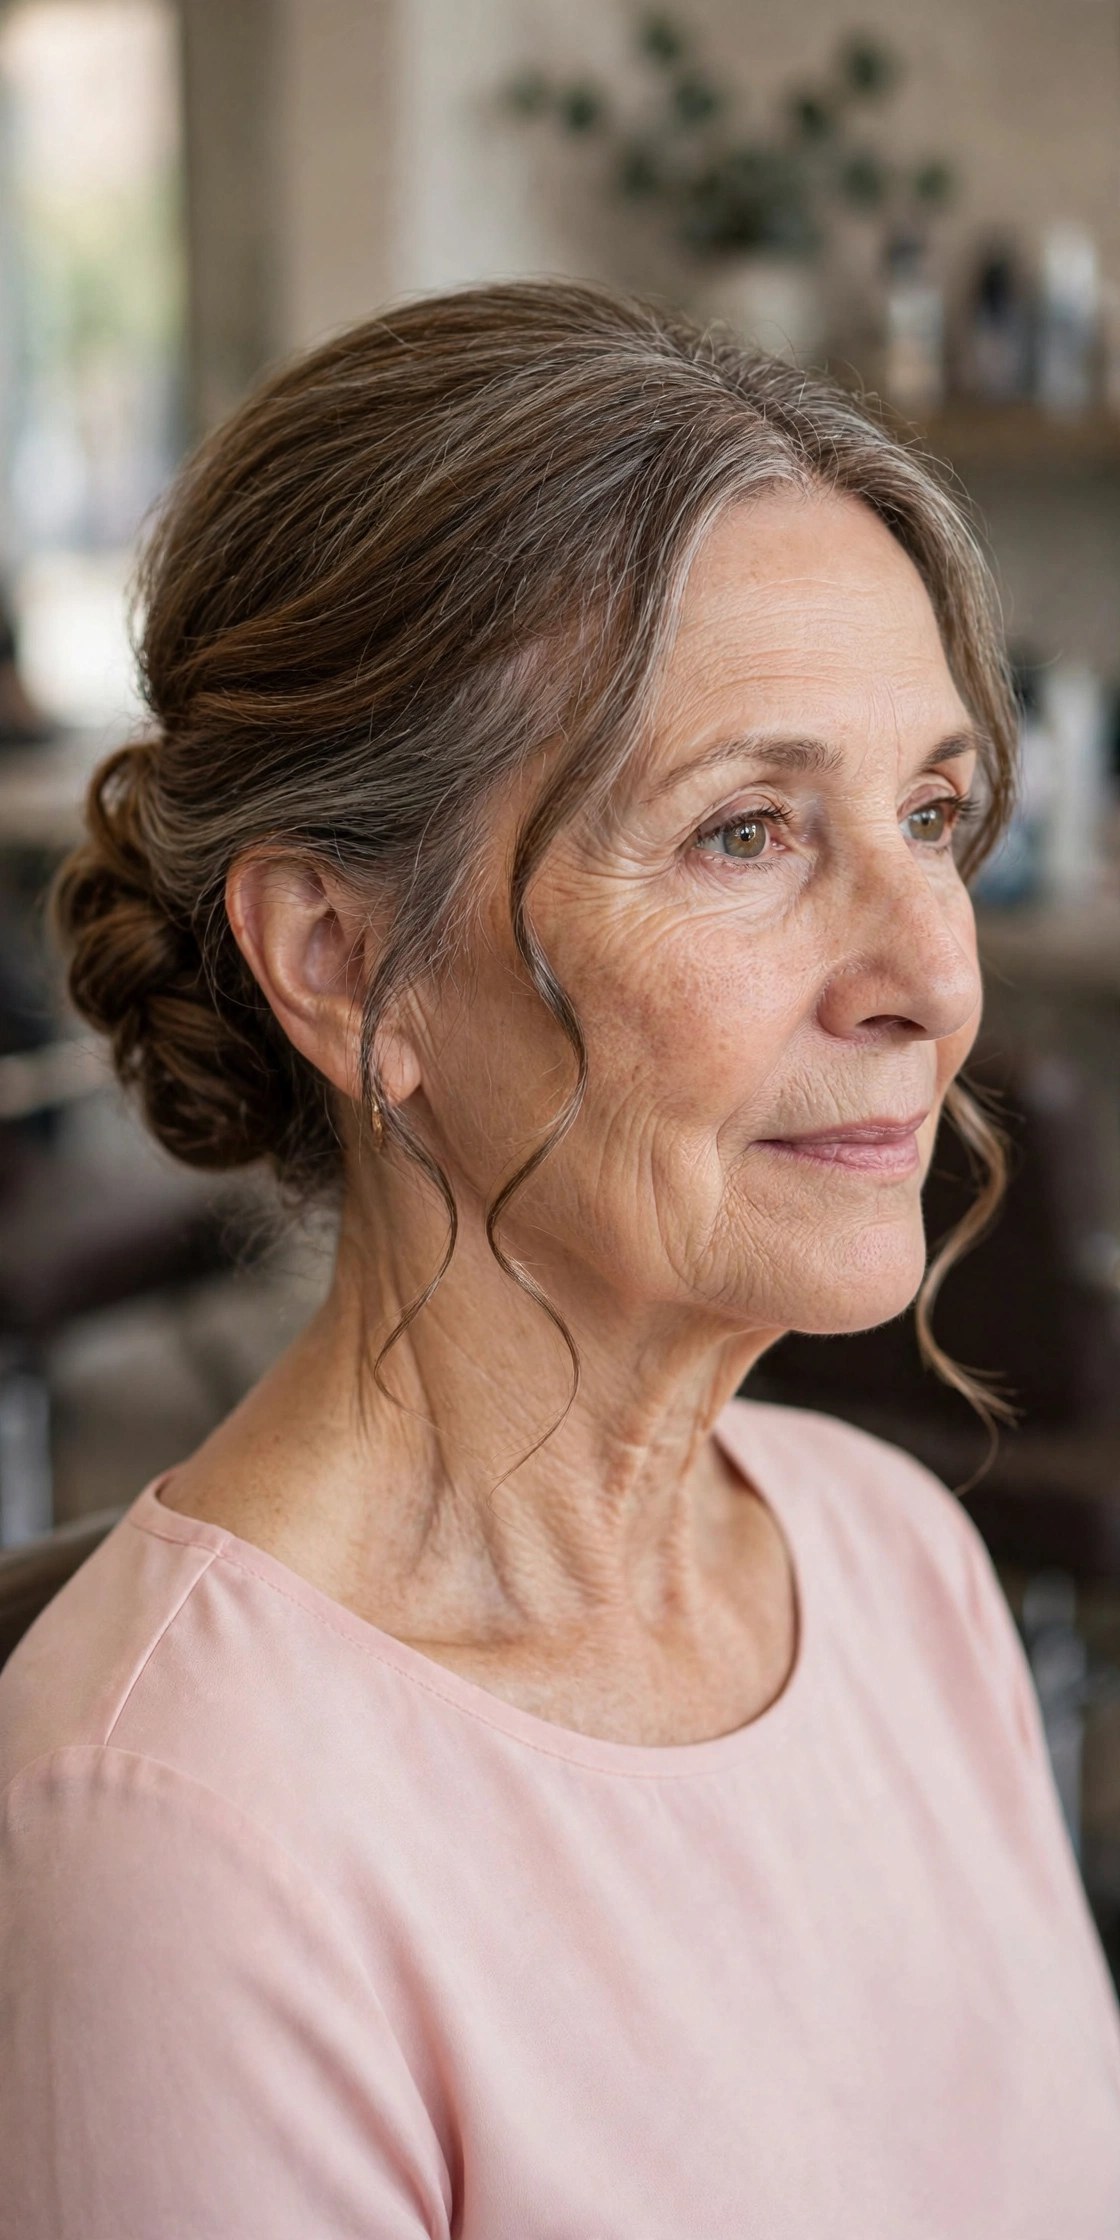
The formal-event version of the low bun: hair gathered into a soft, slightly loose bun at the nape, with exactly two thin tendrils left out at the front and curled or waved. Those two strands change the entire effect of an updo — they soften the hairline, frame the cheekbones, and signal ‘occasion’ in photographs. The discipline is in stopping at two.
Pull the tendrils out before you pin the bun, not after, so they fall from the right place; keep them thin, because thick tendrils read as hair that escaped rather than hair that was placed. A drop of serum keeps them smooth against humidity. This is the style in this guide most likely to be asked about — and it is, underneath, just idea 1 with better manners. Difficulty: easy.
19. Twisted Halo Updo
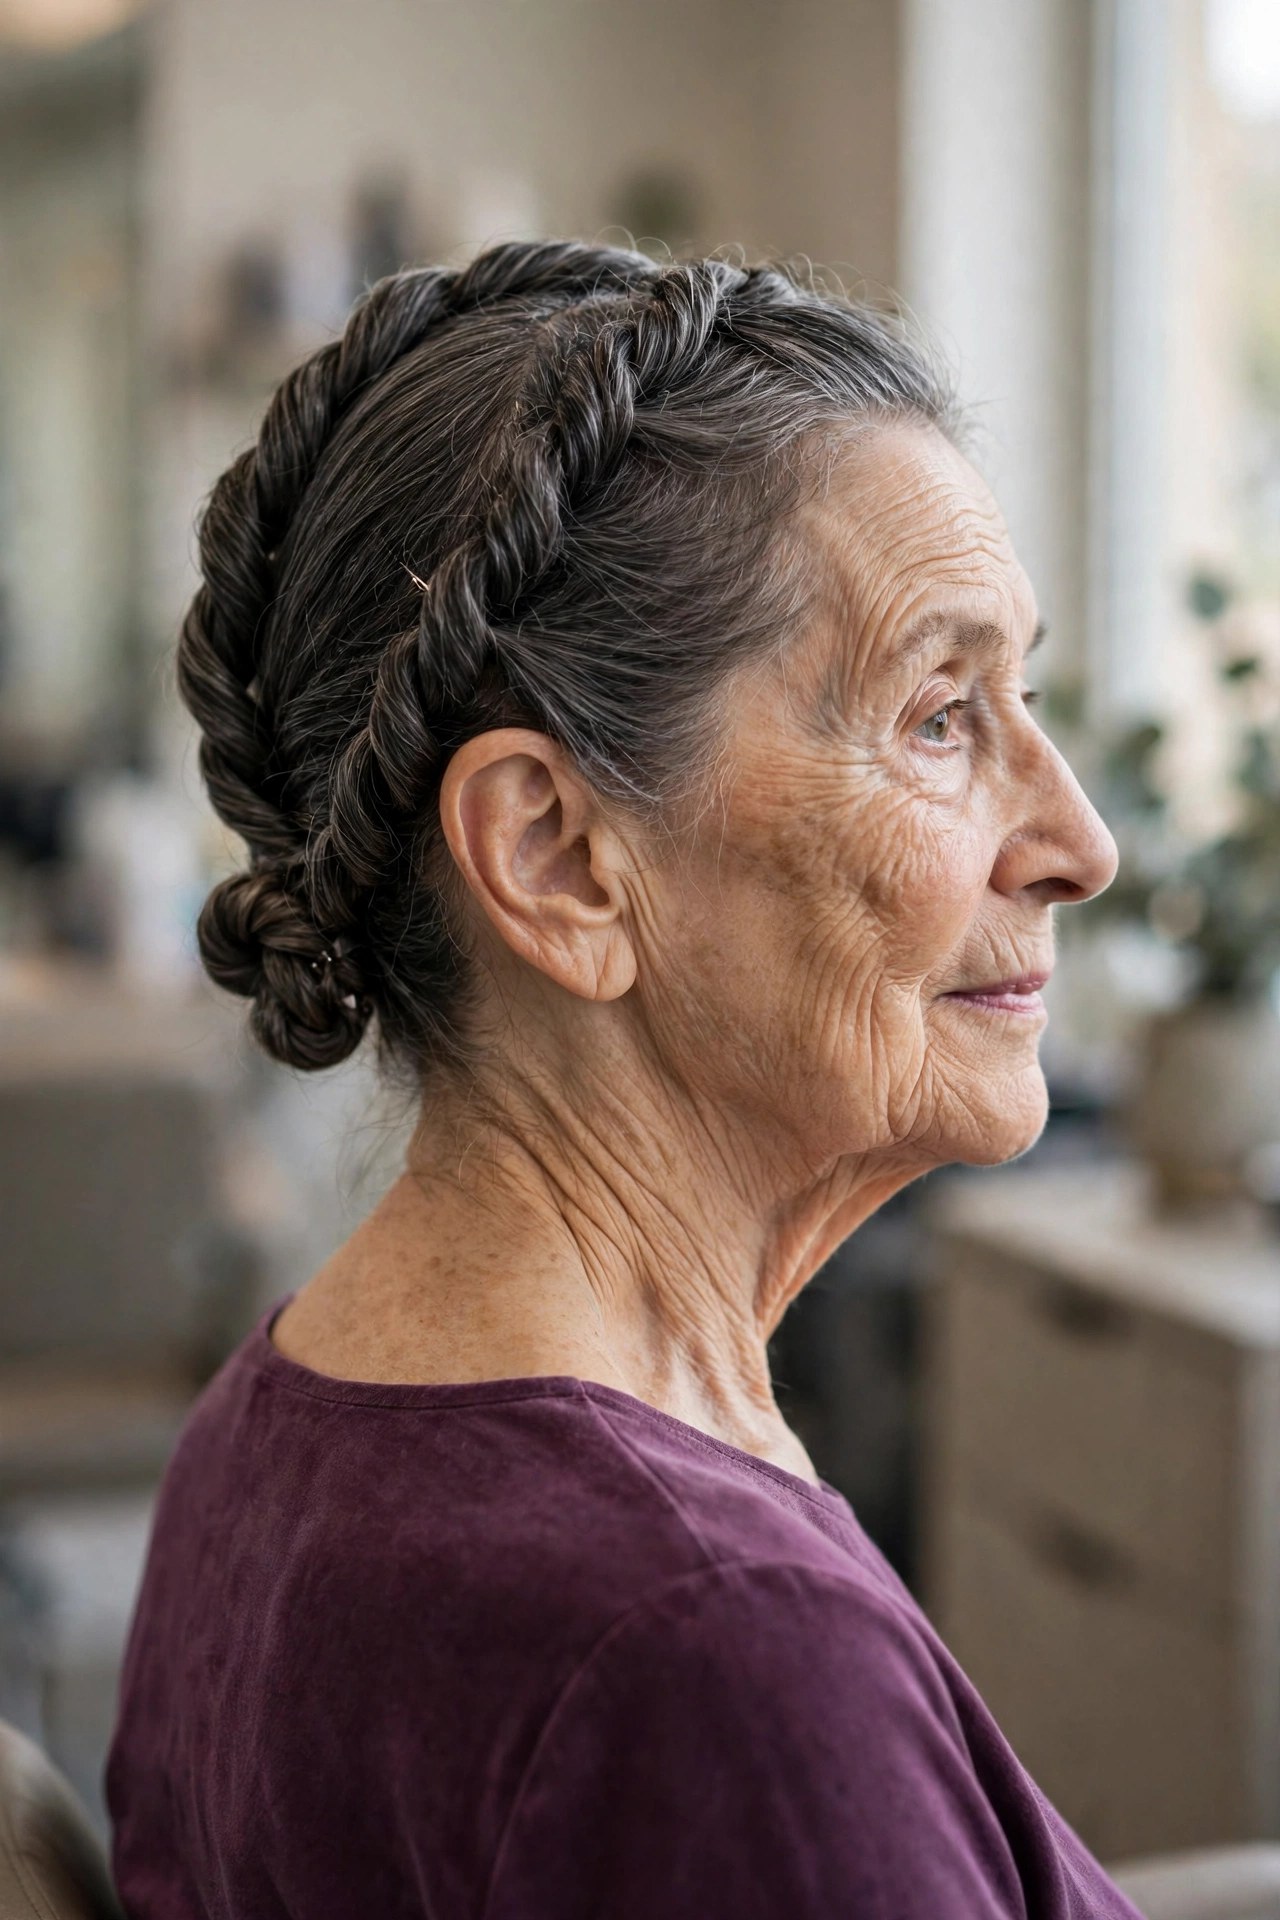
Two rope twists that travel around the sides of the head and meet at the back — the twist version of the braided crown, and for many hands the easier one. Twisting asks for two strands and a simple rotation, the twists lie flat and comfortable, and the finished halo keeps hair completely off the face while looking genuinely intricate.
Work one side at a time: twist from the front hairline, adding small sections as you go, clip it temporarily, then do the other side and pin them together over a small twisted bun of the remaining hair. Fine hair stays in twists better with a little dry shampoo worked through first. Difficulty: medium, but it divides into two short, restable halves — plan it as two five-minute jobs, not one ten-minute one.
20. Two-Minute Loop Bun
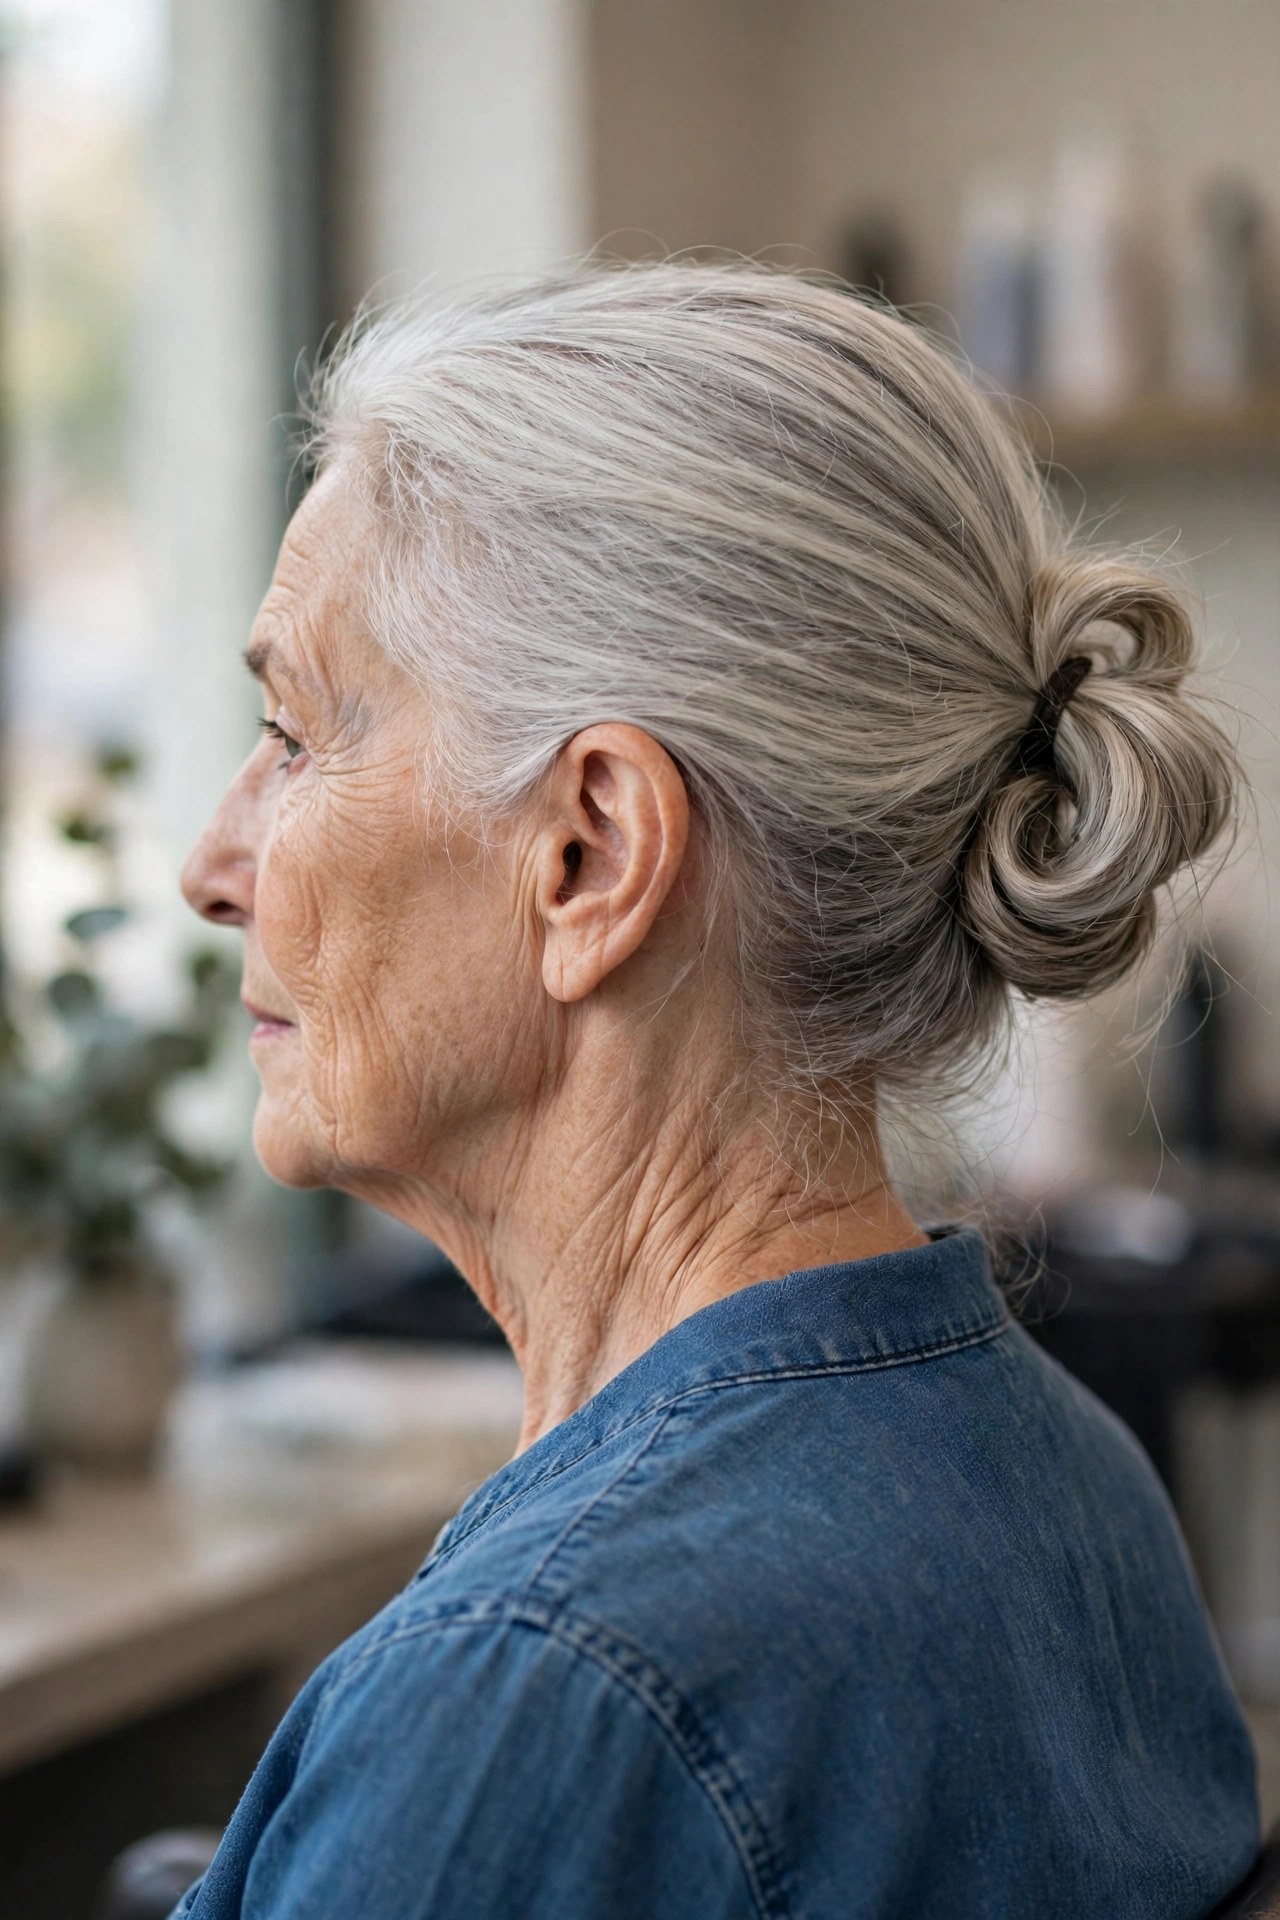
The closer of this guide is the updo you will actually wear daily. Make a low ponytail, and on the last pass of the elastic, pull the hair only halfway through so it forms a loop; fan the loop out a little, wrap the ends around the elastic if you like, and stop. Two minutes, one elastic, no mirror required — the loop bun is to updos what the messy bun is to days at home, but neater.
It suits almost every length from chin to mid-back, and because the elastic is doing all the work, sore hands have almost nothing to do. Keep a flat claw clip in your bag as insurance: if a loop ever feels loose later in the day, one clip over the base resecures it in seconds. Difficulty: the easiest bun here — start with this one if updos have ever defeated you.
Recommended Products
An updo toolkit is small and lasts for years. These are the pieces the styles above actually use — the donut set and U-pins do the heavy lifting in at least half of them, and the claw clips are the zero-effort backup every handbag deserves.
Updo Care Tips That Make Every Style Easier
- Style second-day hair. Freshly washed hair is slippery and drops pins; day-old hair (or dry shampoo added to clean hair) grips.
- Use U-pins properly. Push a U-pin in toward the head, catch a little scalp hair, then flip it back toward the bun — that hook motion is what locks it.
- Cross your pins. Two bobby pins in an X hold like four in a row.
- Work low and seated. Sit at a table, rest your elbows, and use a hand mirror to check the back instead of holding your arms up to a wall mirror.
- Pin as you go. Secure each twist or section the moment it is placed rather than holding everything with one hand.
- Protect it overnight. A satin pillowcase keeps a good updo wearable on day two and is kinder to fragile hair than cotton.
- Practice once a week. Ten unhurried minutes on a quiet day builds the muscle memory that makes getting-ready updos fast.
Frequently Asked Questions
What is the easiest updo for a beginner over 60?
The loop bun (idea 20) and the claw clip twist (idea 9). Both use a single tool, take under two minutes, and need no mirror once you have done them twice. Start there, then graduate to the classic low chignon, which teaches the pinning skill every other updo uses.
How long does my hair need to be for an updo?
Chin-length hair can manage the headband tuck, the claw clip twist and pinned styles. Shoulder-length hair unlocks most of this list, including chignons, twists and donut buns. If your hair is shorter, a donut or padding still lets you fake a bun surprisingly well — the foam supplies what length does not.
My fine hair slips out of every updo. What actually helps?
Three things, in order: texture (style day-old hair or add dry shampoo for grip), the right pins (U-pins hooked in properly hold fine hair far better than bobby pins laid flat), and a base (a ponytail elastic or donut gives pins something solid to anchor into). Hairspray should go on after pinning, not before — sprayed-first hair is smoother and slides more.
My arms get tired holding my hair up. Which styles avoid that?
Choose low styles where your hands work at nape level: the Gibson tuck, the headband tuck, the low chignon and the loop bun. Sit down, rest your elbows on a table, and pin each section as you place it instead of holding everything at once. Tipping your head forward while gathering a ponytail also lets gravity do part of the work.
Can I do an updo on short hair over 60?
Yes, with the right expectations: short hair does twists, tucks and pinned-up styles rather than big buns. The double twist, headband tuck and claw clip twist all work from chin length. If you are growing toward updo-friendly lengths, our long layered hair guide for women over 60 shows lengths that still go up easily.
An updo is not a performance — it is a practical skill, like tying a scarf well, and it improves quickly with a little practice. Start with the loop bun this week, add the chignon when that feels boring, and keep the donut and U-pins in the drawer for the day you want to look unmistakably dressed up. The woman in every mirror in this guide put her own hair up. So can you.