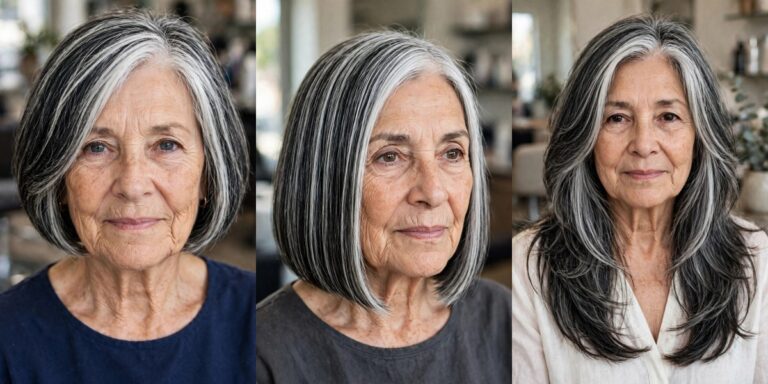
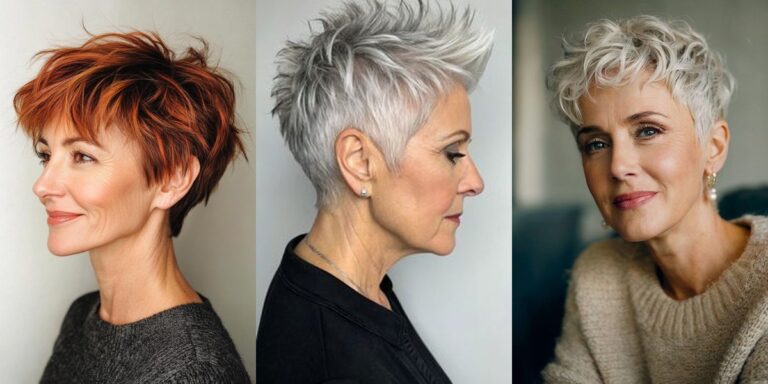
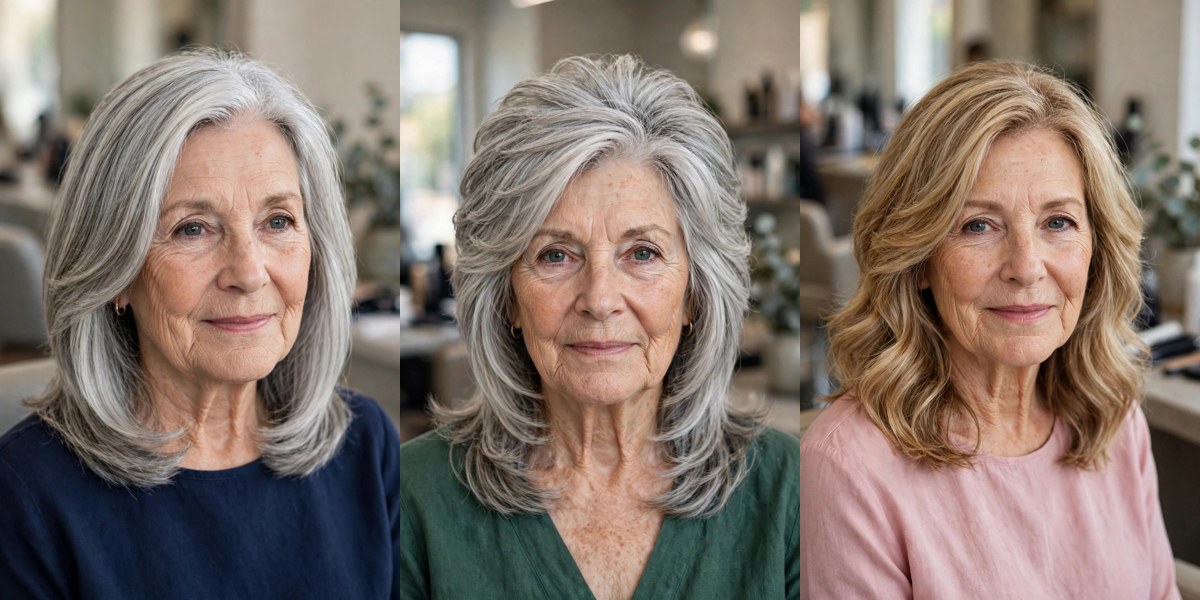
Shoulder Length Layered Haircuts for Women Over 60
This post contains affiliate links. As an Amazon associate, I earn from qualifying purchases. I only recommend products that are of high quality and that I would use myself.
Shoulder length is the most requested length after 60 — and the most commonly ruined by the wrong layers. Cut one-length, it hangs heavy, triangles out at the bottom, and drags the face down with it. Cut with too many short layers, the ends turn thin and see-through, and hair that was already finer than it used to be looks finer still. The difference between the two failures is not luck. It is placement: where the layers start, how long they are, and which parts of the perimeter are left alone.
Below are 20 shoulder-length layered haircuts for women over 60, each built around a specific layer placement — long layers for fine hair, interior layers for thick hair, graduated layers for a flat crown, rounded layers for curls — with exactly what to ask your stylist for and how to keep the shape at home. If you are still deciding between lengths, our Over-50 shoulder-length layered guide covers the same placements from a slightly younger angle.
Table of Contents
- 1. Classic Shoulder-Length Layers with Face-Framing Pieces
- 2. Feathered Shoulder Layers with Flicked-Out Ends
- 3. Layered Lob with Curtain Bangs
- 4. Soft Wavy Shoulder Layers
- 5. Choppy Shoulder-Length Layers
- 6. Deep Side-Part Layered Cut in Bright Silver
- 7. Curly Shoulder-Length Layers
- 8. Bouncy Blowout Layers for Fine Hair
- 9. Shoulder Layers with Wispy Bangs
- 10. Graduated Shoulder Layers with Crown Volume
- 11. Long Layers That Take the Bulk Out of Thick Hair
- 12. Shoulder-Length Shag with Layered Texture
- 13. Angled Forward Layers That Slim the Face
- 14. Airy Long Layers for Fine, Delicate Hair
- 15. Side-Swept Layers with a Sweeping Fringe
- 16. Layered Cut with Flipped Ends
- 17. Layered Cut with Soft Dimensional Highlights
- 18. Low-Maintenance Wash-and-Go Layers
- 19. Sleek Center-Part Shoulder Layers
- 20. U-Shaped Shoulder Layers with a Rounded Back
- Recommended Products
- FAQs
- Fine or thinning hair? Long layers only, over a mostly blunt base (ideas 8 and 14) — short layers will thin your ends.
- Thick, heavy hair? Long interior layers that remove bulk (idea 11) or the full U-shape (idea 20).
- Flat crown? Graduated layers (idea 10) or a deep side part (idea 6) — volume built into the cut, not teased in.
- Natural waves or curls? Wave-following layers (idea 4) or rounded dry-cut layers (idea 7).
- Round or full face? Angled forward layers (idea 13) — the diagonal slims.
- No blow-drying, ever? Wash-and-go layers (idea 18) or the forgiving shag (idea 12).
- Silver and proud of it? Ideas 6 and 15 place the layers where silver catches the most light.
1. Classic Shoulder-Length Layers with Face-Framing Pieces
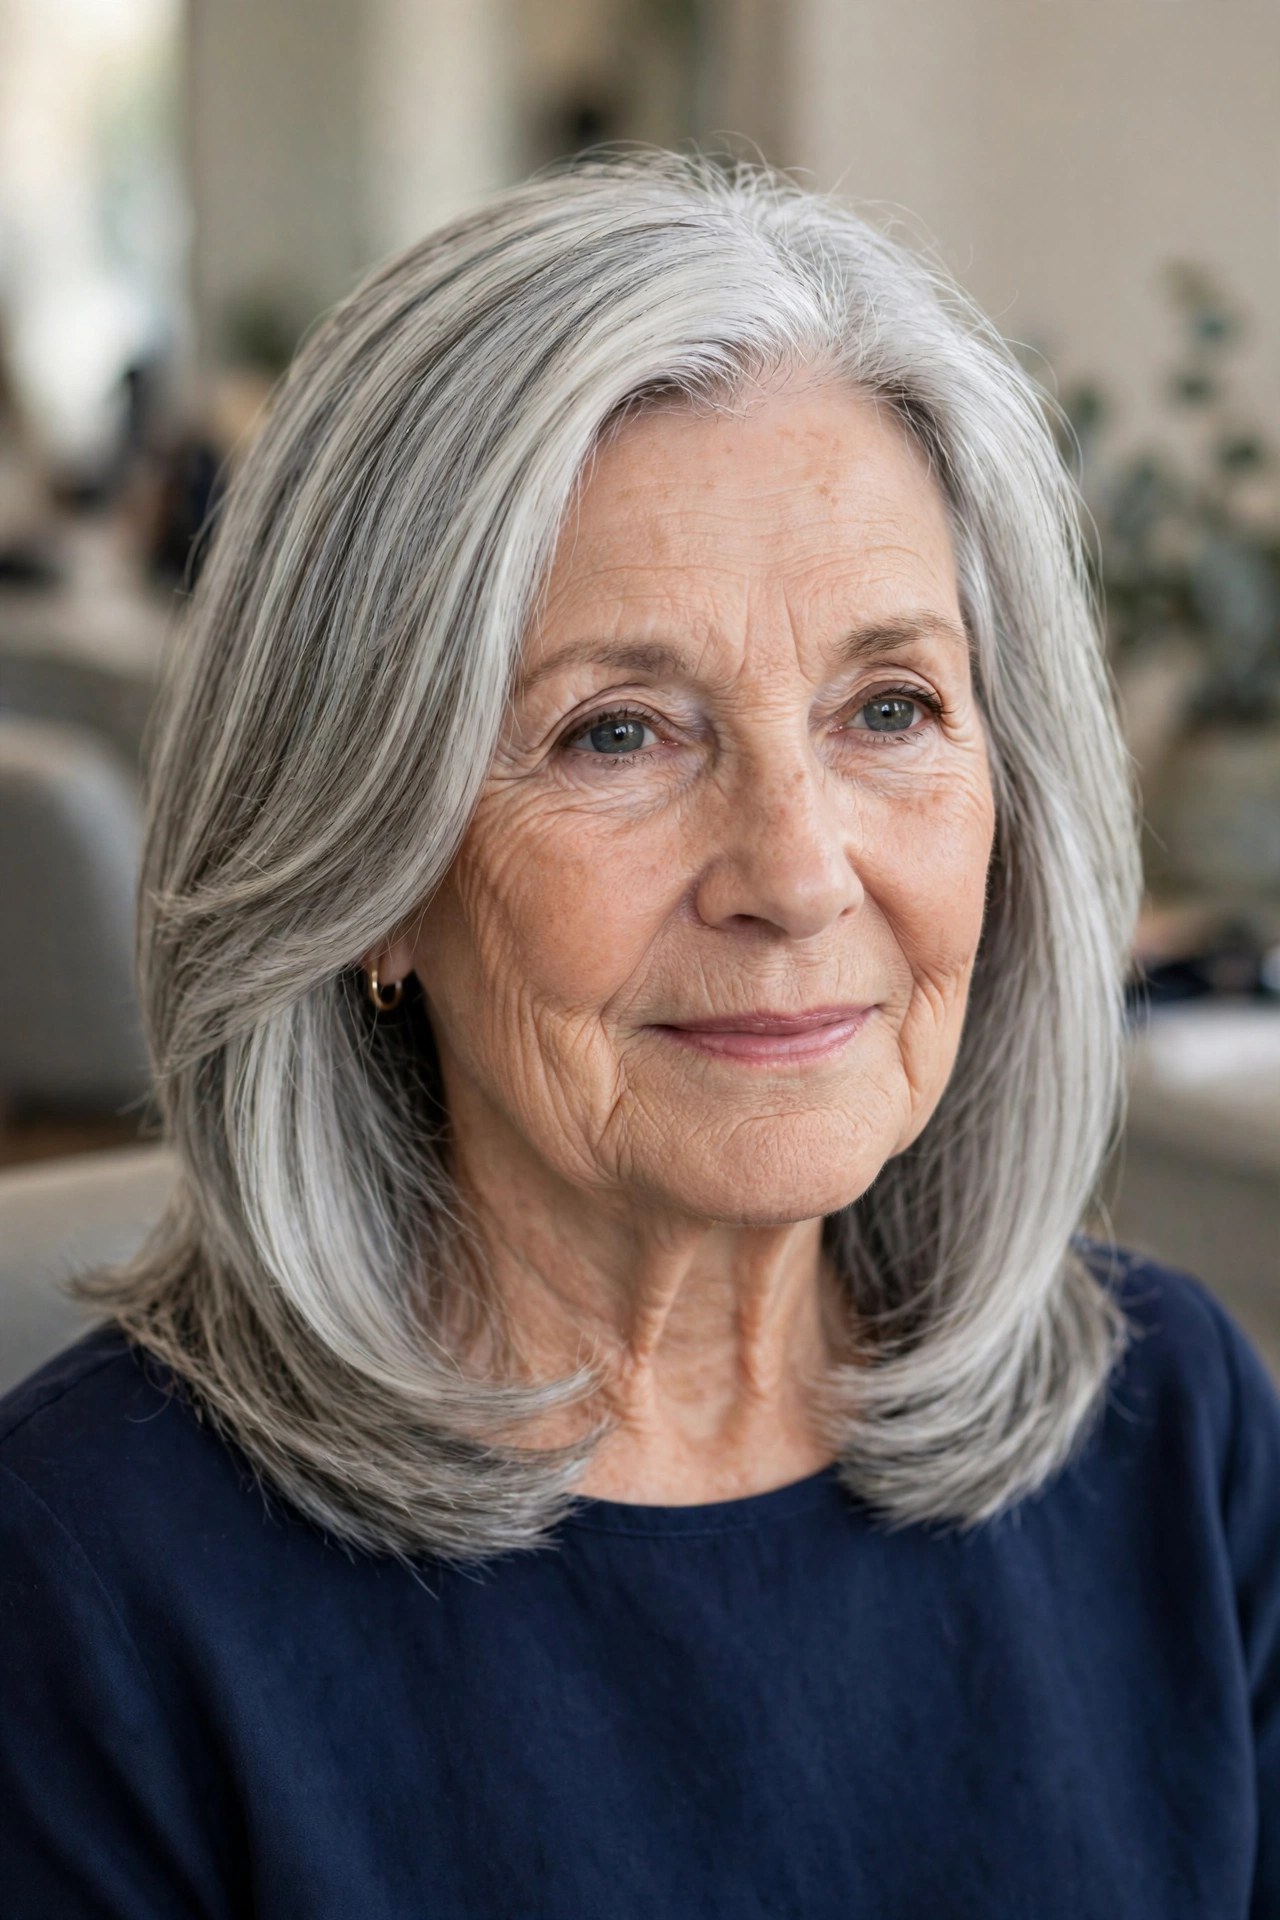
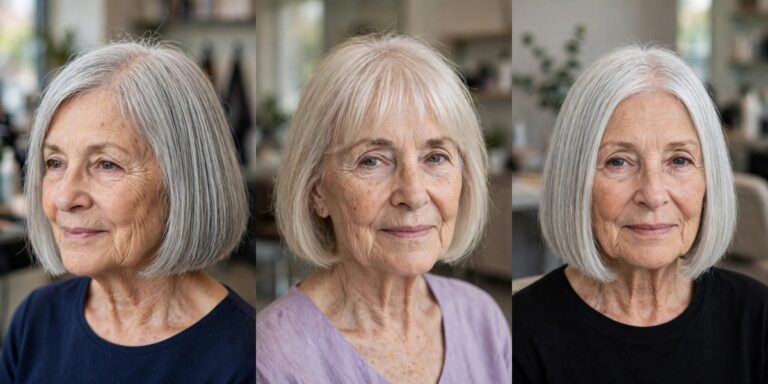
This is the reference cut — the one the other nineteen are variations of. The perimeter sits right on the shoulders, and layers are placed through the mid-lengths so the hair moves instead of hanging in one heavy curtain. The shortest pieces are reserved for the front, where two or three face-framing layers at cheekbone and jaw level soften the features and keep the whole shape from dragging the face downward.
The placement rule to tell your stylist: layers belong in the middle of the length, not at the very ends. Keeping the last inch or two of the perimeter mostly intact is what keeps shoulder-length hair looking full rather than stringy at 60+. Dry it with a round brush, rolling the face-framing pieces slightly forward, and the shape more or less maintains itself between six-to-eight-week trims.


2. Feathered Shoulder Layers with Flicked-Out Ends
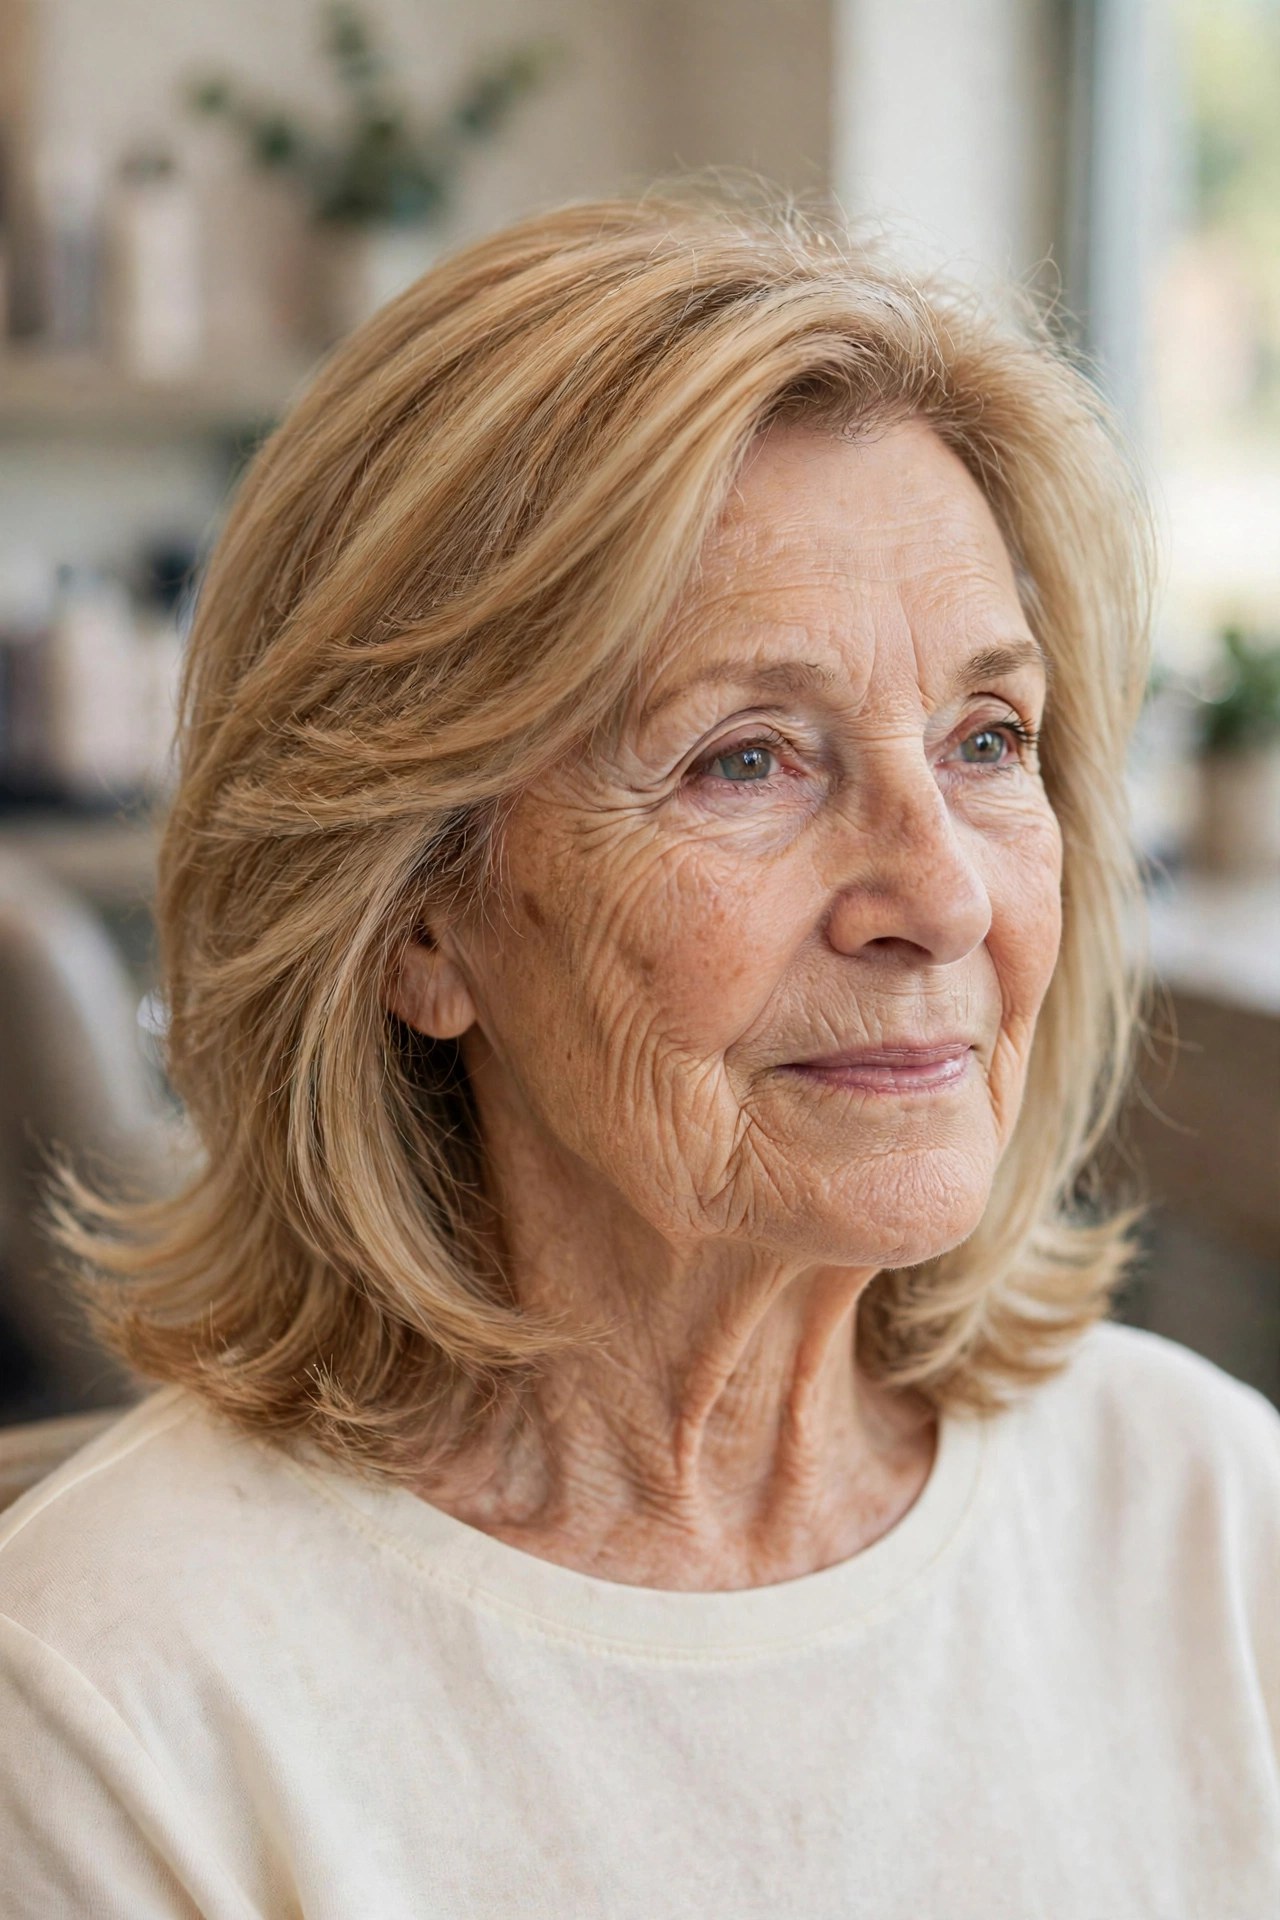
Feathering places many fine, blended layers through the top and sides and brushes them back and away from the face, so each layer overlaps the next like the barbs of a feather. At shoulder length that buys you something precious after 60: lightness without shortness. Hair that would sit heavy and triangular in one length lifts, separates, and finishes in a soft outward flick at the ends.
This is the friendliest layer type for straight to slightly wavy hair that collapses by lunchtime. Work a small amount of sculpting foam through damp hair, blow-dry with a round brush directing everything up and back, and let the ends kick out naturally rather than curling them under — the flick is the whole point, and it makes a simple cut look styled all day.


3. Layered Lob with Curtain Bangs
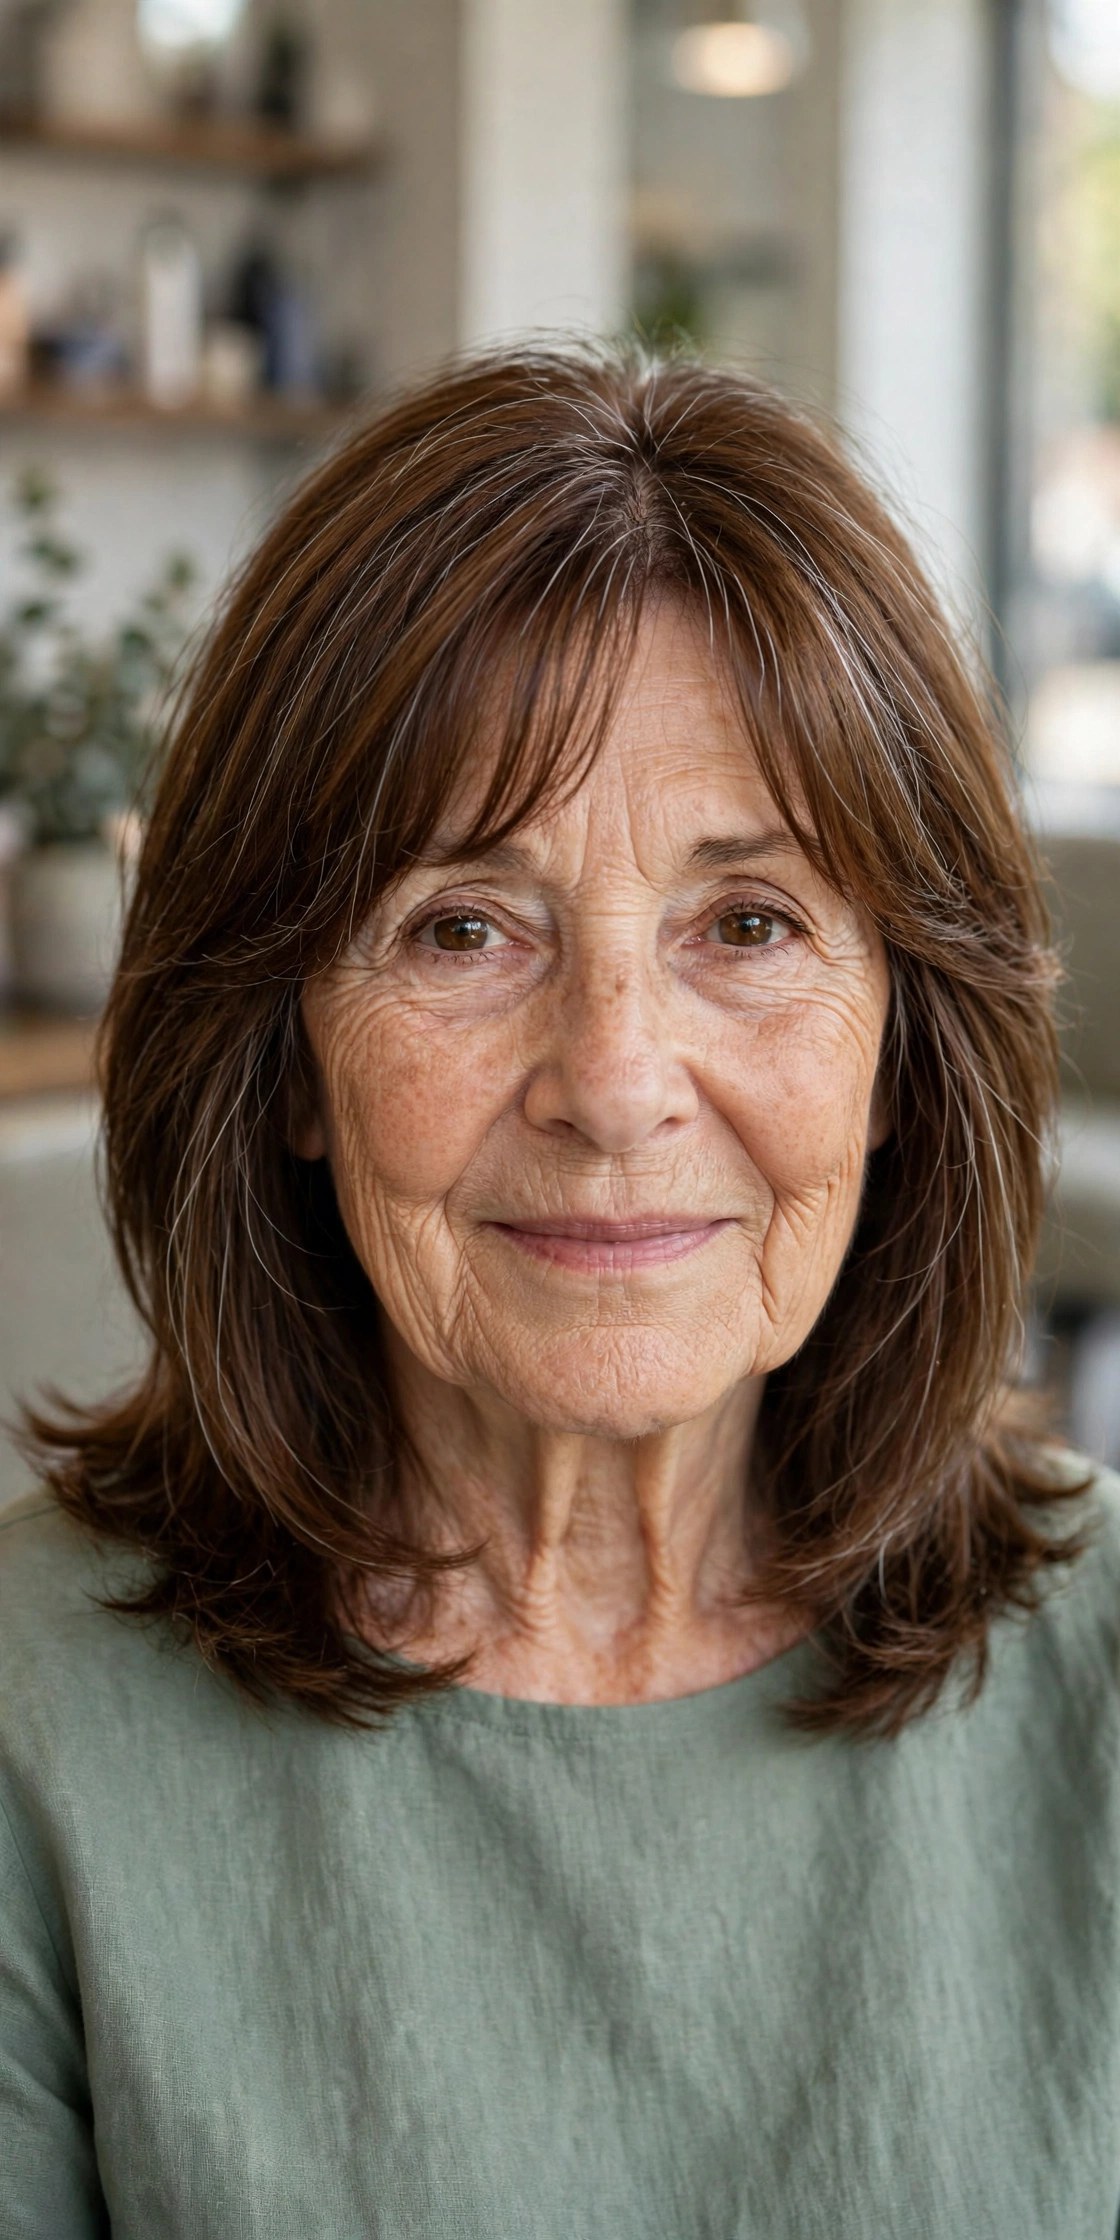
The lob — a long bob resting just at the shoulders — gets its movement here from long internal layers, cut inside the shape rather than on the surface. You keep the clean, fuller-looking outline of a bob, but the hair swings when you turn your head instead of moving as one block. Curtain bangs part in the middle and sweep to the cheekbones, opening up the face and giving glasses a soft frame to sit under.
Ask for the layers to be ‘invisible’ — your stylist will know that means weight removed from within, with no choppy steps on the surface. Curtain bangs need one quick habit: dry them first, forward and then to each side, before the rest of the hair sets. If you are weighing this against a shorter bob, our bob haircuts guide shows where the lob sits in the family.


4. Soft Wavy Shoulder Layers
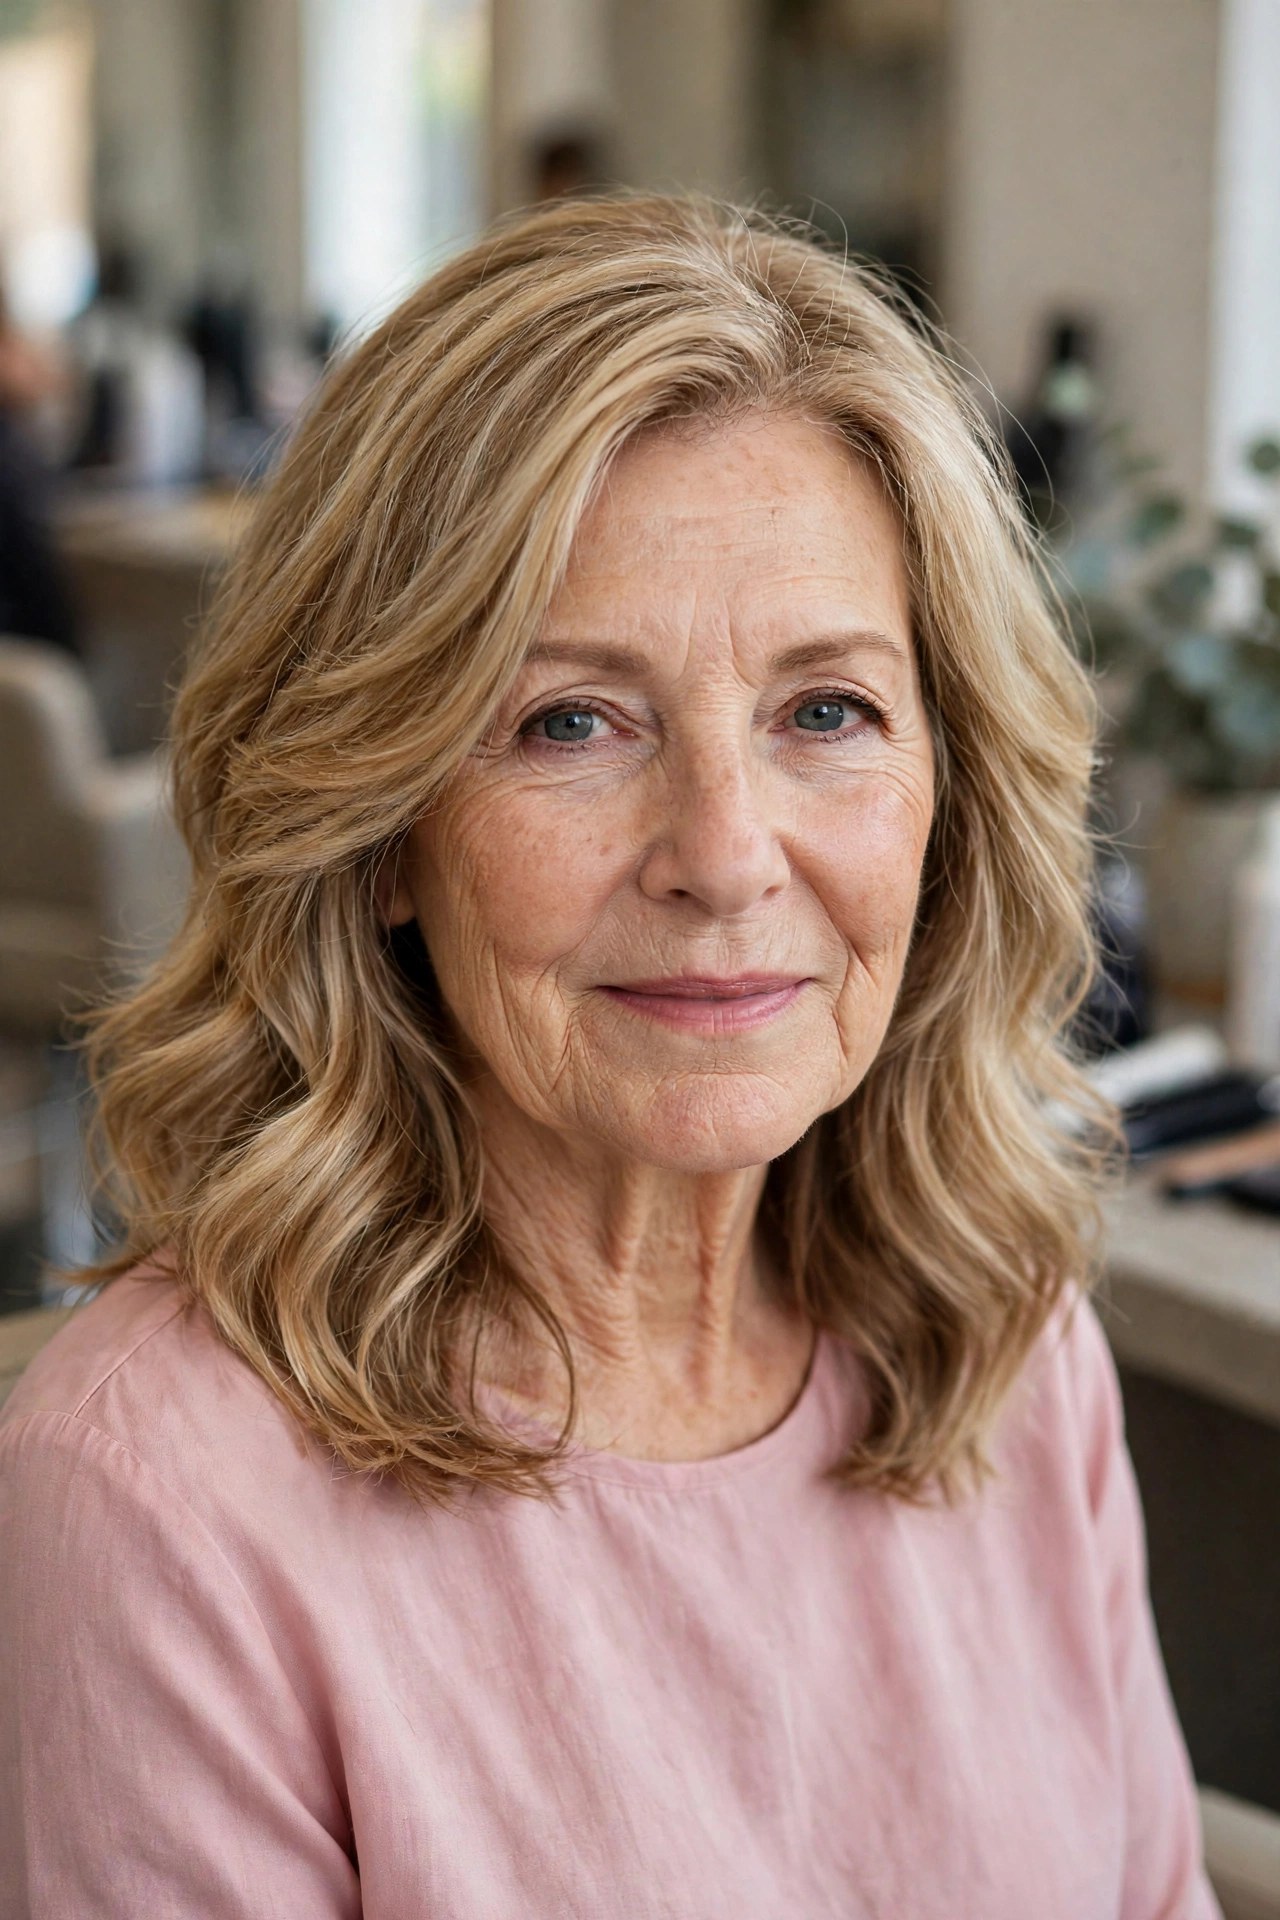
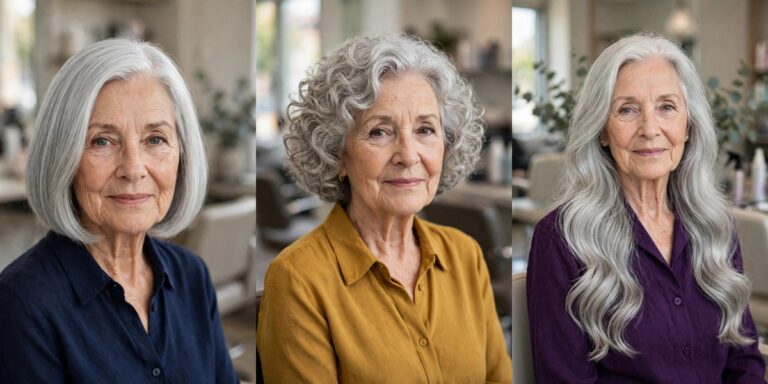
Waves and layers are made for each other at shoulder length: the layers remove just enough weight that a natural wave can actually form and spring up, instead of being pulled straight by its own length. The result is loose, touchable movement that reads soft around the face — one of the most forgiving finishes for features that have grown more defined with age.
Cut for your texture, not against it: ask for layers that follow your wave pattern, and slightly longer layers if your hair is coarse, so the waves stack instead of puffing into a triangle. At home, scrunch texture spray into damp hair and either air-dry or diffuse on low. Hands off while it dries — touching wavy layered hair mid-dry is how frizz gets invited in.


5. Choppy Shoulder-Length Layers
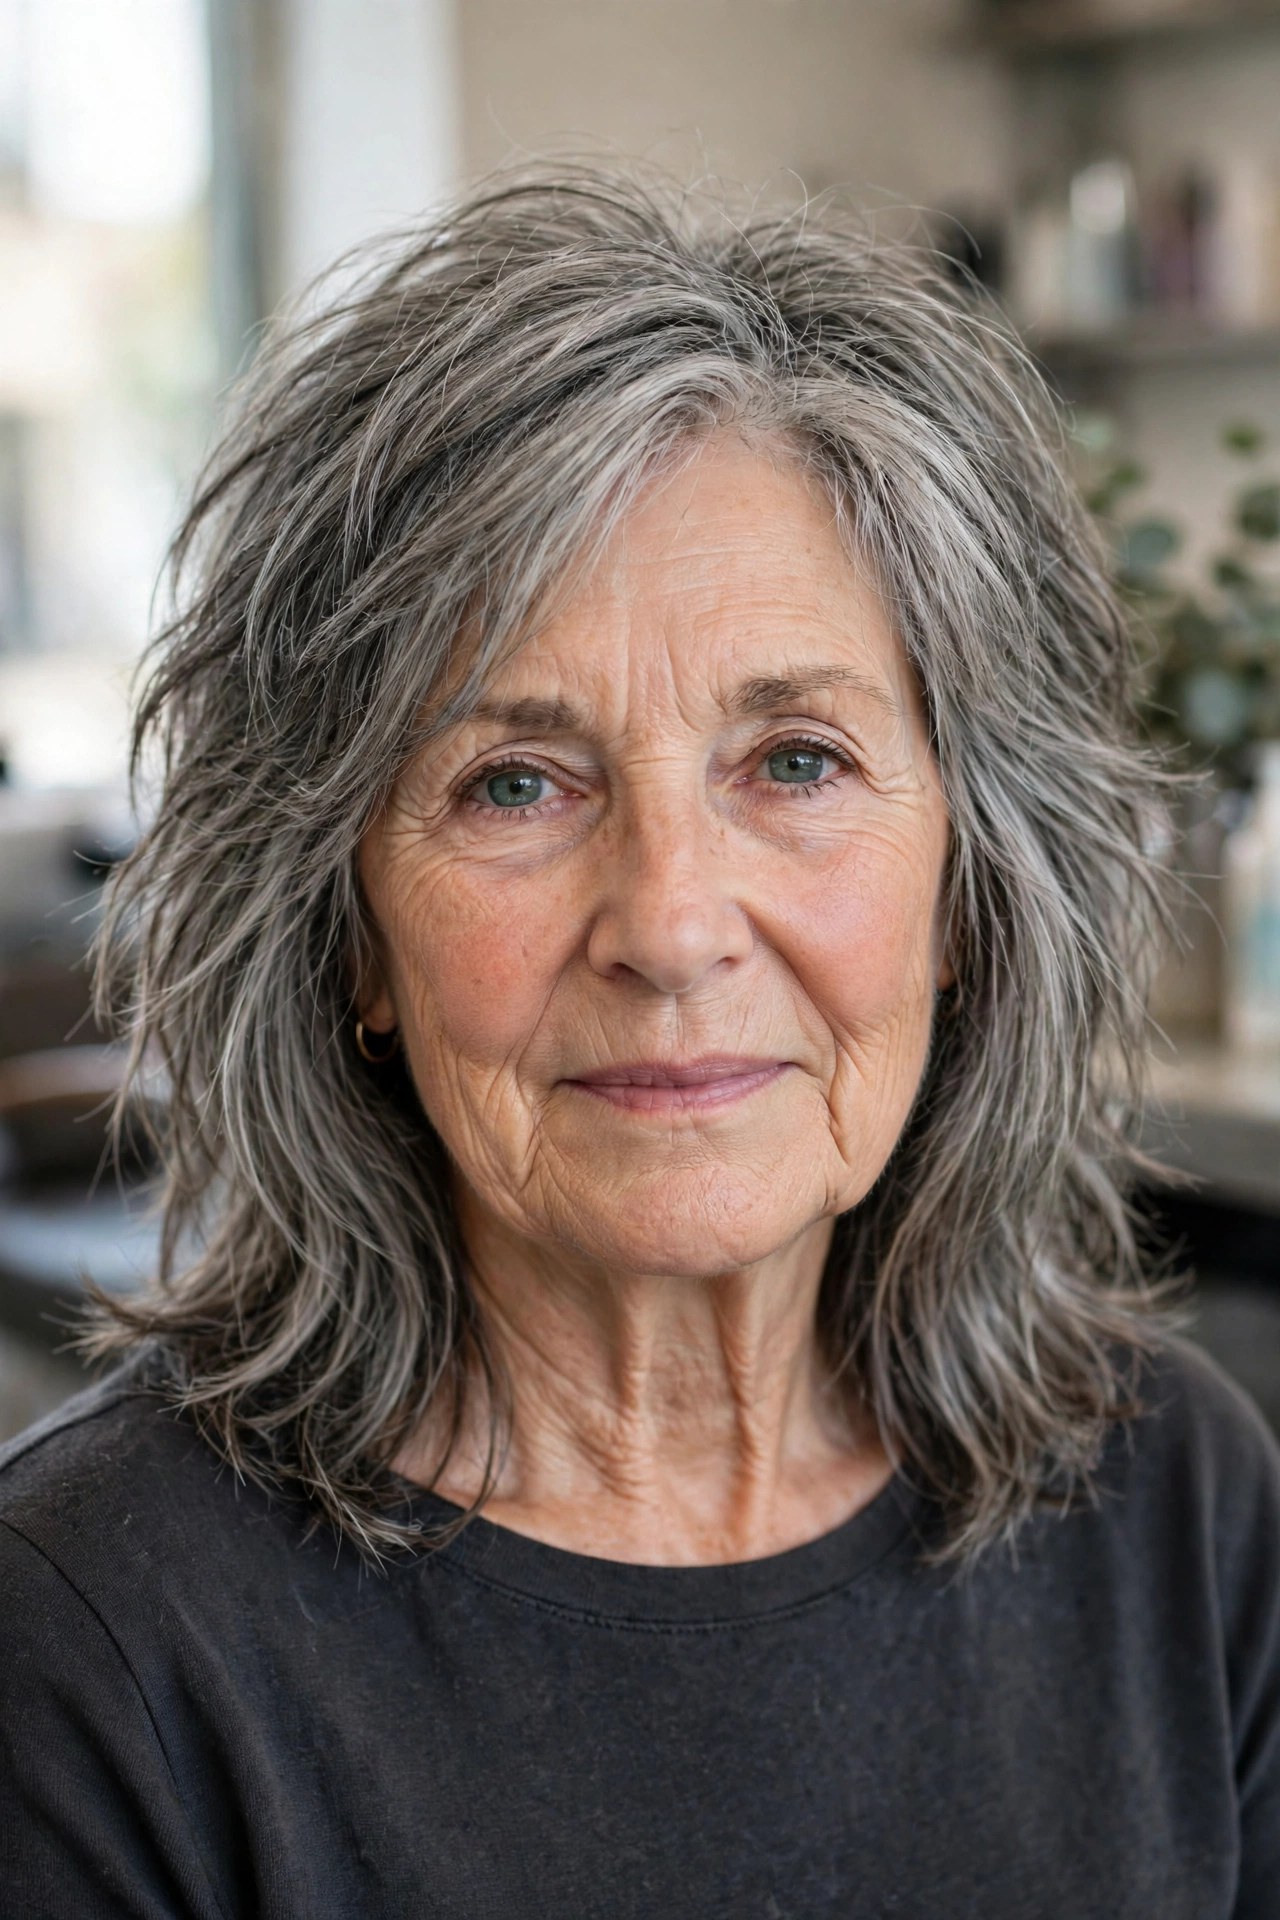
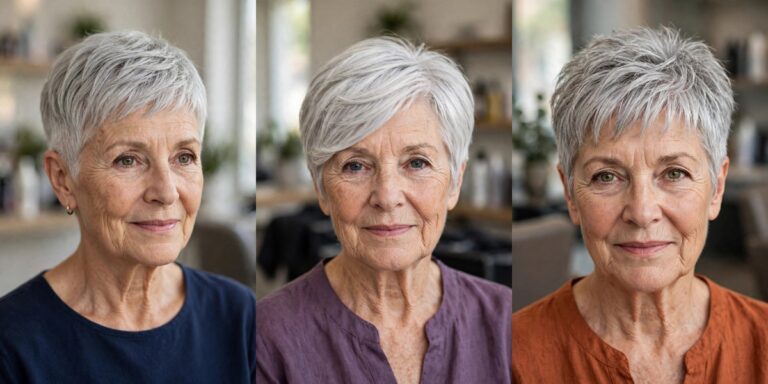
Choppy layers are point-cut at uneven intervals, deliberately breaking the surface into separated pieces. At shoulder length this is the modern, energetic option: it stops a longer cut from looking too ‘done,’ hides the odd wiry gray strand in the texture, and creates the impression of thickness on hair that sits flat because every piecey end casts a tiny bit of shadow and separation.
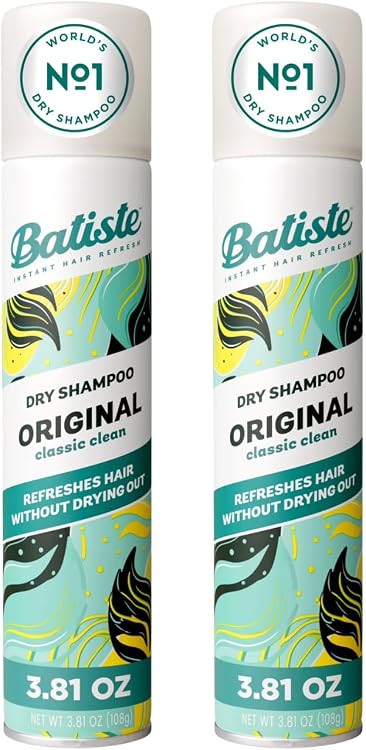
Choppiness lives and dies on product restraint. A pea-sized amount of texturizing putty pinched through dry ends defines the pieces; any more and it clumps. The cut itself grows out kindly, because uneven layers still look intentional at week seven. Refresh flat roots on day two with dry shampoo at the crown rather than restyling the whole head.
The right layer placement depends on your face shape as much as your hair type — angled layers love a round face, while a long face wants width at the sides. Try our free Face Shape Finder to discover your face shape in under a minute, then match it to the ideas above.
6. Deep Side-Part Layered Cut in Bright Silver
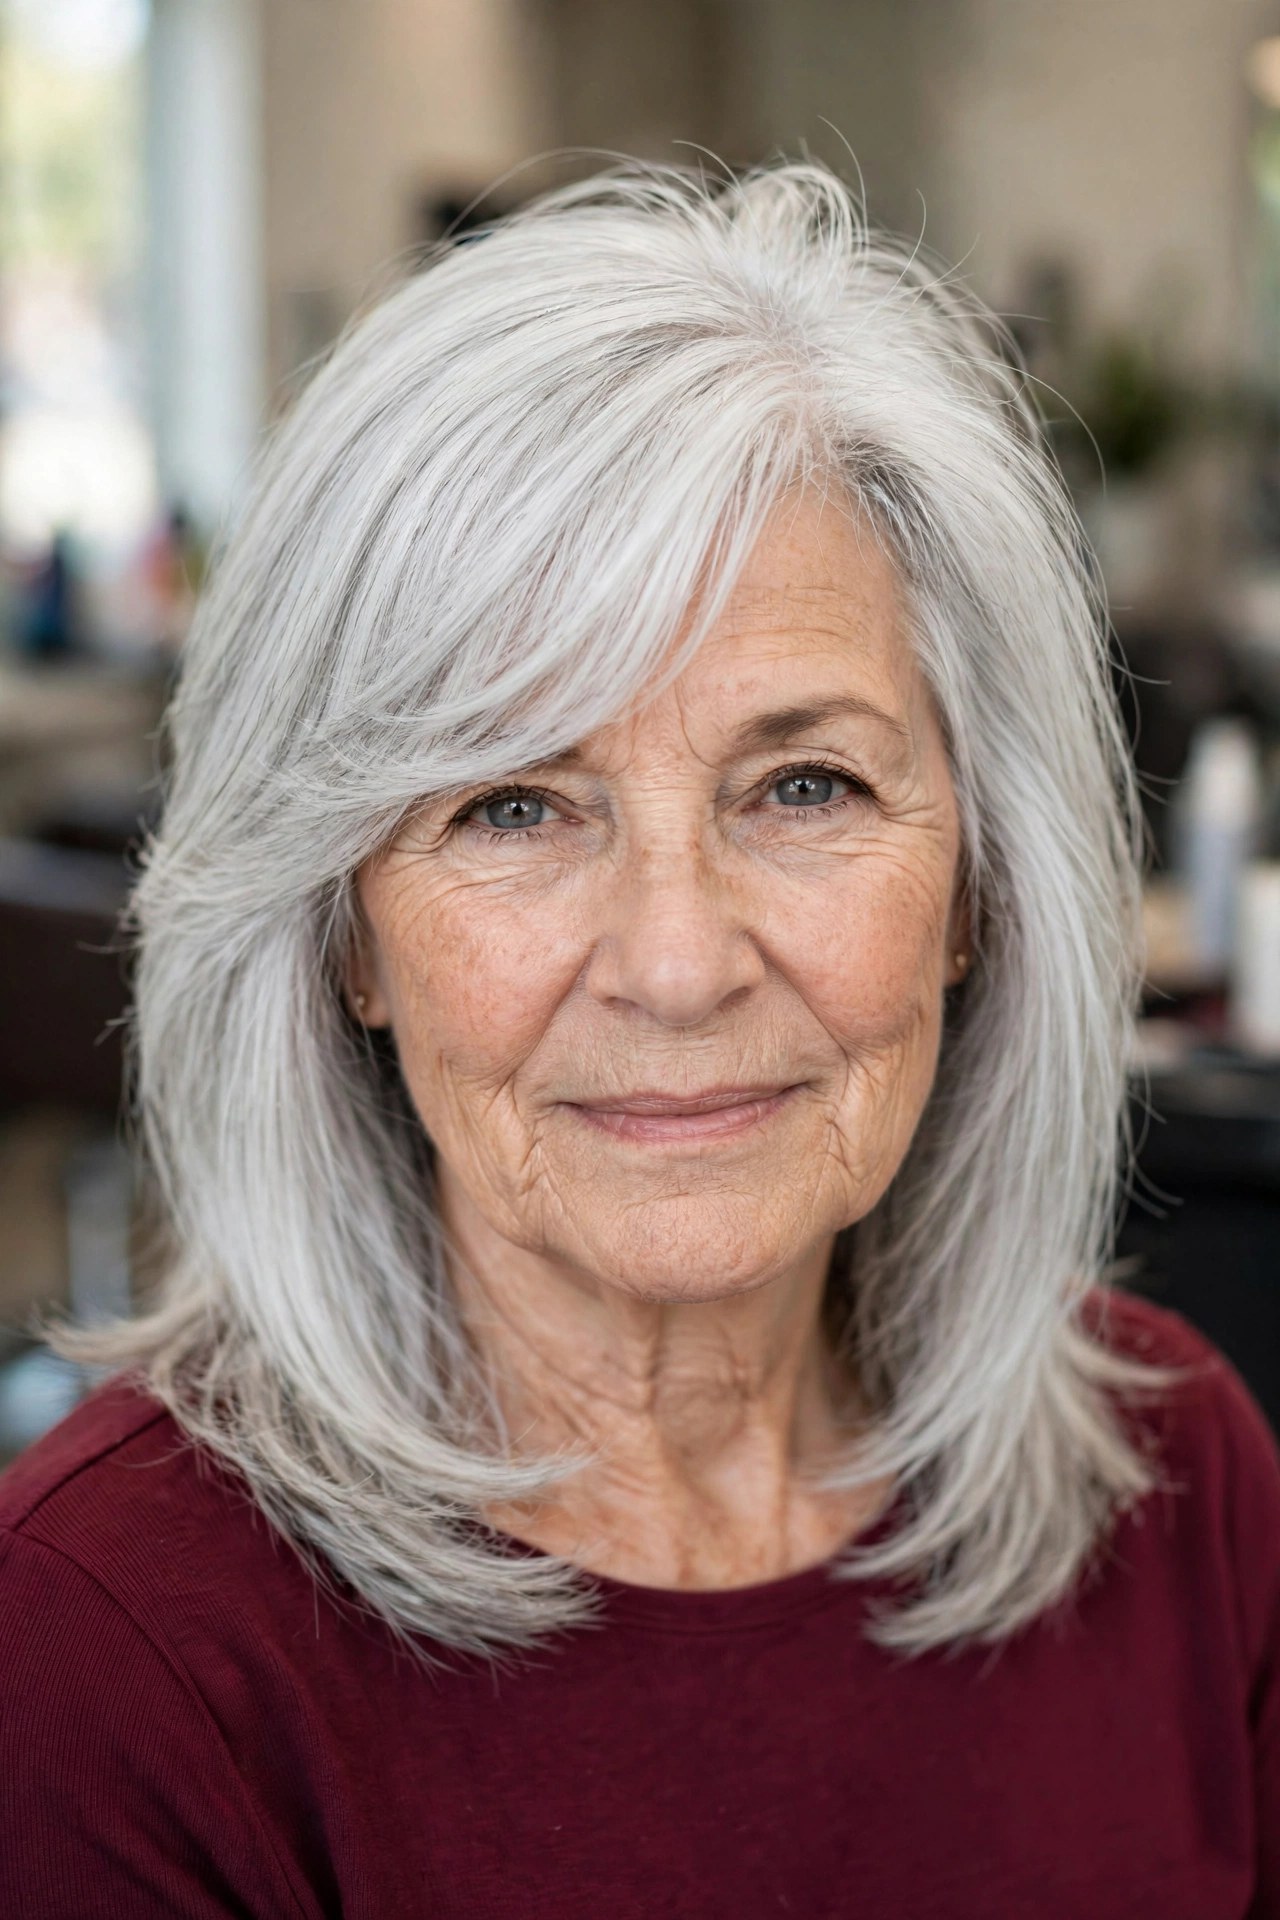
Changing where the layers fall is one trick; changing where the hair parts is another, and the deep side part may be the hardest-working one in this guide. Sweeping shoulder-length layered silver across the forehead builds instant crown height on the heavy side, creates a long diagonal that softens the hairline, and lets the layers cascade at slightly different lengths on each side of the face.
Silver shows off layering beautifully because each layer catches light at a different angle — but only if brassiness is kept out of it, so a weekly purple shampoo is part of this cut’s maintenance, not an extra. Set the part while the hair is damp, since mature hair tends to dry where it is placed and resist being moved later. Blow-dry the heavy side up and over for maximum lift.

7. Curly Shoulder-Length Layers
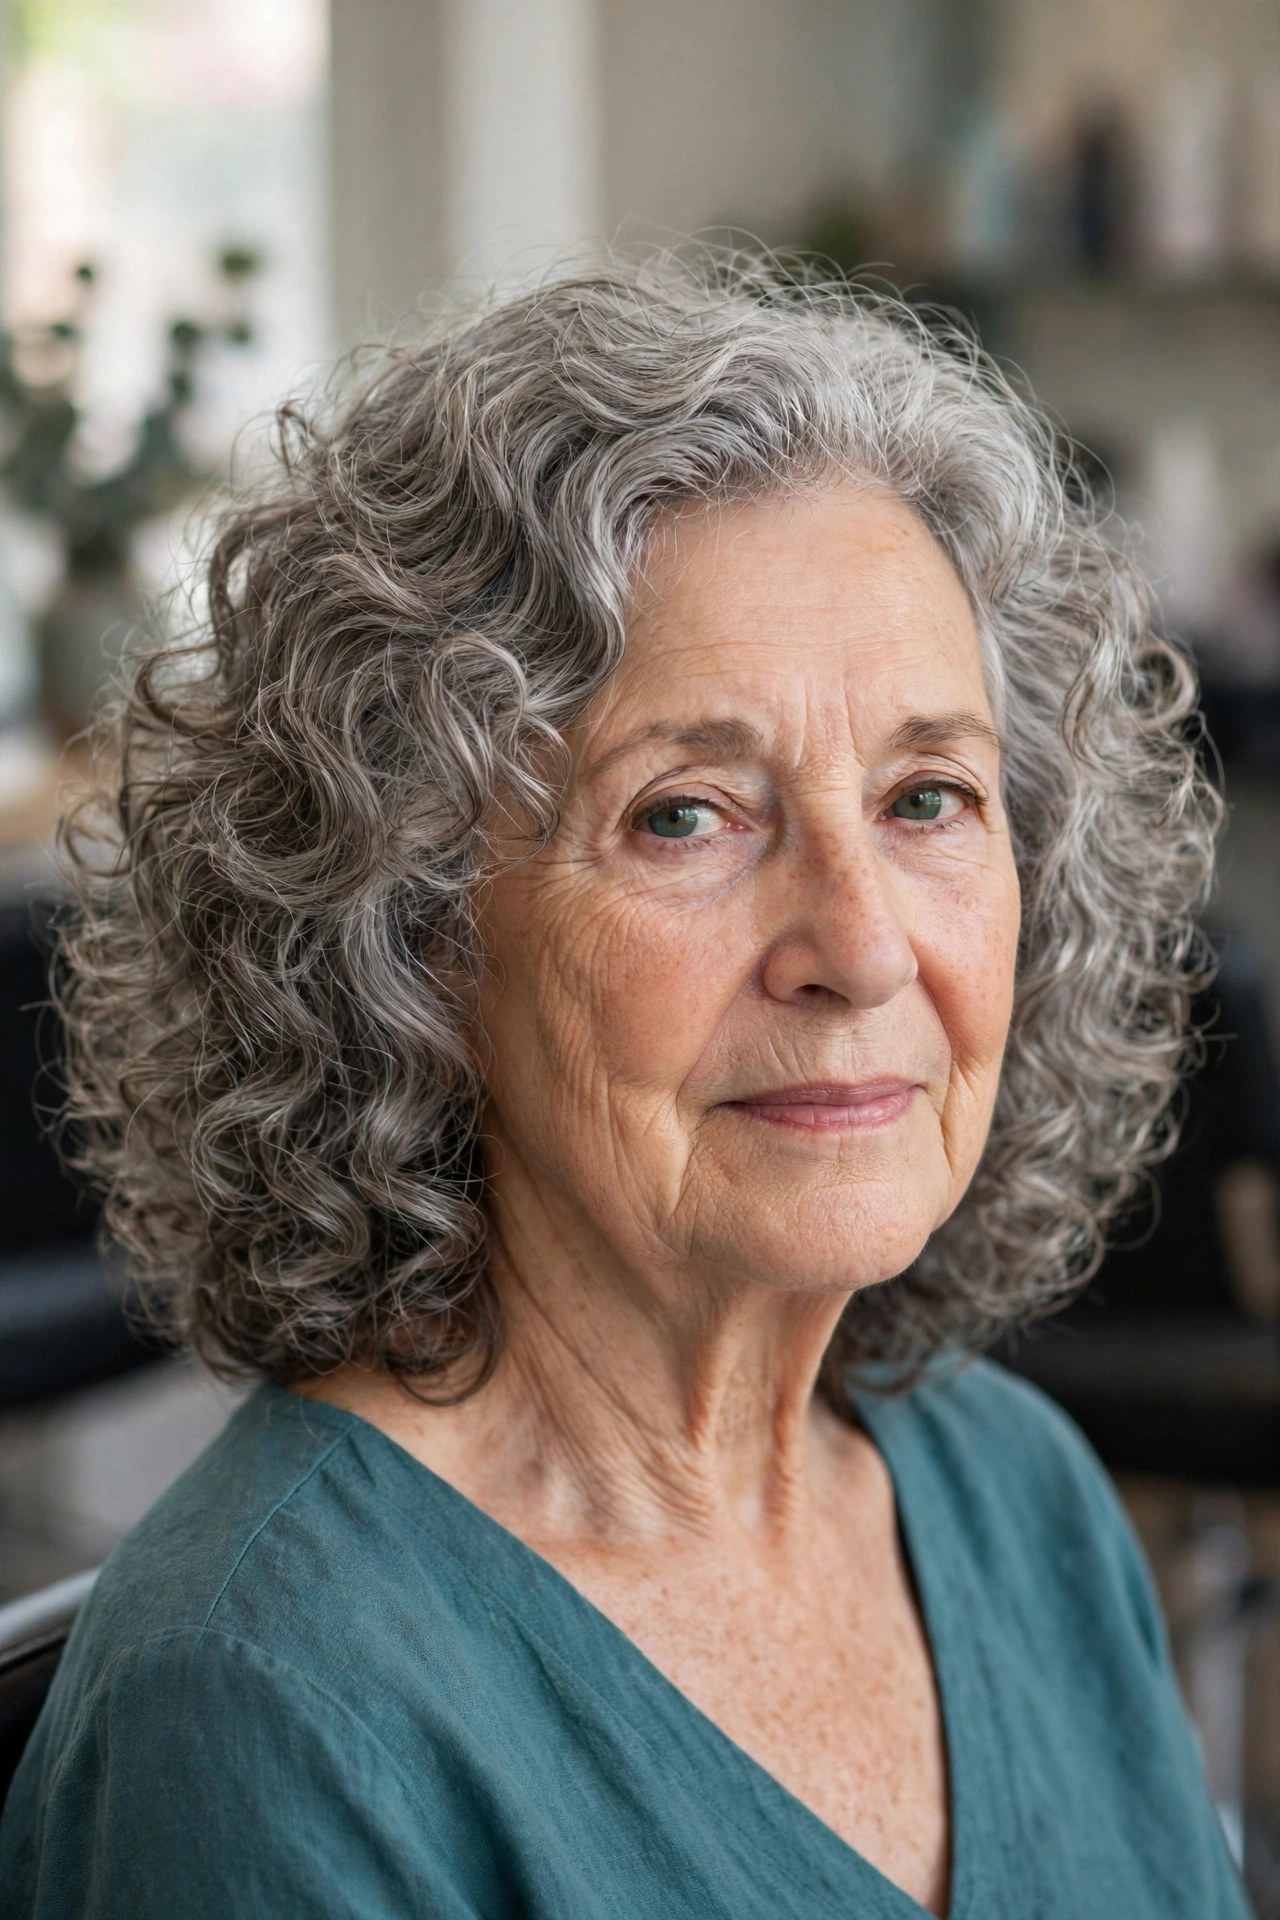
Curly hair at shoulder length has one classic problem: cut in one length, it builds width at the bottom and forms a pyramid. Rounded layers are the structural fix — shorter layers through the crown and mid-lengths let each curl sit on its own shelf, so the shape becomes round and balanced instead of triangular, and the curls themselves get bouncier because they are carrying less weight.
Insist on a dry cut, or at least a dry finish check: curls spring up two to three inches when dry, and layers cut wet can end up far shorter than planned. Keep definition simple — curl cream worked through soaking-wet hair, then no touching until fully dry. Gray curls are drier than pigmented ones, so moisture, not hold, is what this cut asks for.

8. Bouncy Blowout Layers for Fine Hair
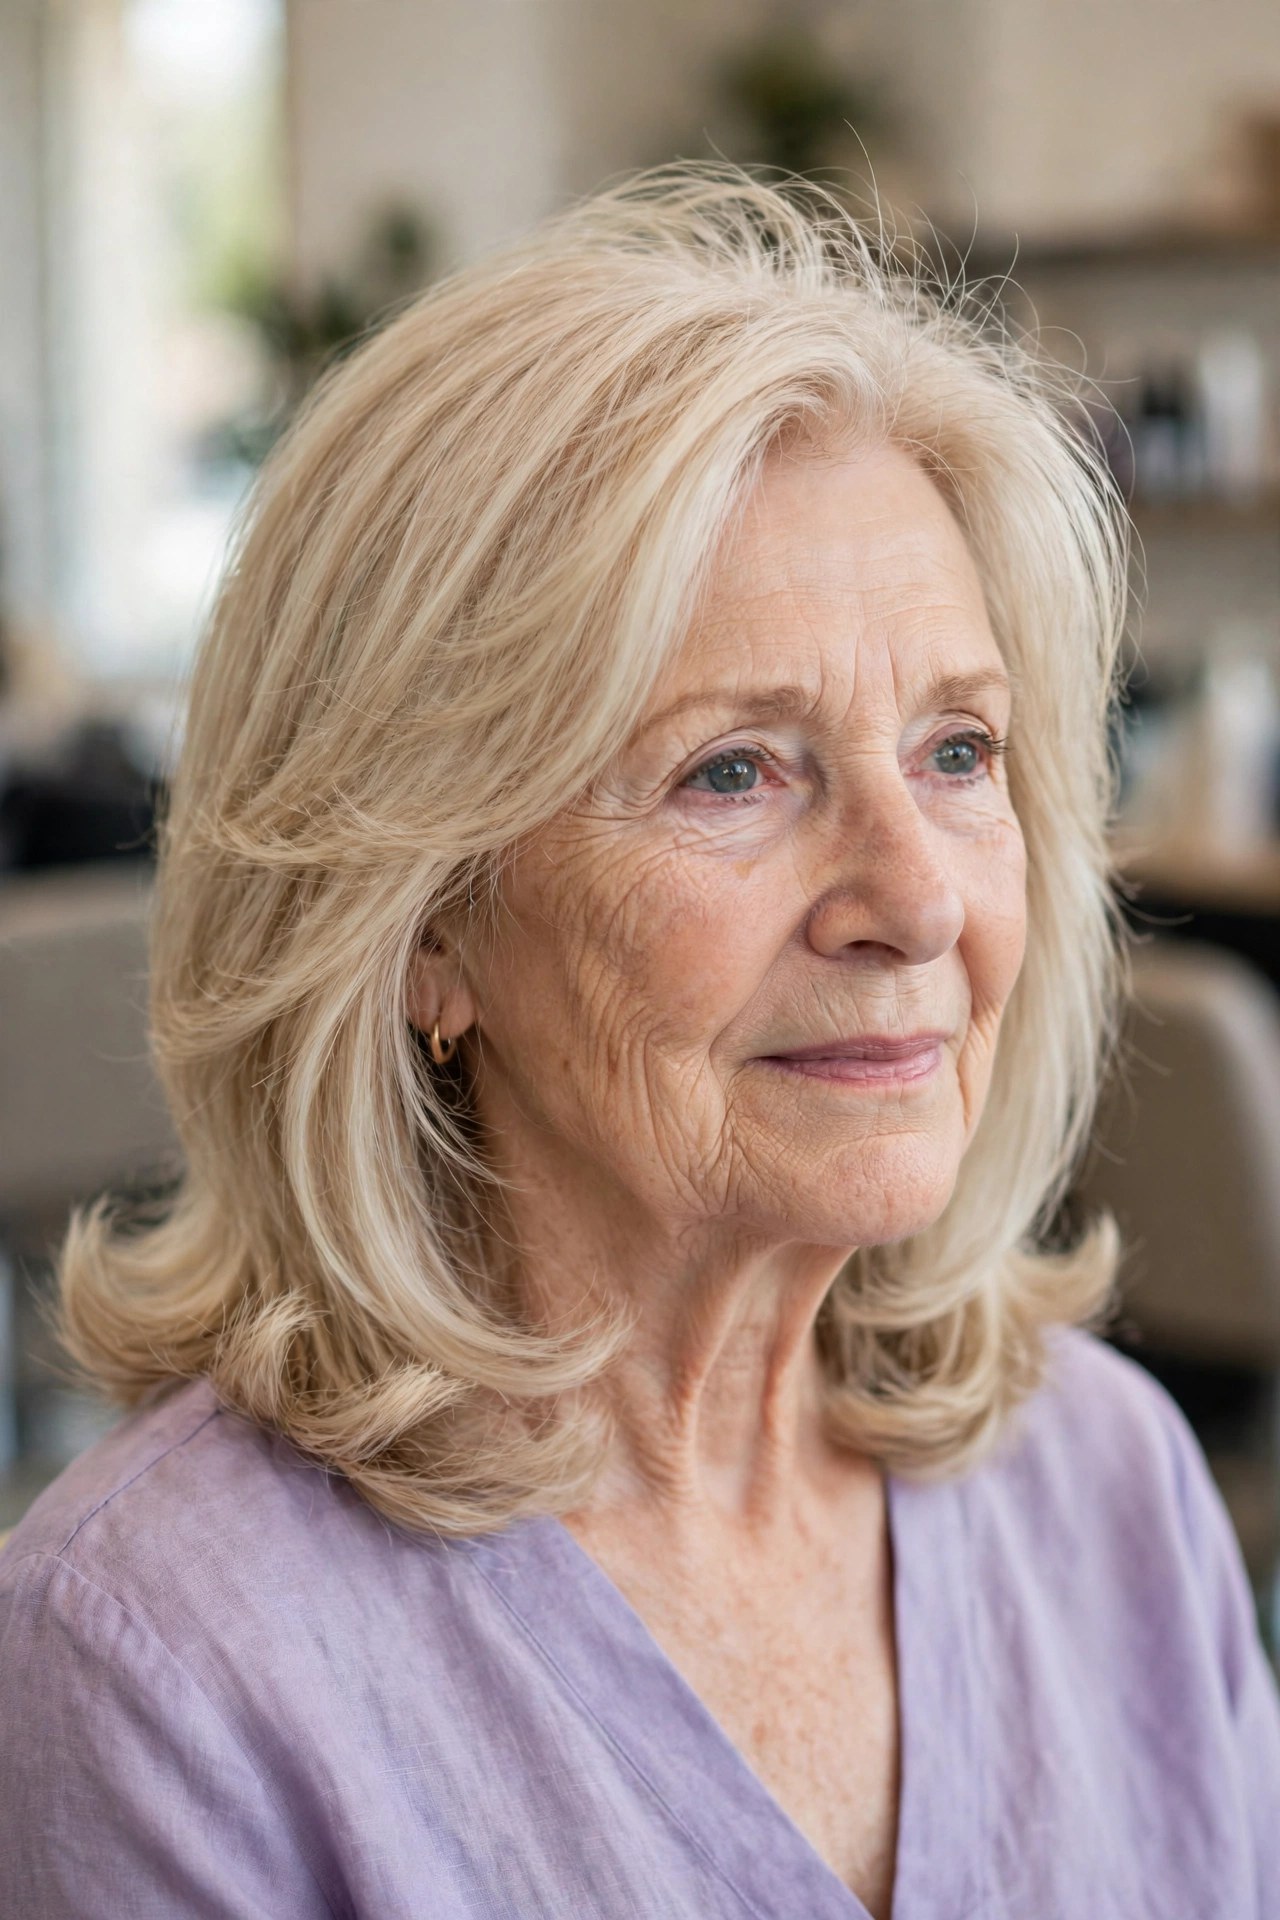
Fine hair changes the layering rules completely. Short, plentiful layers — wonderful on thick hair — remove so much of a fine head’s limited bulk that the ends turn see-through. The fine-hair formula at shoulder length is the opposite: a few LONG layers, starting no higher than the chin, over a perimeter that stays mostly blunt. You get movement and a bouncy blowout shape while the bottom line still reads dense and healthy.
Build the bounce at the roots, not the ends: mousse worked into damp roots, then dried in sections with a root-boosting brush, lifting straight up before rolling under. More fine-hair strategies — including which lengths flatter most — live in our guide to hairstyles for fine hair.


9. Shoulder Layers with Wispy Bangs
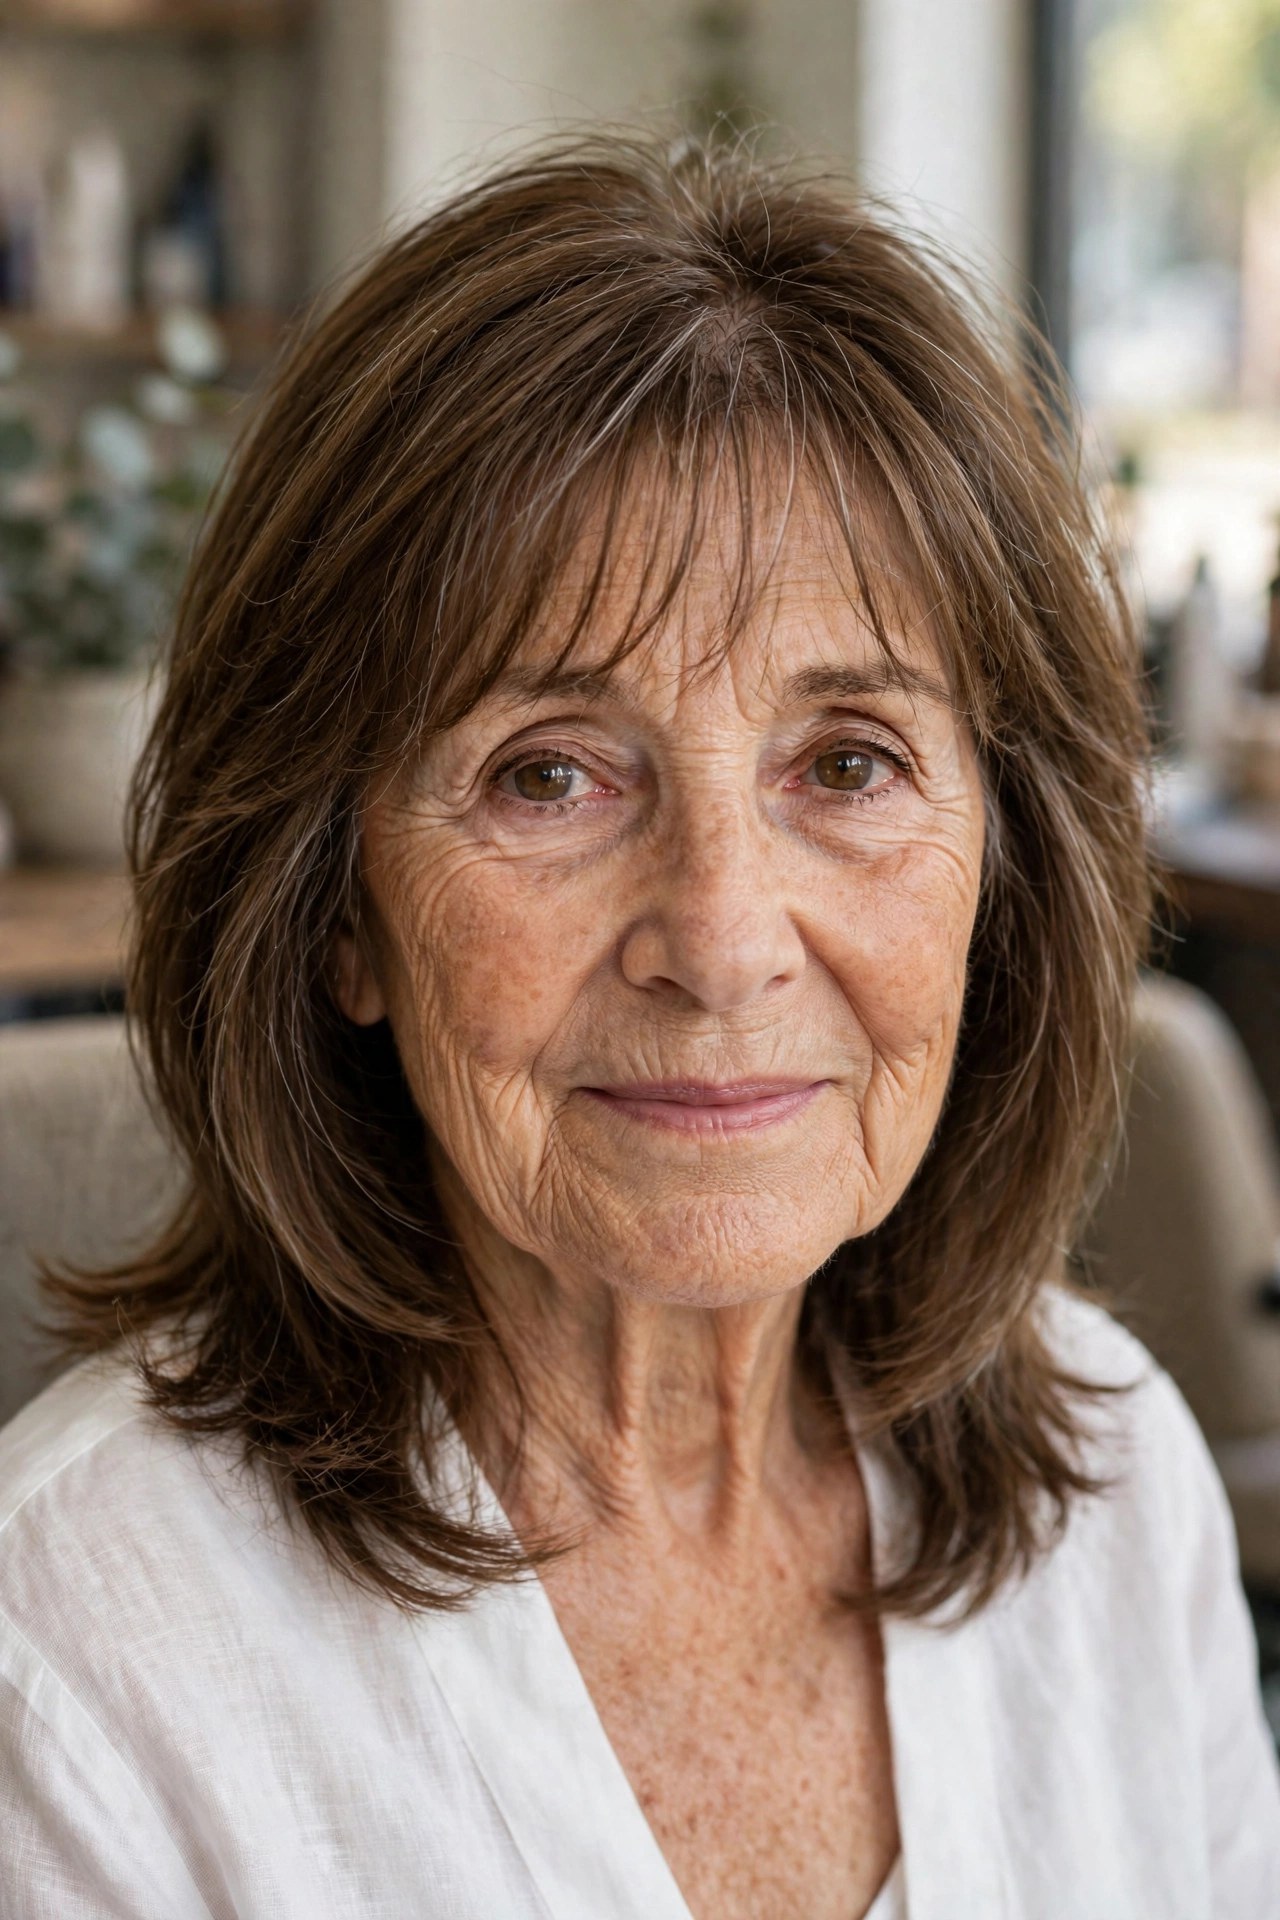
A wispy fringe is the gentlest way to add a layer where it matters most: right at the front of the face. The bangs are point-cut sheer — you can almost see through them — so they soften the forehead and brow line without the commitment or heaviness of a blunt fringe, and they blend straight into the shoulder-length layers on either side. It is also the newest, freshest hair on your head, which is why fringes tend to shine.
Two habits keep wispy bangs wispy rather than stringy. Dry them first, before the rest of the hair, sweeping side to side with the dryer so they fall naturally. And expect them to pick up skin oil faster than the rest of your hair — a light touch of dry shampoo at the fringe roots on day two separates them again in seconds.

10. Graduated Shoulder Layers with Crown Volume
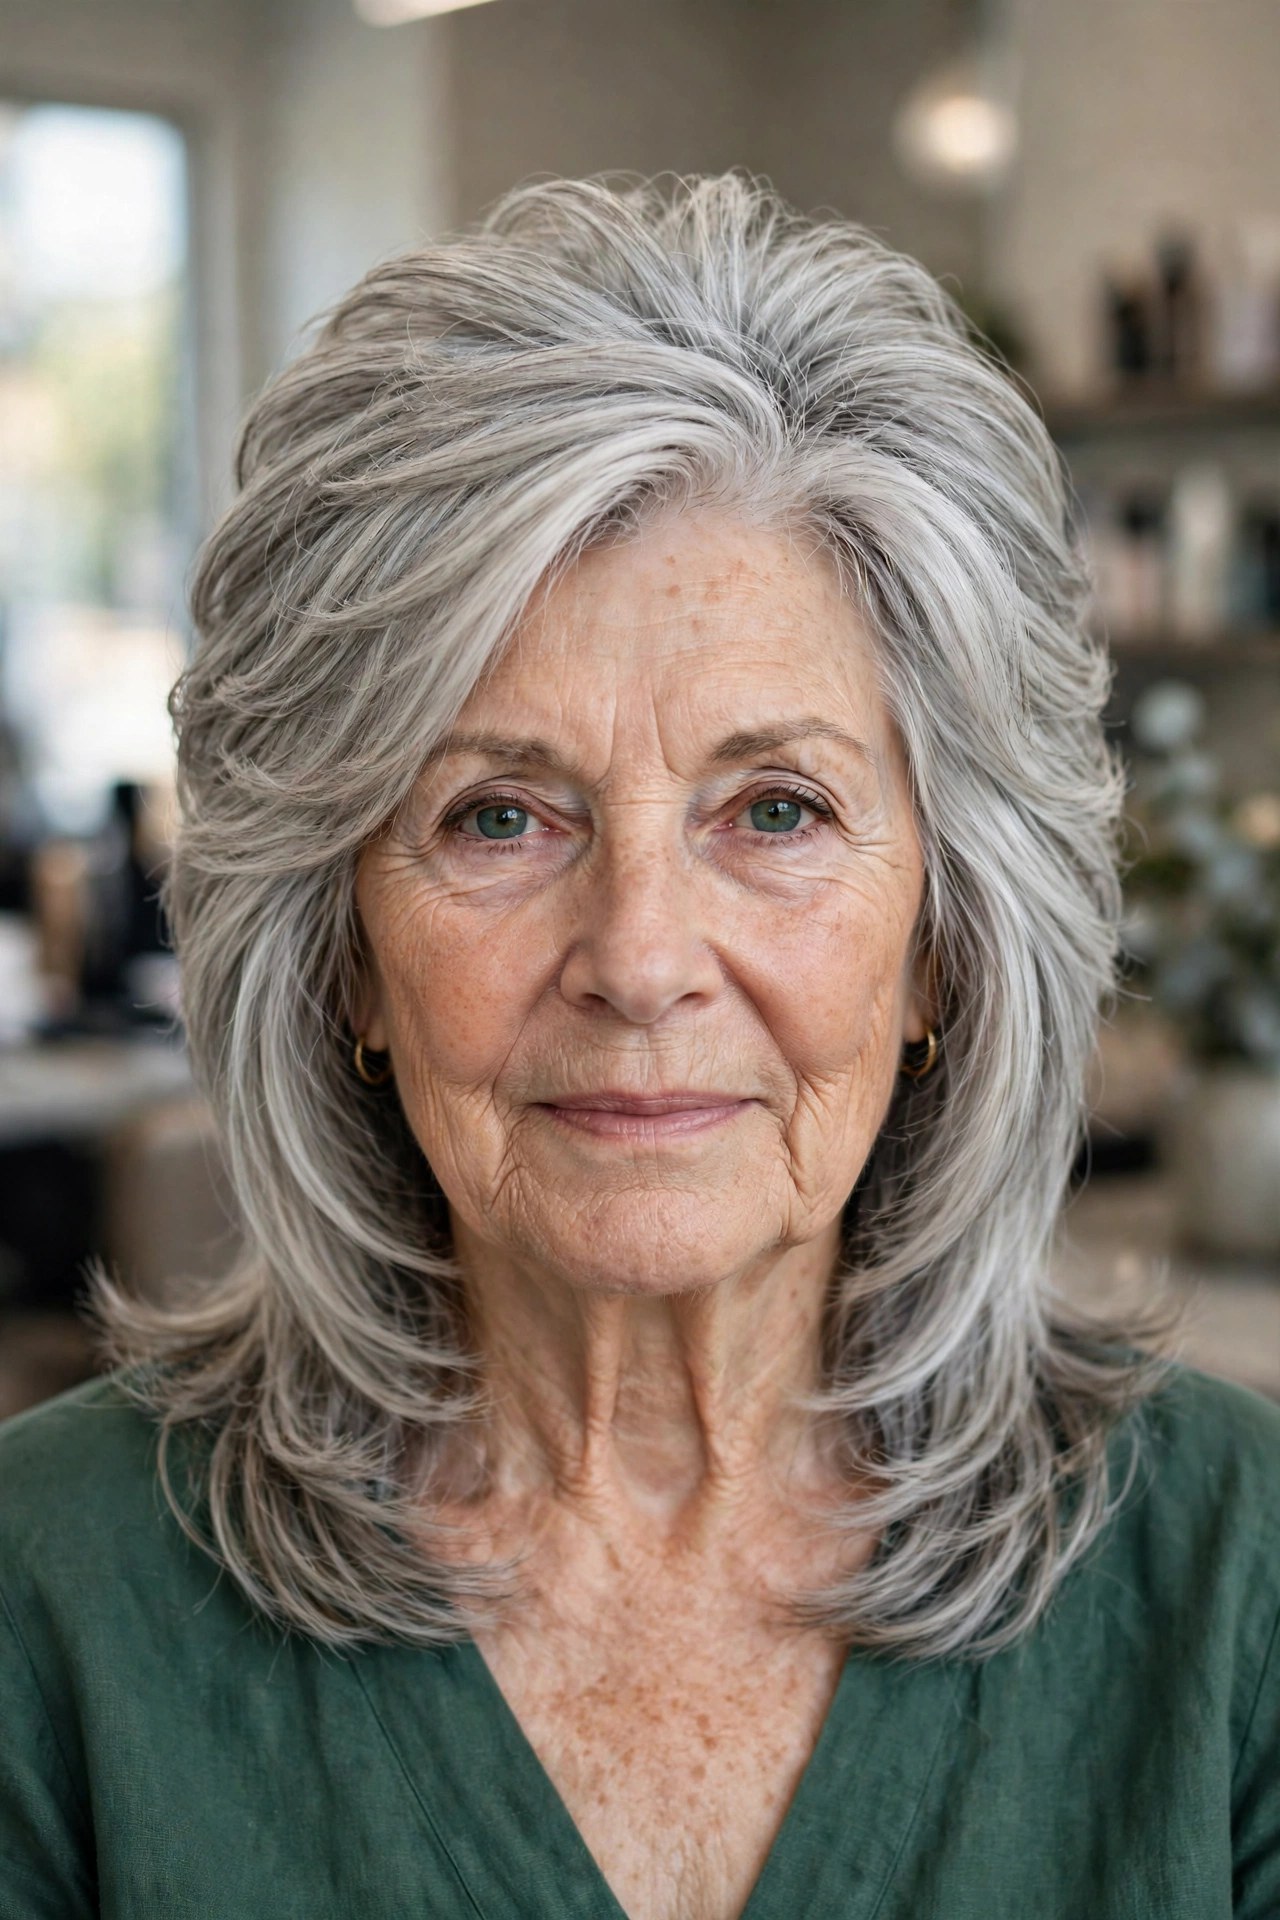
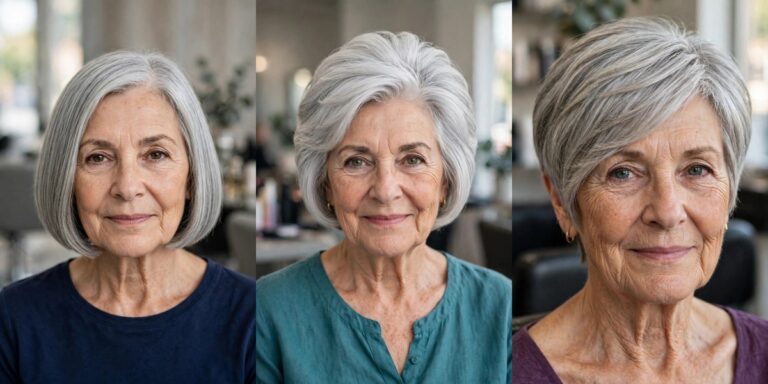
Graduation stacks shorter layers at the back and crown, each one resting on the layer below, so volume is built into the architecture of the cut instead of being teased in every morning. From the front you simply see shoulder-length layered hair; from the side and back, the crown has a lifted, rounded shape that counteracts the flattening that happens to the back of the head with age.
This placement suits straight and wavy hair that is fine at the crown but still has density through the lengths. Style by drying the back sections up and forward — the opposite of their natural fall — and finish the stacked area with a brushable spray. When the crown stops holding its curve by midday, that is your trim signal: graduation loses its spring first.
11. Long Layers That Take the Bulk Out of Thick Hair
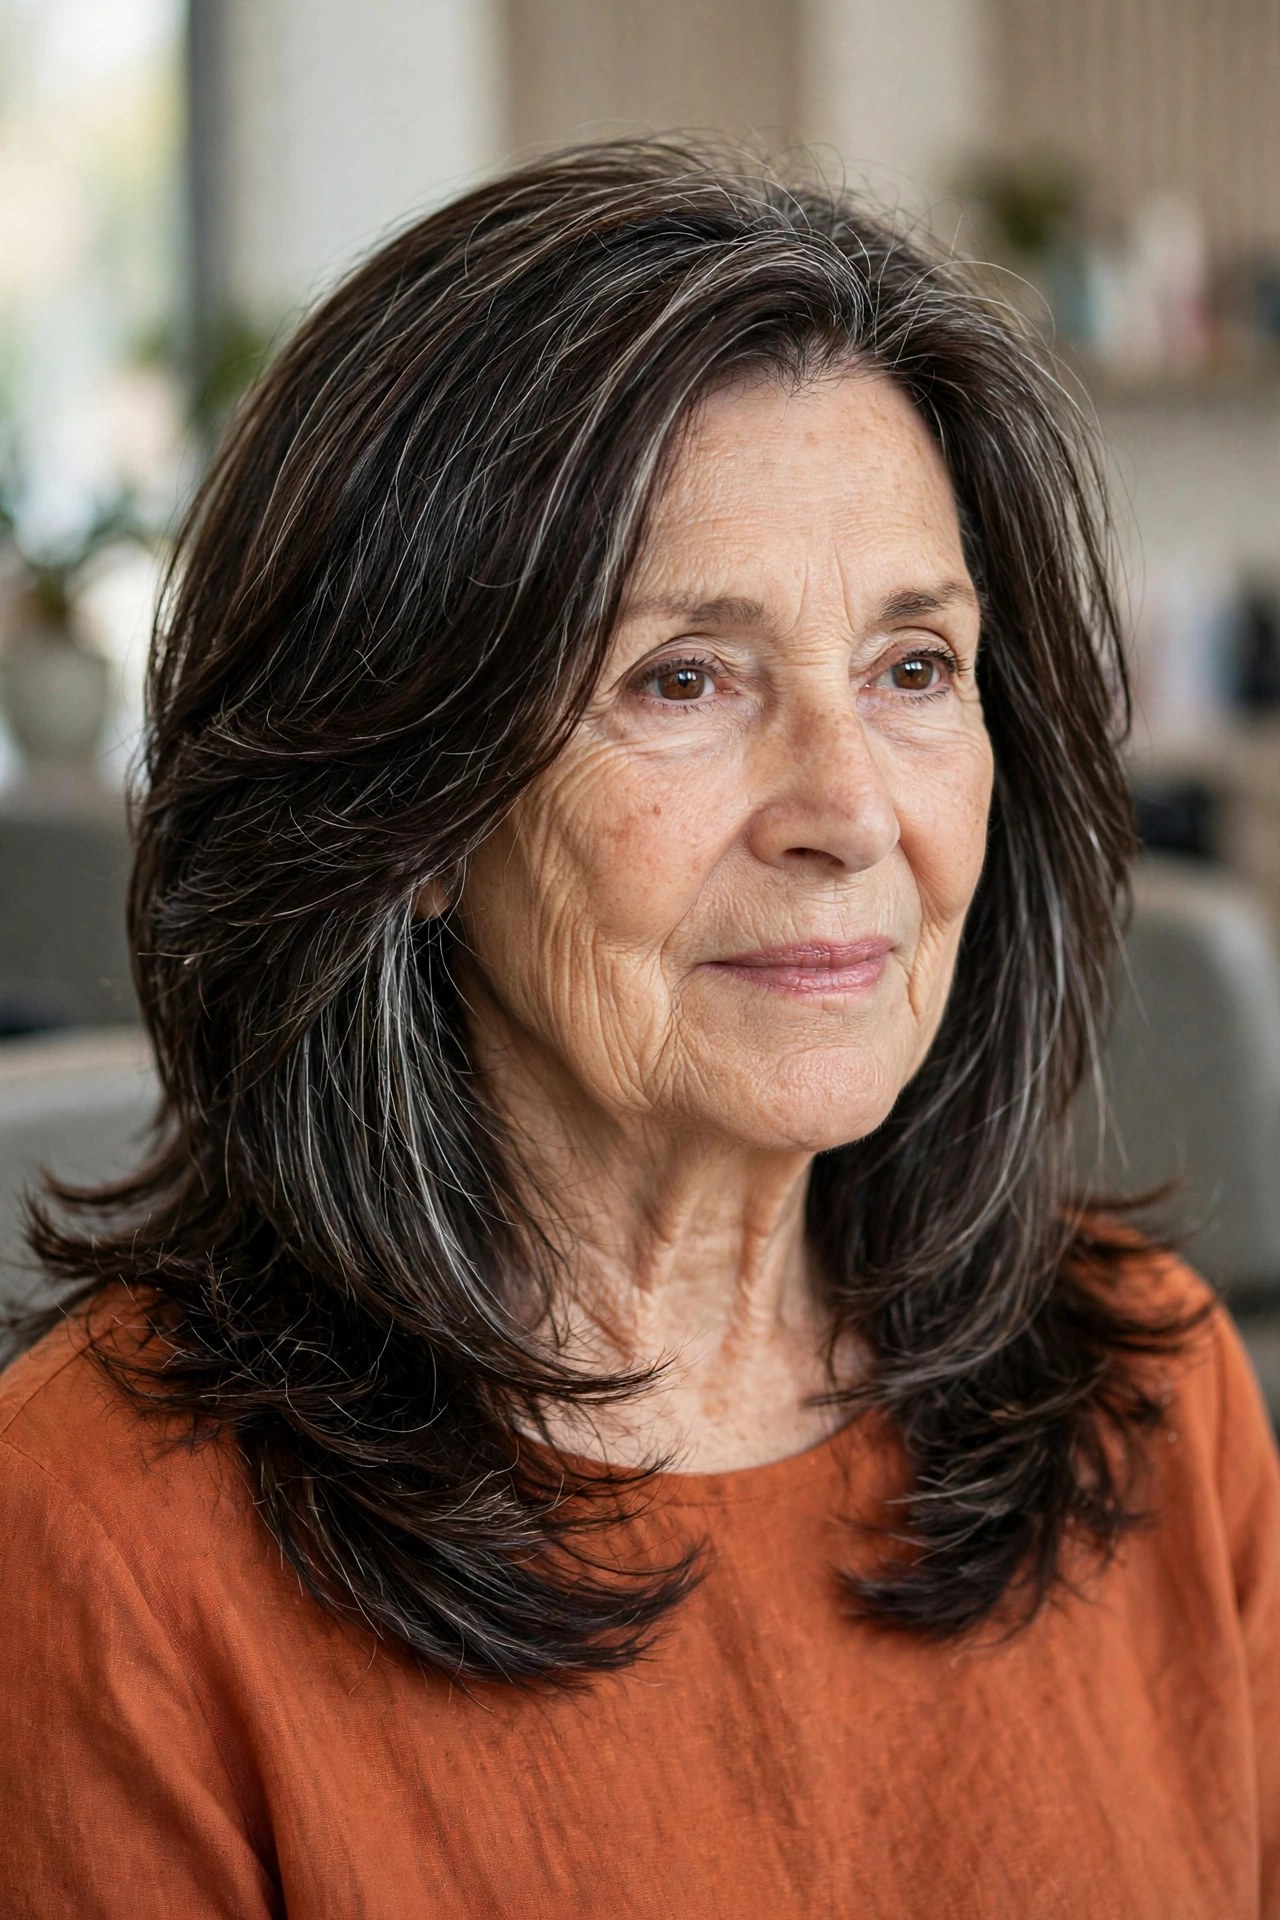
If your hair is thick, shoulder length in one piece can feel like wearing a warm, heavy blanket that poofs at the ends. Long layers are the release valve: they run from around the jaw all the way through the length, removing interior weight so the hair lies closer to the head, swings freely, and dries noticeably faster — while the surface still looks lush and full.
Ask your stylist to remove weight from the interior with layers rather than thinning shears over the surface, which can make thick mature hair frizz at the ends. Thick layered hair also tangles less in the shower when it is washed in two sections. A bonding shampoo suits this cut well, since thick hair worn at this length has ends that are genuinely old and benefit from the reinforcement.


12. Shoulder-Length Shag with Layered Texture
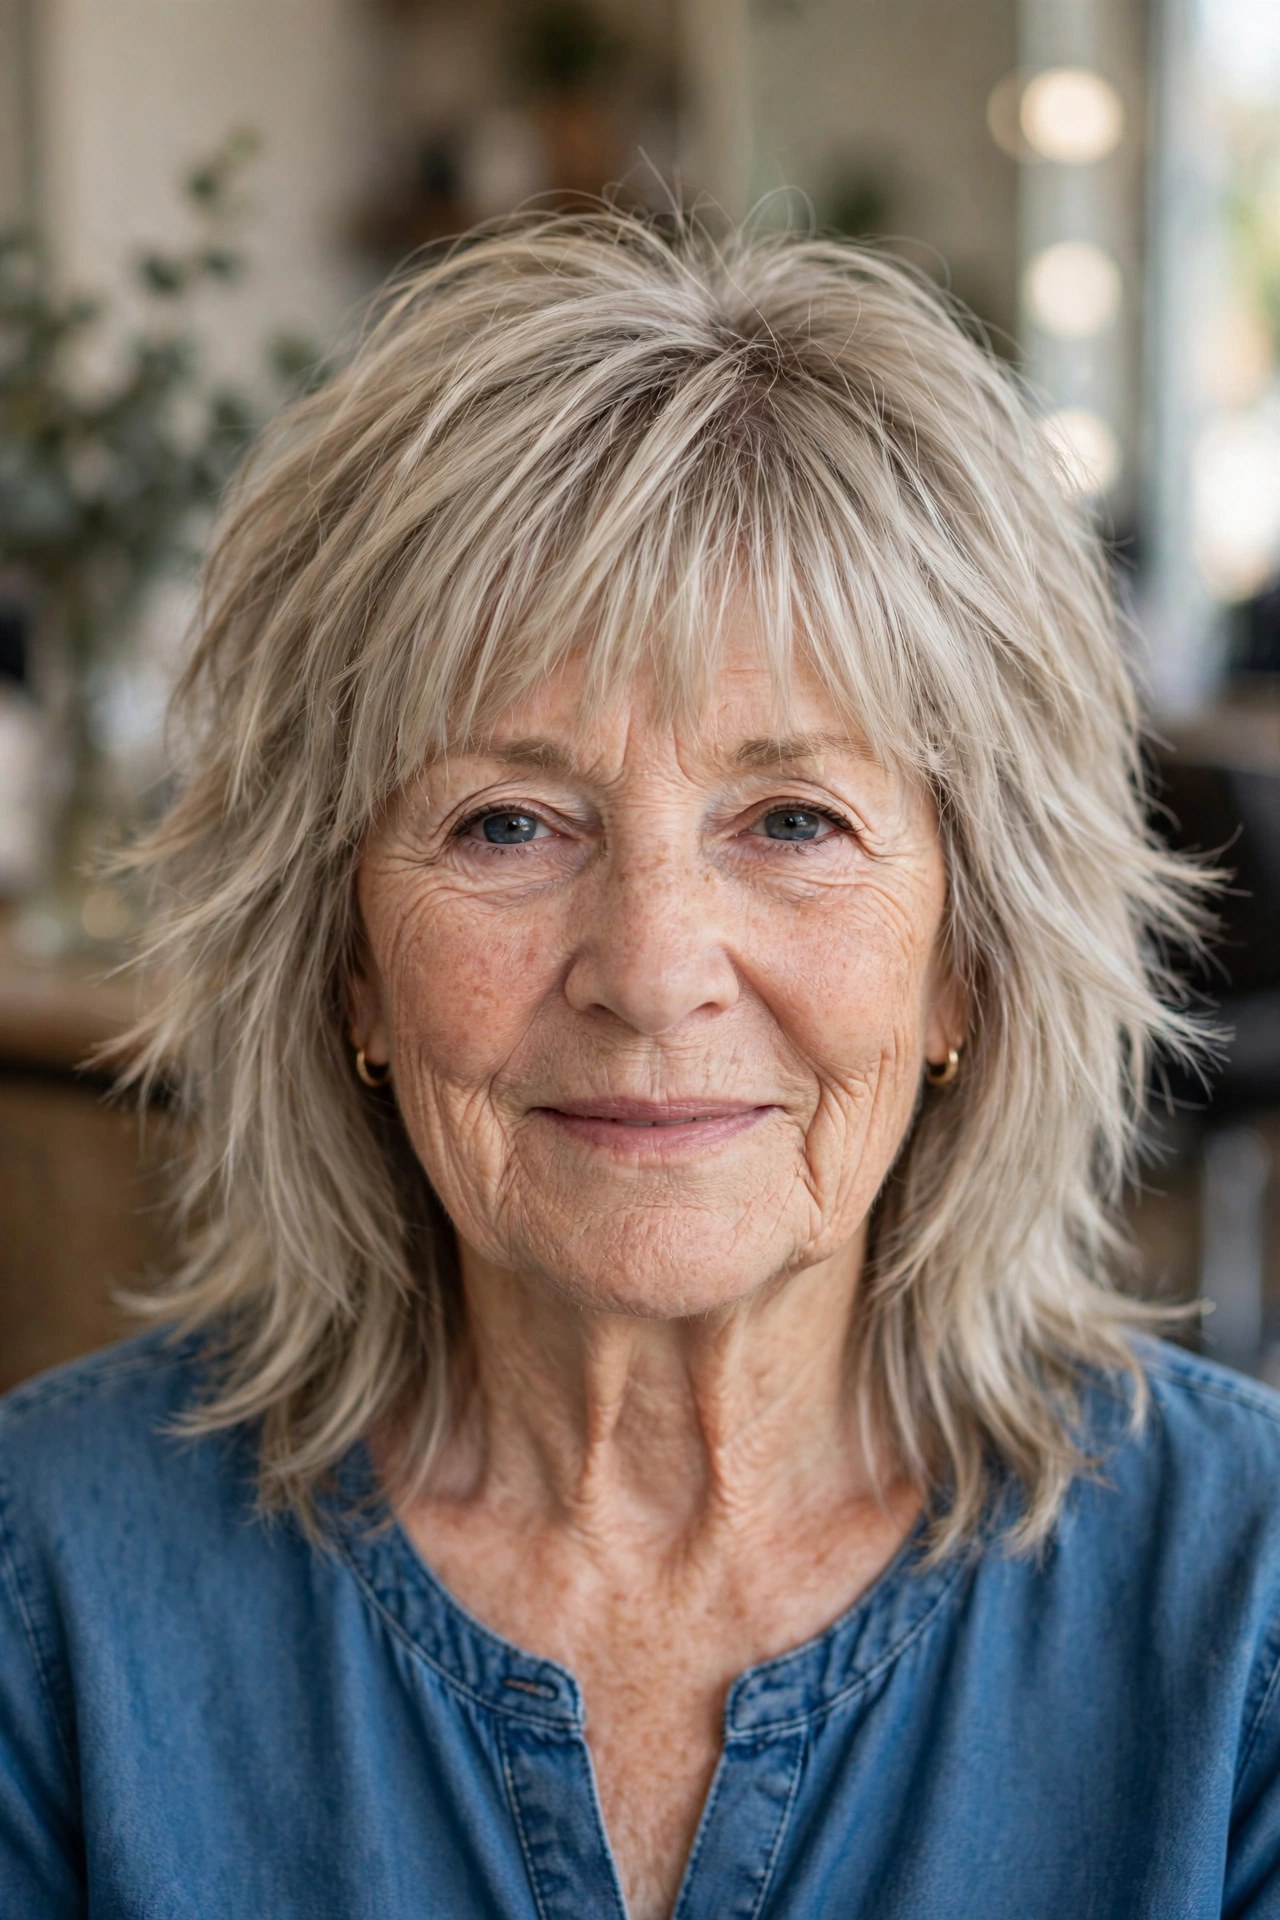
The modern shag takes layering to its logical extreme: lots of layers, starting high at the crown, with wispy textured ends and usually a soft fringe. Shrunk to shoulder length it becomes surprisingly wearable after 60 — the high layers fake crown fullness, the broken ends disguise thin spots, and the whole thing is designed to look good slightly undone, which makes it the most forgiving grow-out in this guide.
The shag’s secret is that it is styled by being left alone. Scrunch, rough-dry with fingers, and resist the round brush — smoothness is not the goal. It flatters wavy hair most, but straight hair gets there with texture spray and the choppy fringe. One caution: very fine hair should take the shag’s layers longer and fewer, or the ends disappear.

13. Angled Forward Layers That Slim the Face
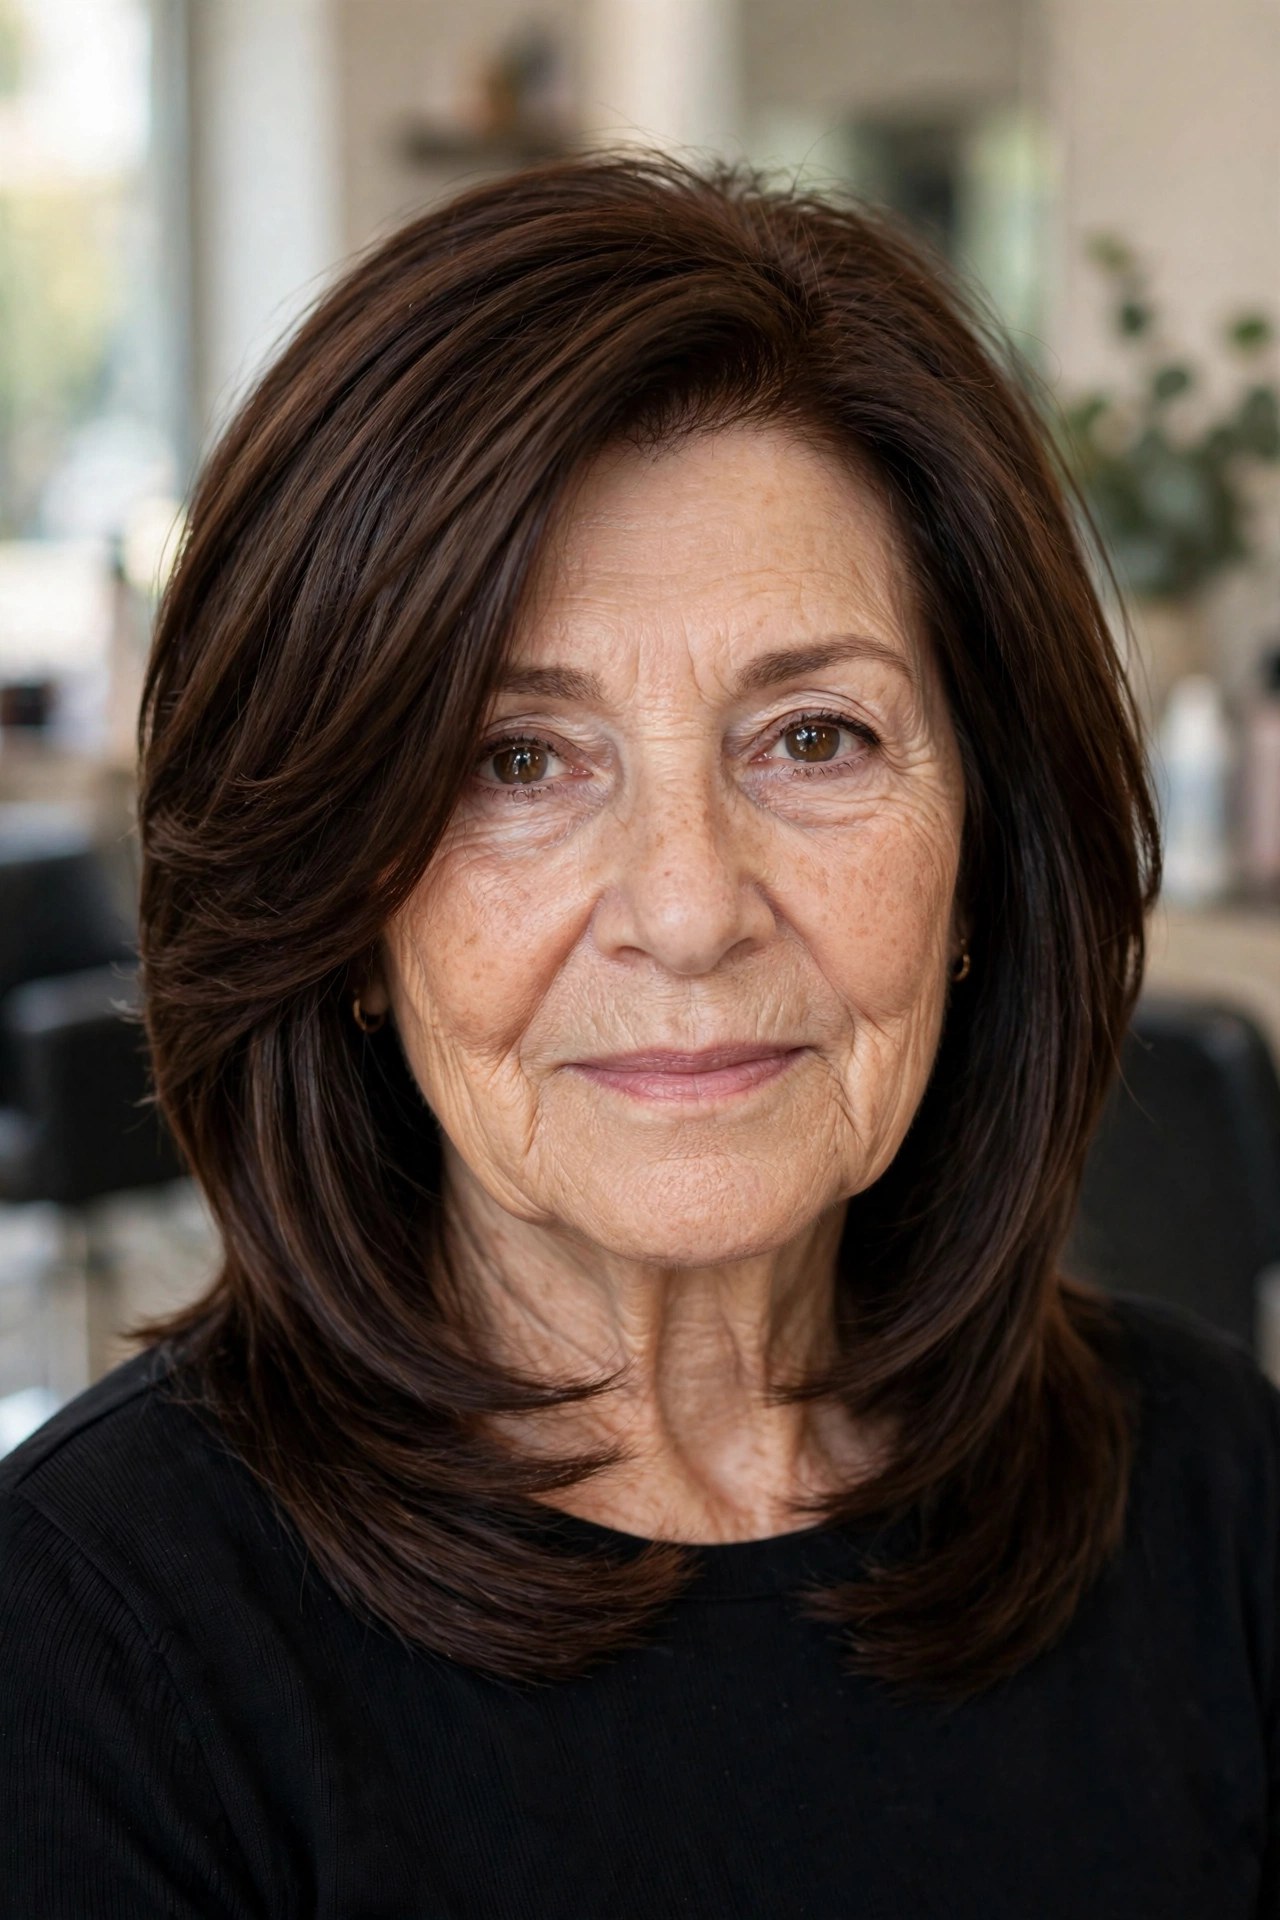
Angled layers are cut on a diagonal: shorter toward the back, lengthening as they travel forward, so the longest pieces rest at the front near the chin and shoulders. That forward sweep does visual work — it draws the eye down and in, which is why this is the go-to layered shape for round and fuller faces, and why it pairs so well with a side part that adds height on top.
Keep the angle honest with regular trims; once the back grows out, the slimming diagonal softens into an ordinary layered cut. At home, a flat iron used on the front sections only — always over heat protection, always on a moderate setting — sharpens the forward lines for occasions. The back can stay softly brushed; the contrast is part of the design.


14. Airy Long Layers for Fine, Delicate Hair
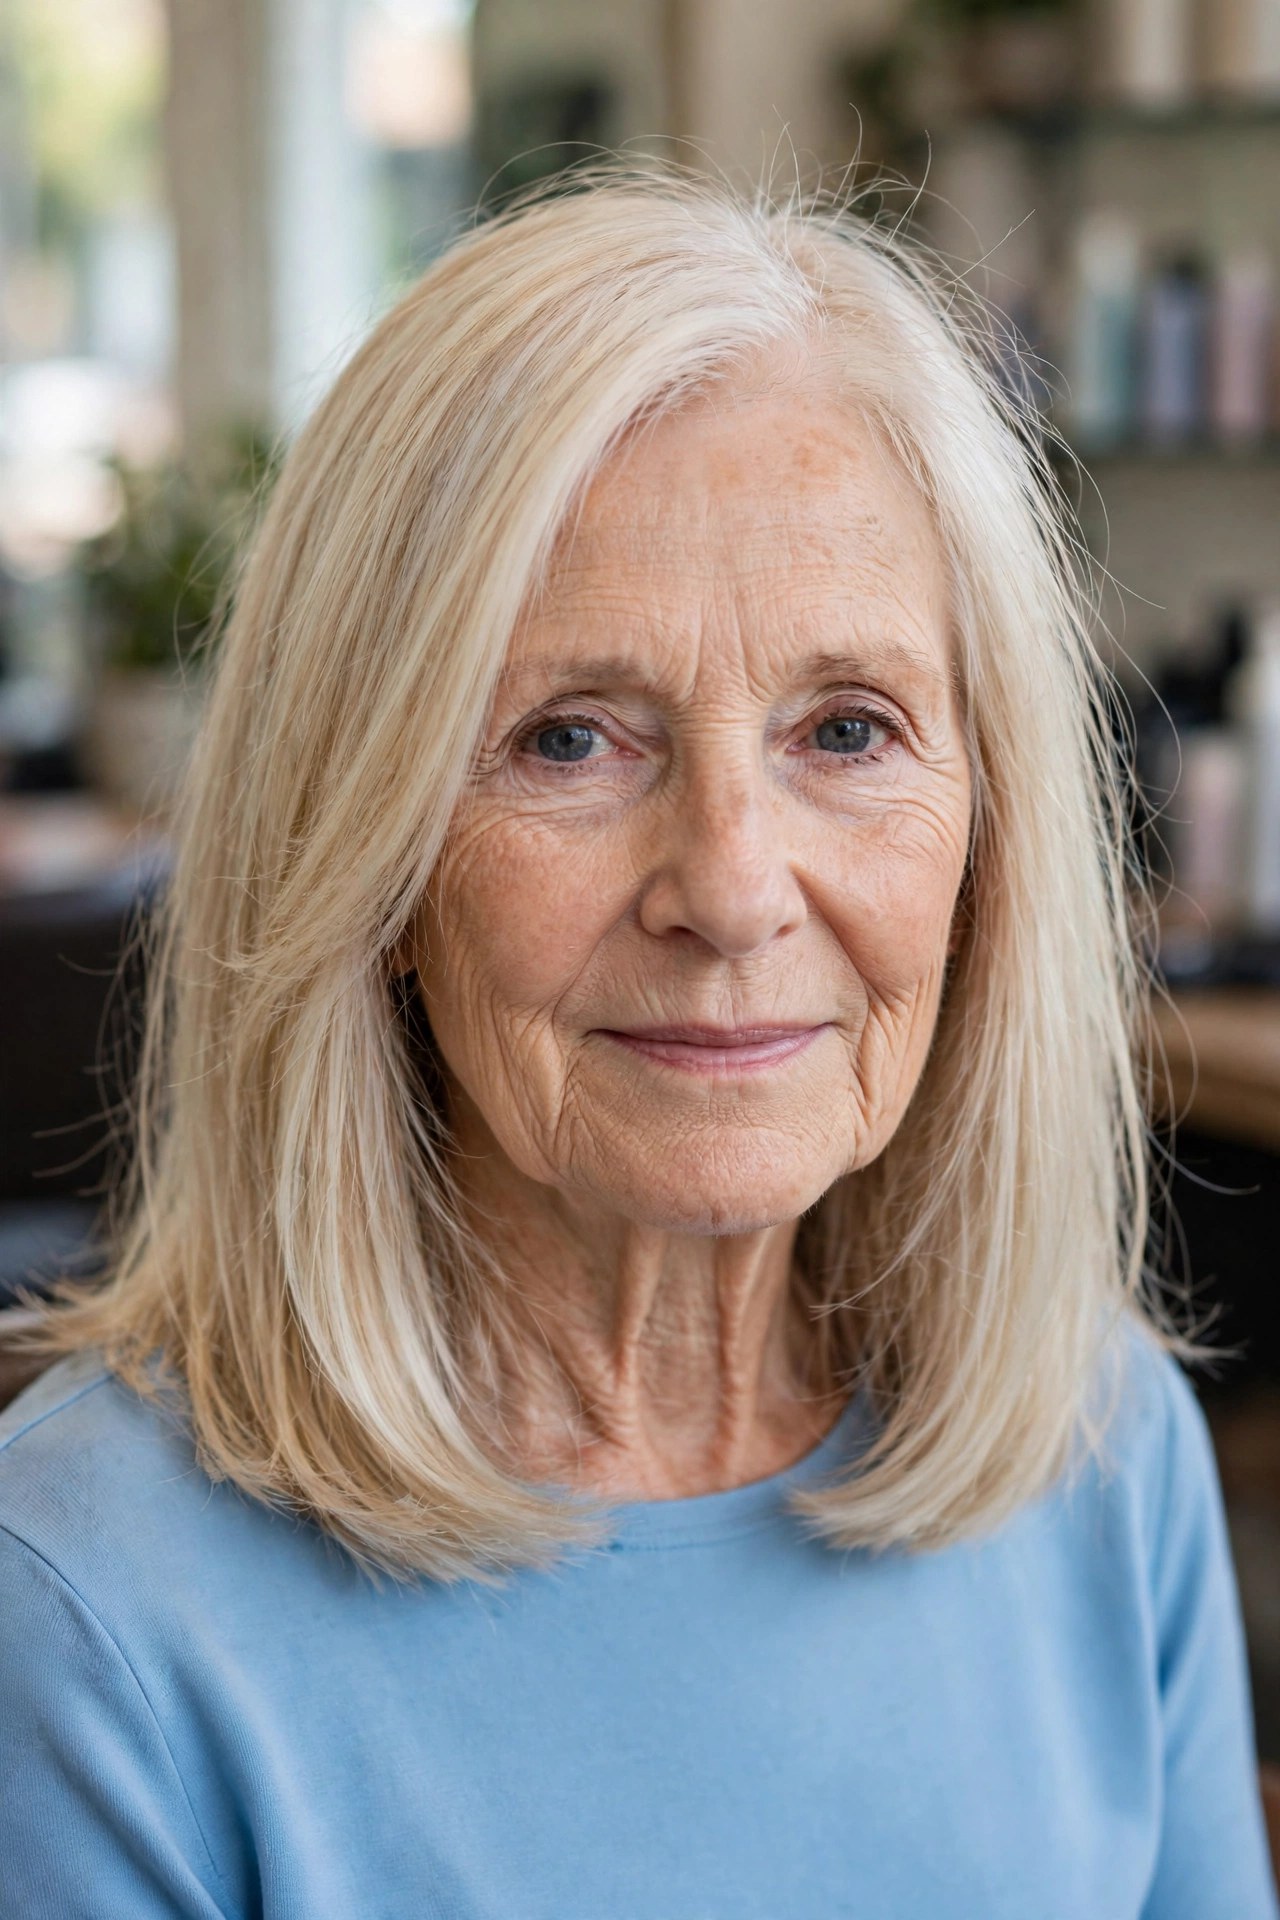
Think of this as the blowout cut’s quieter sister: fine hair, shoulder length, and layers so long and sparse they are almost a rumor. The first layer may start only two inches above the ends. What that whisper of layering buys is movement at exactly the place one-length fine hair goes stiff and swingless — the last few inches — without ever exposing how fine the hair is.
Everything about styling fine layered hair is a lightness discipline: volumizing mousse at the roots only, conditioner kept off the crown, and products marketed as ‘smoothing oils’ used sparingly or not at all, because they collapse the shape. Dry shampoo before bed, not in the morning, gives fine hair its best second day — it absorbs oil overnight while you sleep.
15. Side-Swept Layers with a Sweeping Fringe
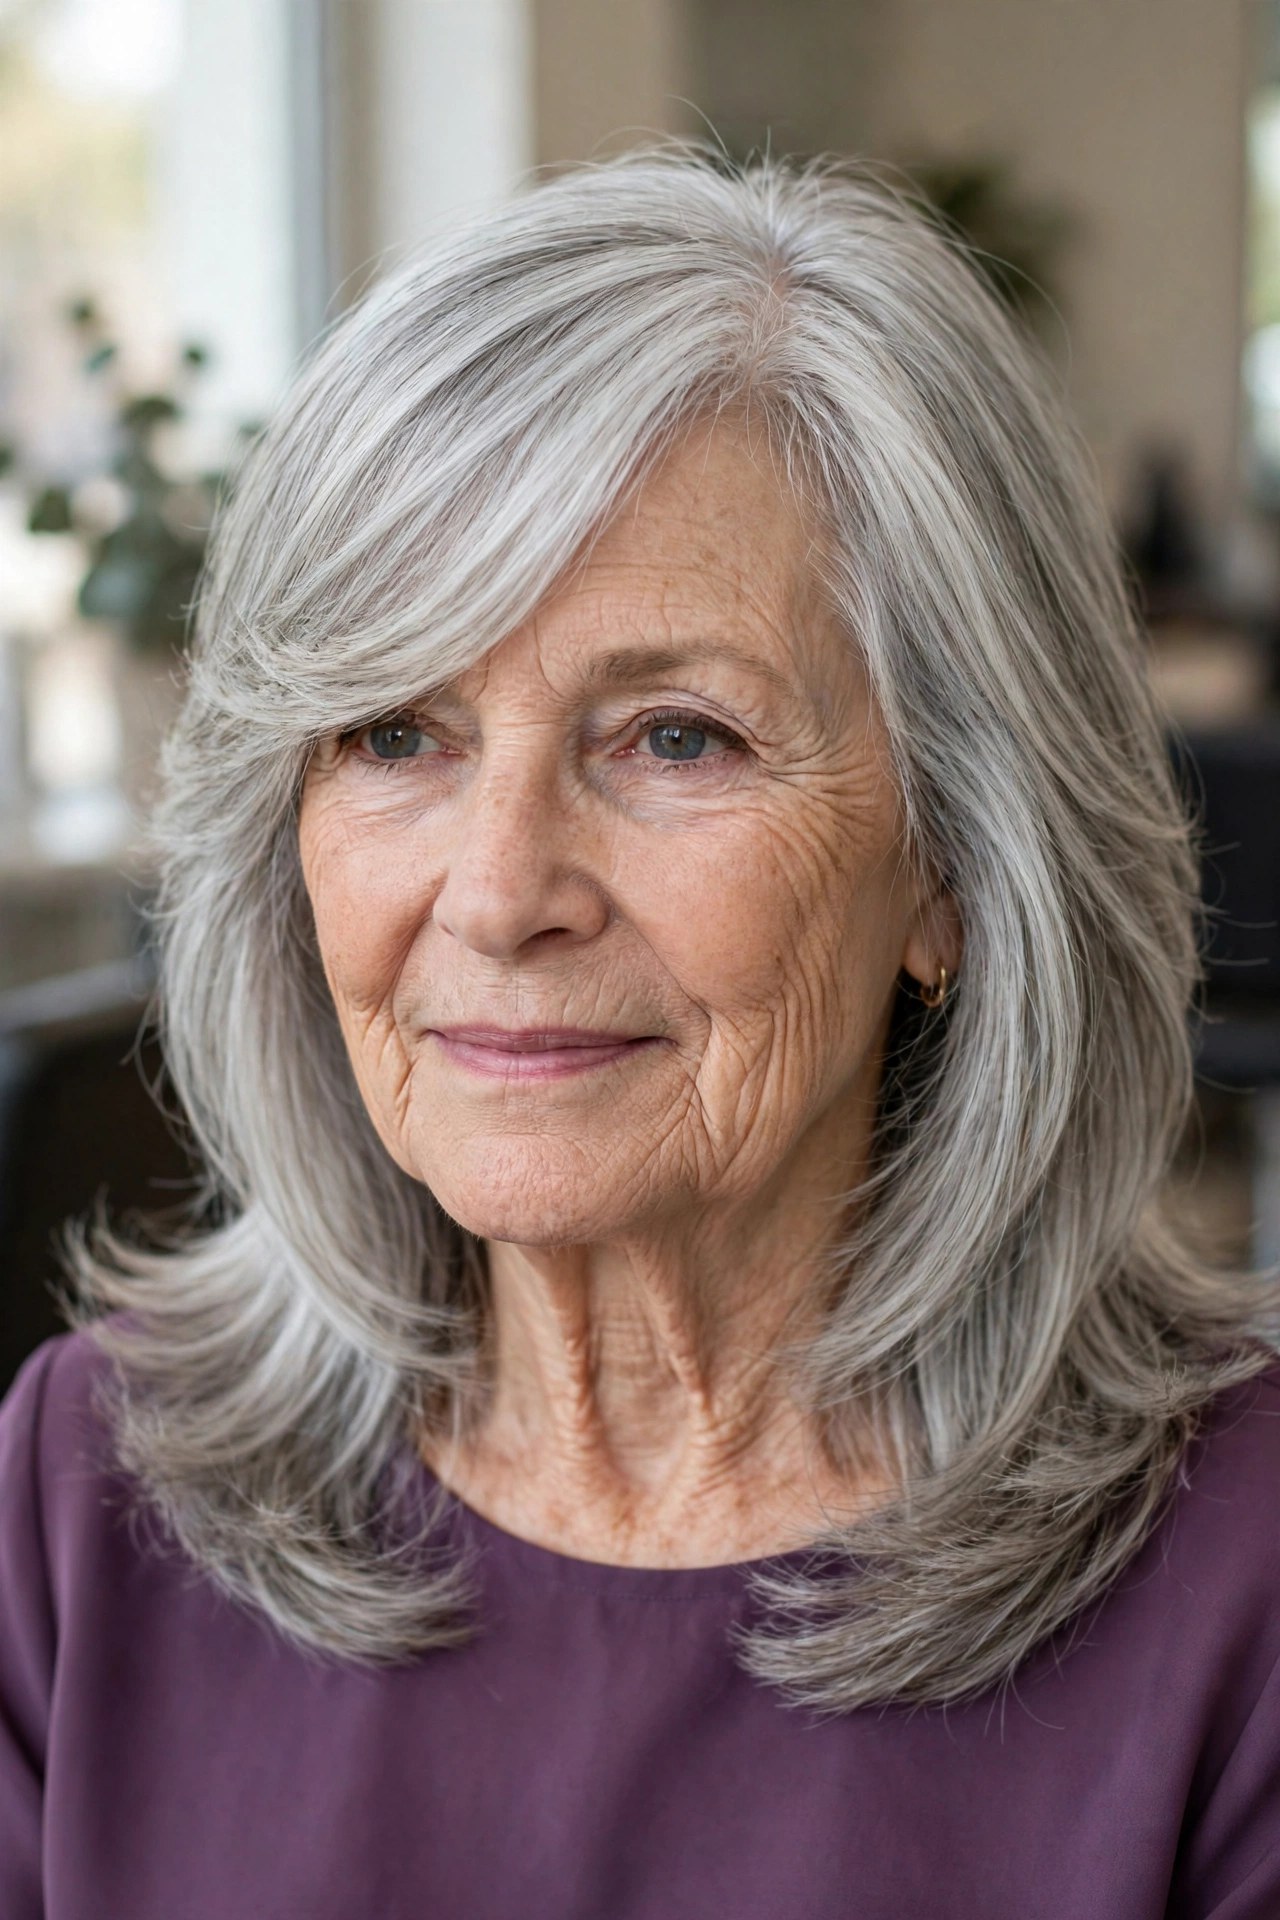
Where the deep side part of idea 6 builds drama, the sweeping fringe builds softness. A long fringe layer is cut to brush diagonally across the forehead and melt into the layers on one side, so the whole front of the cut moves in one fluid direction. On silver hair especially, that single smooth sweep reflects light like a ribbon and takes the visual weight off the hairline.
This is a kind cut for a high forehead or a hairline you would rather style around than expose, and it grows out into ordinary face-framing layers without an awkward phase. Keep the sweep glossy with an in-shower silver gloss every few weeks, and train the fringe with the dryer while damp — mature hair sets where it dries.

16. Layered Cut with Flipped Ends
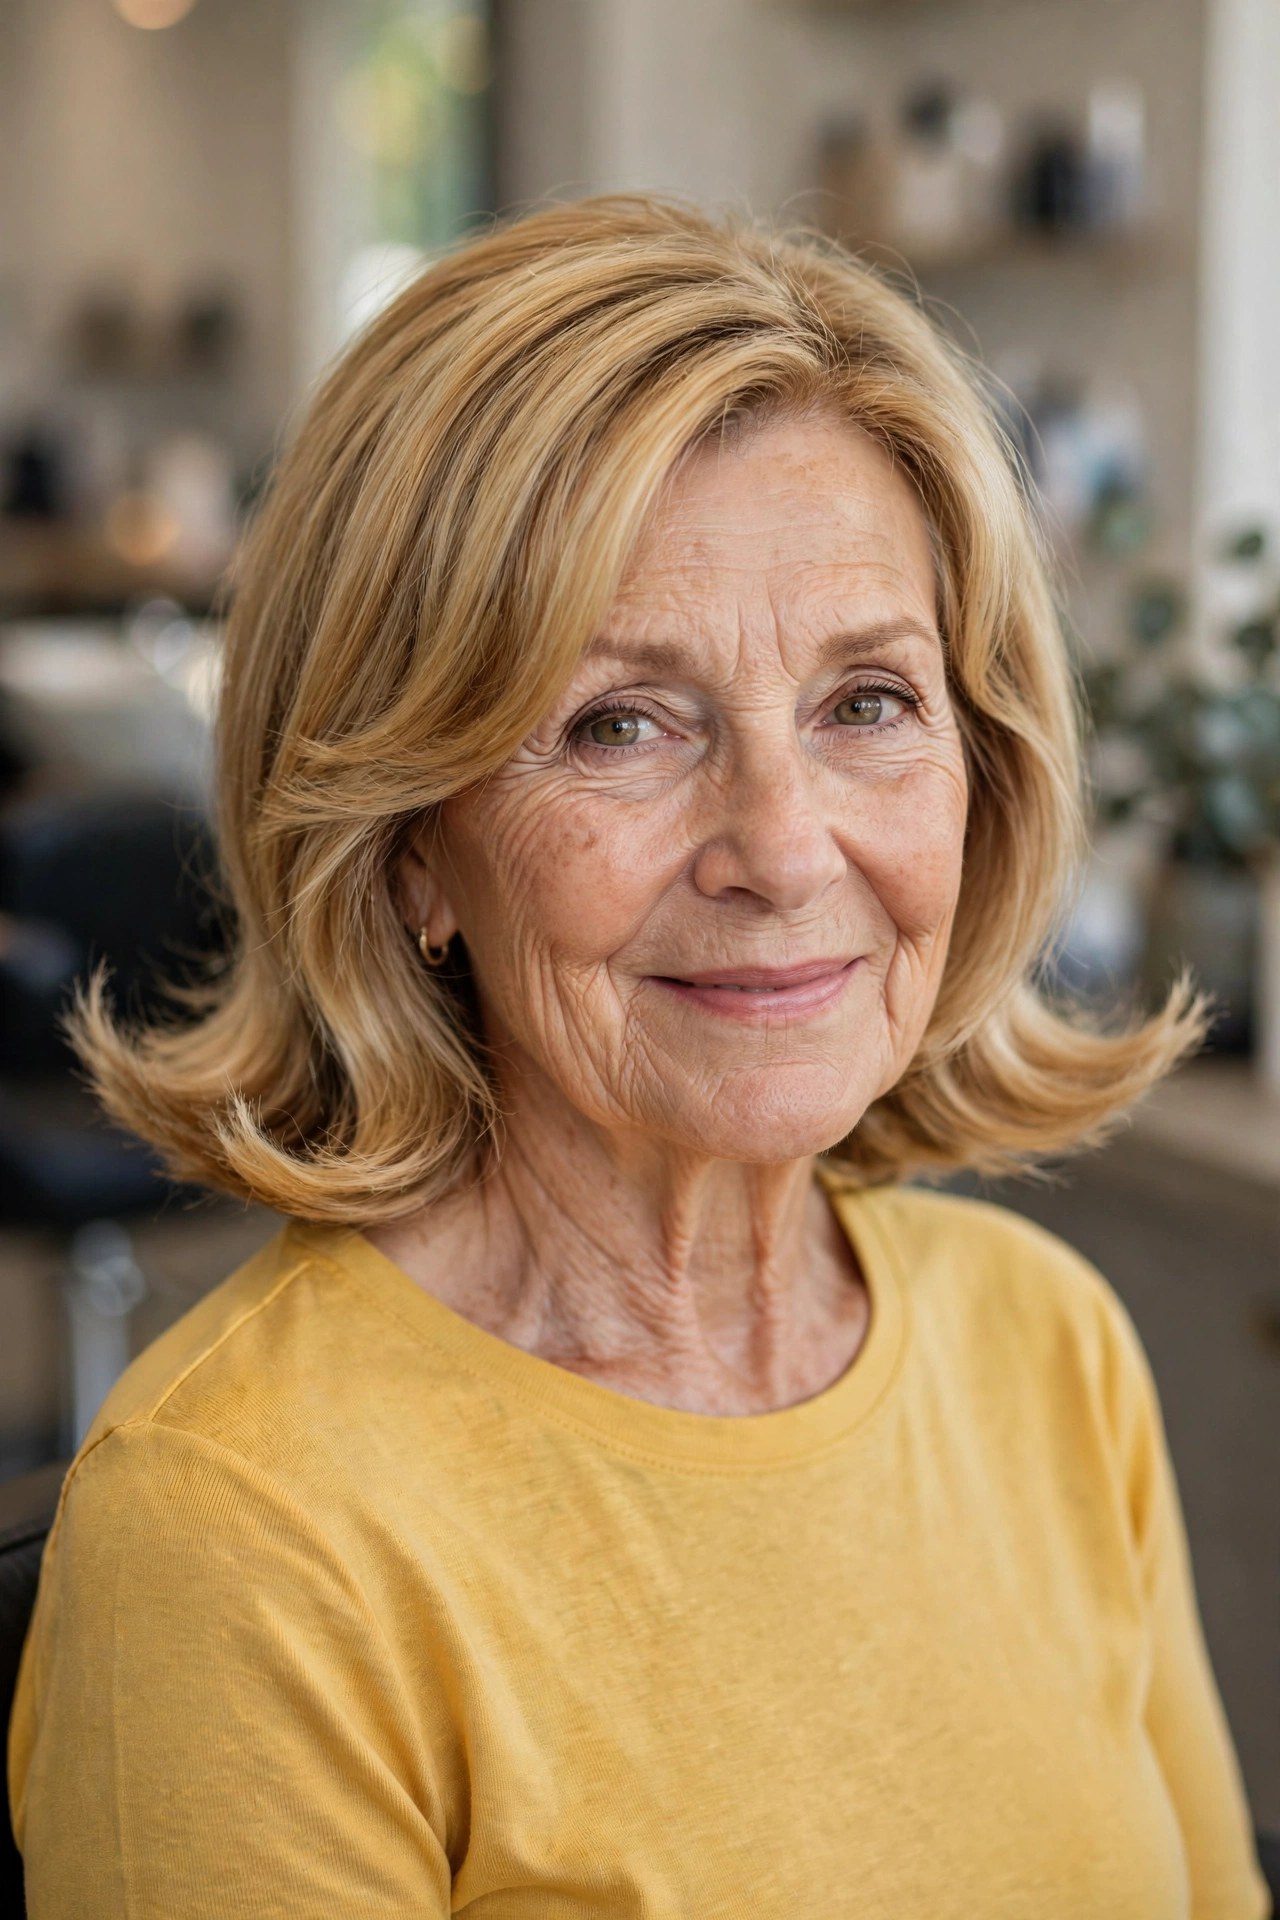
The flip is back, and at shoulder length it is pure placement logic: the layers are cut so their natural resting point sits right at the shoulder, then styled to kick outward instead of curling under. That outward flick adds width and energy at the bottom of the cut, balancing a narrower crown, and it turns a simple layered shape into something with genuine personality — playful without trying too hard.
The round brush does all the work: dry each section down and roll the brush outward at the very end, or use a hot-air styler in the last inch of hair. Set each flipped section for a few seconds with a cool shot before moving on. A light, brushable hairspray holds the kick; a strong one freezes it into a helmet, which is not the revival anyone wants.
17. Layered Cut with Soft Dimensional Highlights
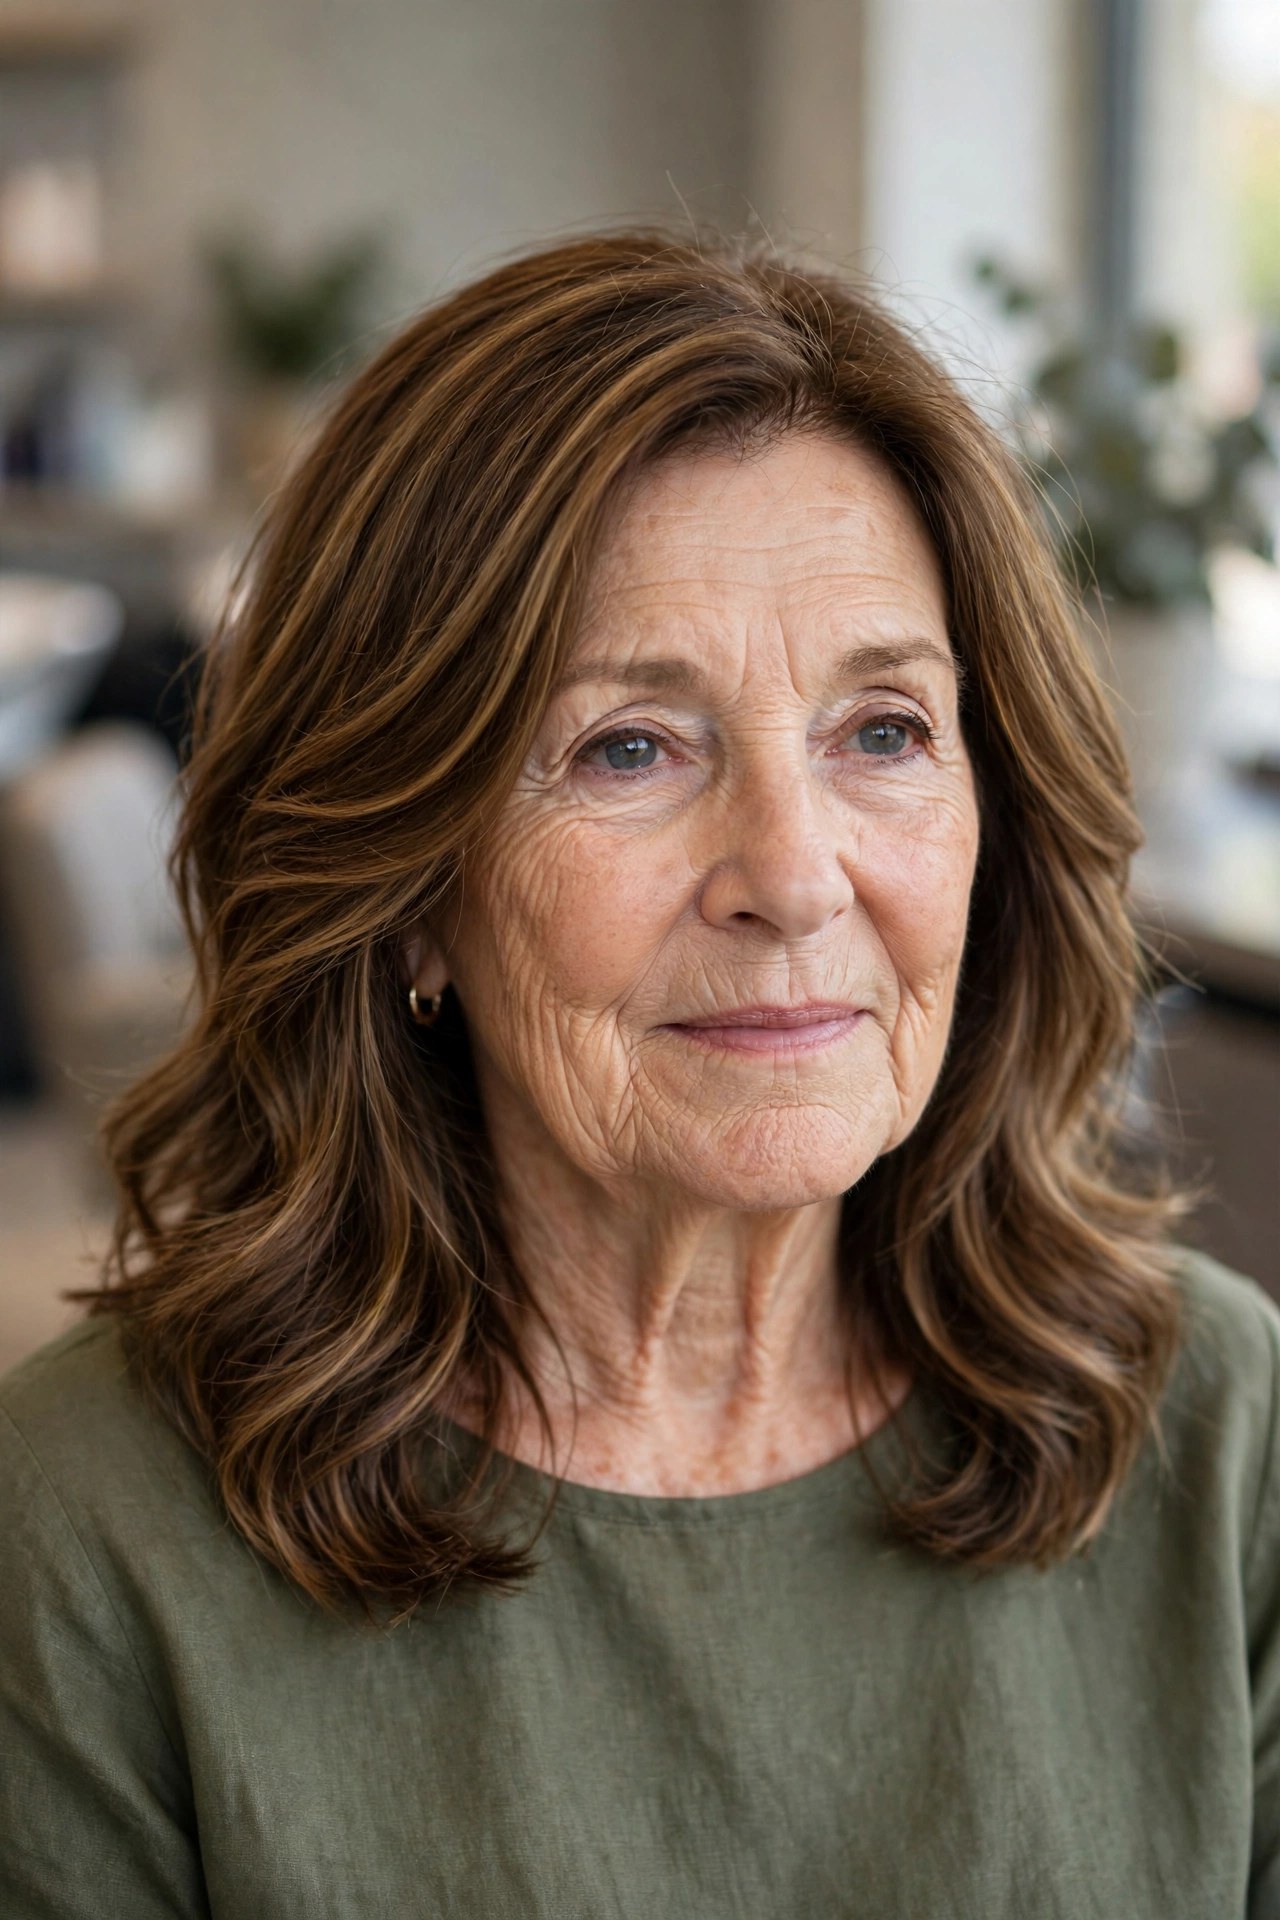
Layers create movement you can see; highlights placed along them create movement you can see from across the room. Fine caramel ribbons woven through a medium-brown layered cut trace each layer’s edge, so when the hair moves, the light and dark pieces alternate. It is also a forgiving color strategy after 60: dimensional color blends gray regrowth far more gently than one flat shade does.
Ask for the lightest pieces around the face and through the top layers, where the movement is, and keep the underneath deeper for contrast. Colored layered hair is thirstier, so a bonding shampoo and restraint with heat keep both the color and the ends intact. Highlights grow out softly on a layered base, stretching color appointments comfortably.
18. Low-Maintenance Wash-and-Go Layers
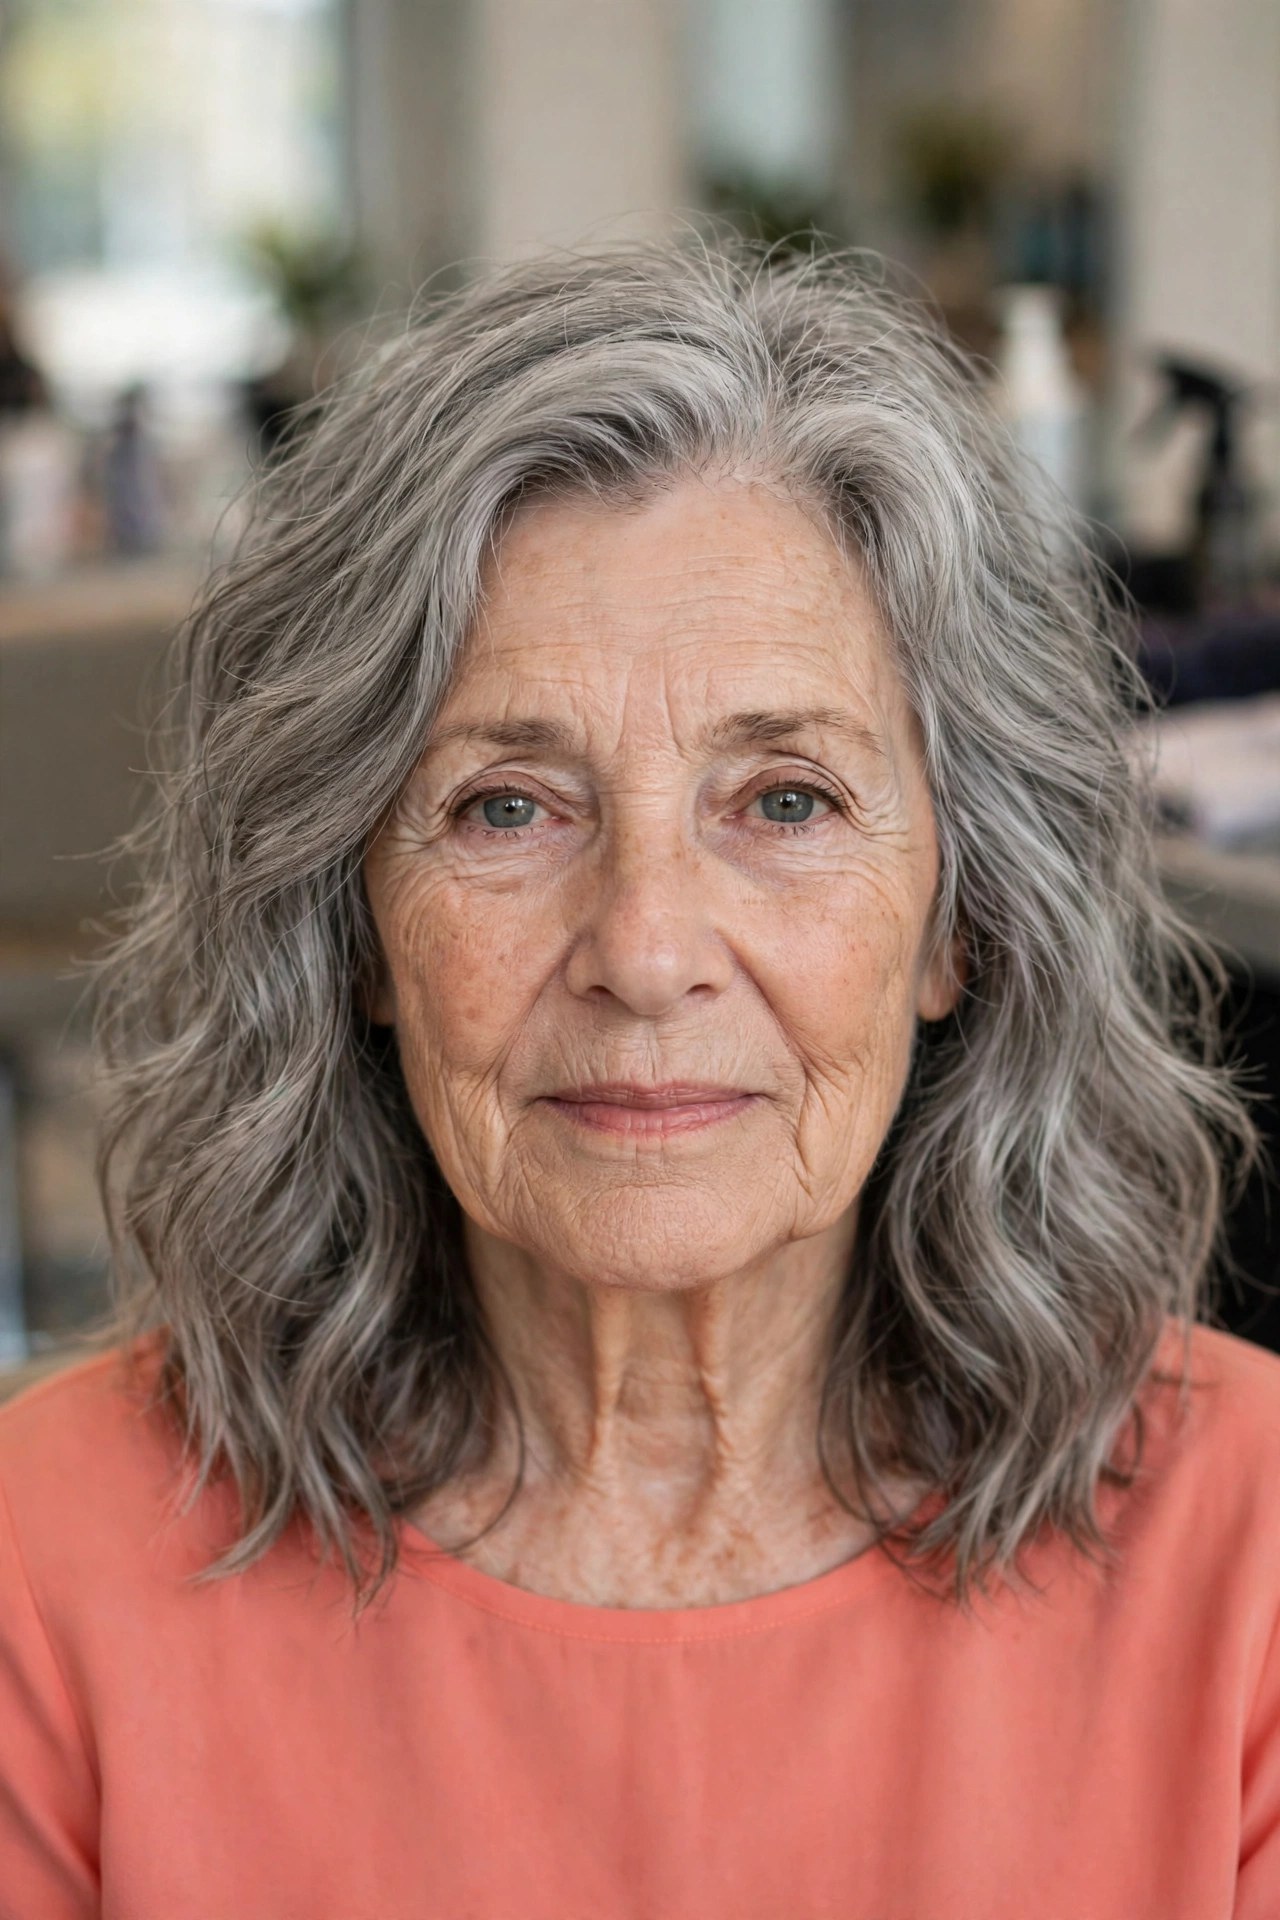
Every layered cut so far assumes a blow-dry. This one assumes you have better things to do. The layers are cut long, even, and deliberately un-fussy, shaped to follow your natural texture — wave, bend, or straight — so the hair falls into place as it air-dries. At shoulder length with natural gray, it is the honest, modern version of wash-and-wear: nothing to fight, nothing to fake.
The maintenance is in the cut, not the styling: this shape needs a precise trim every seven to eight weeks, because its whole charm is a clean perimeter with soft internal movement. On wash day, a little sea-salt spray scrunched into damp lengths encourages the layers to separate; on other days, the length is still there for a claw clip or a low twist when you want it up.

19. Sleek Center-Part Shoulder Layers
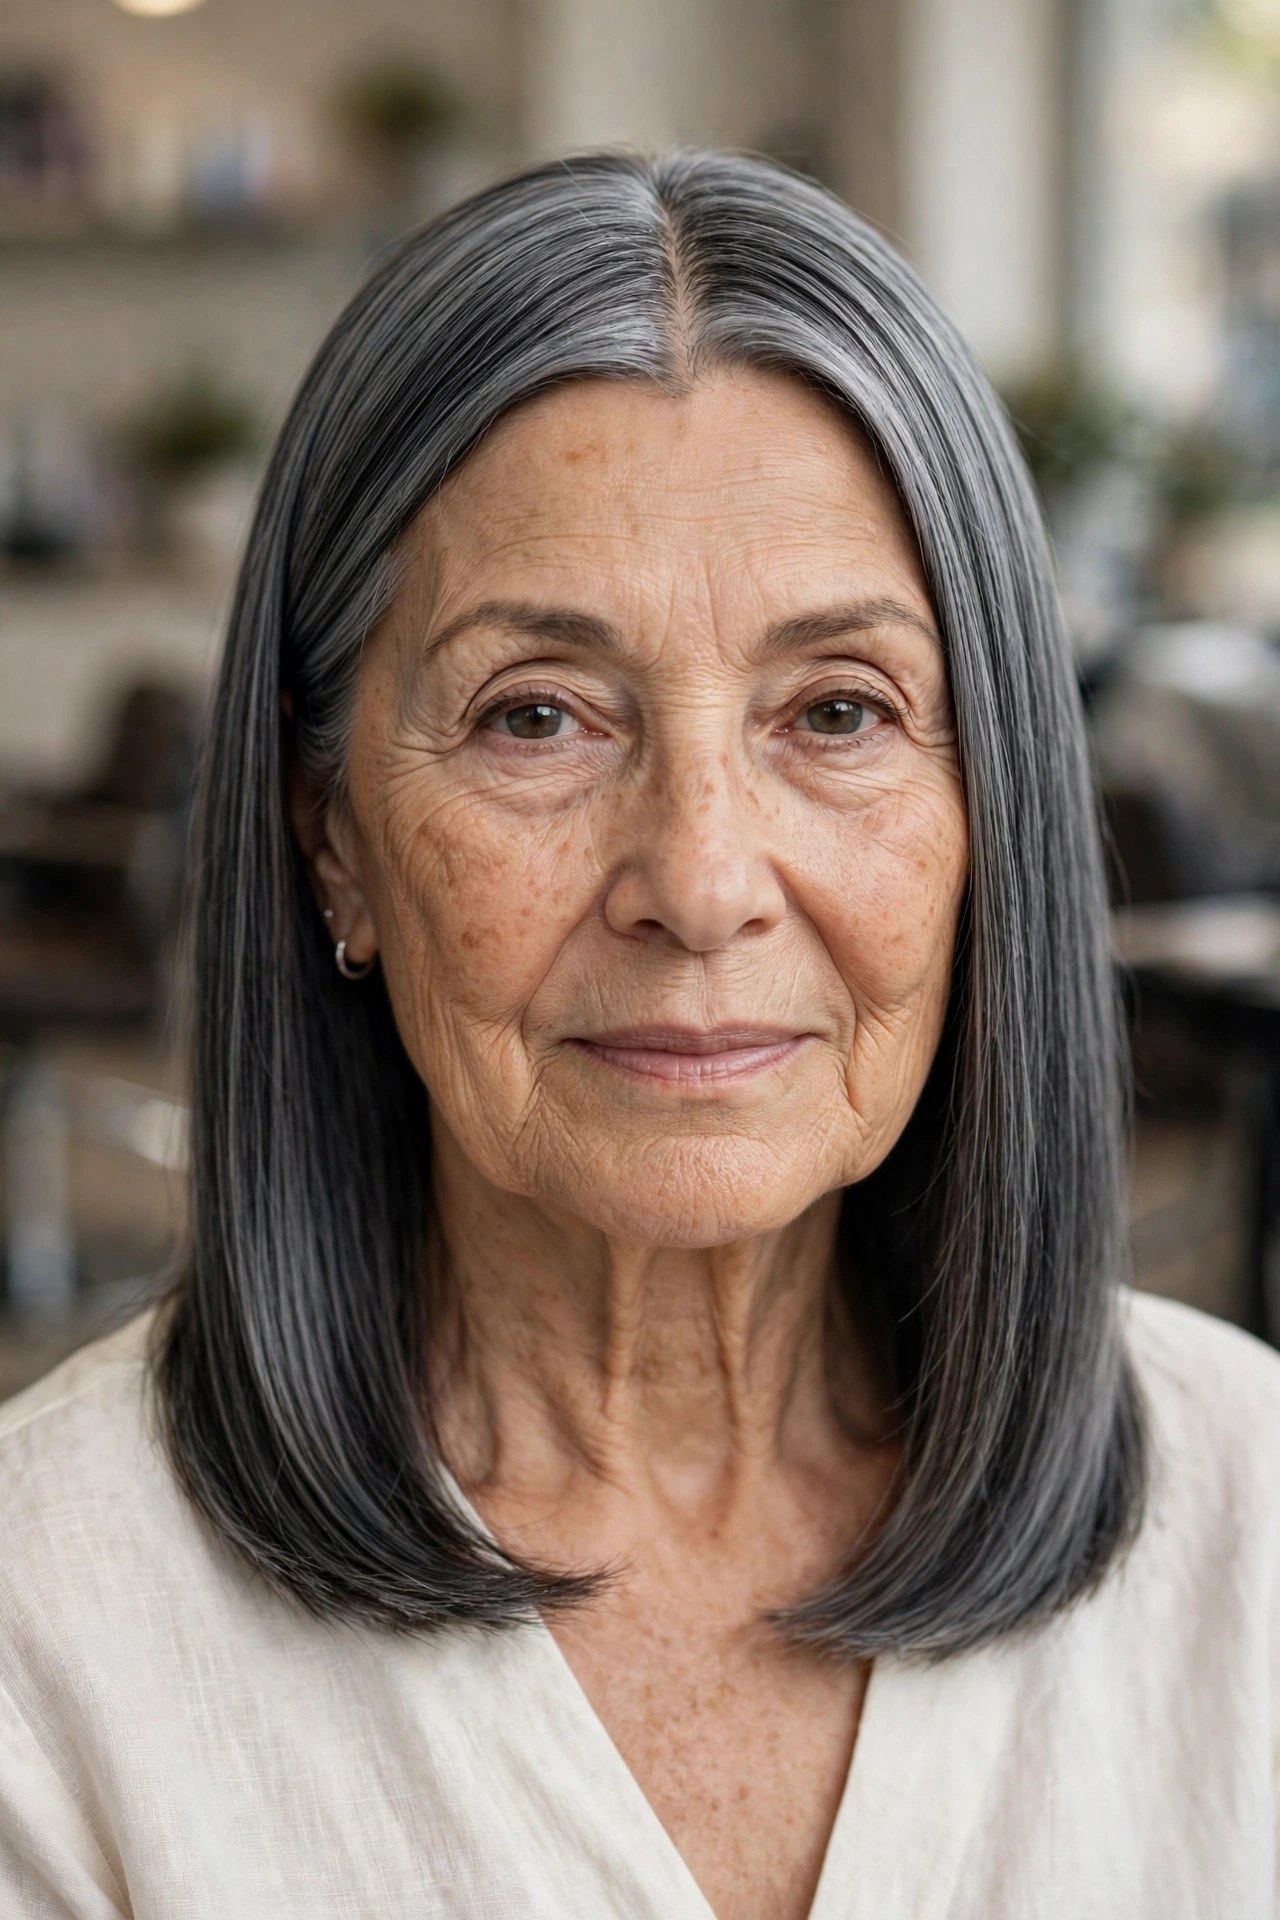
The center part is the most exposing style there is — it hides nothing — and that is exactly why it looks so striking when the hair is healthy. Long, smooth layers fall in two even curtains from a precise middle part, the ends resting on the shoulders with just enough layering at the front to stop the shape reading as a blunt wall. On dark silver hair the gloss is almost graphic.
Symmetry is the maintenance: this cut asks for even trims, because a quarter-inch difference shows. A mini flat iron is the right tool for the front layers and ends — one slow, protected pass on moderate heat — rather than running a full-size iron over your whole head daily. If your face is long, soften the geometry by drying the front pieces with a slight outward bend.


20. U-Shaped Shoulder Layers with a Rounded Back
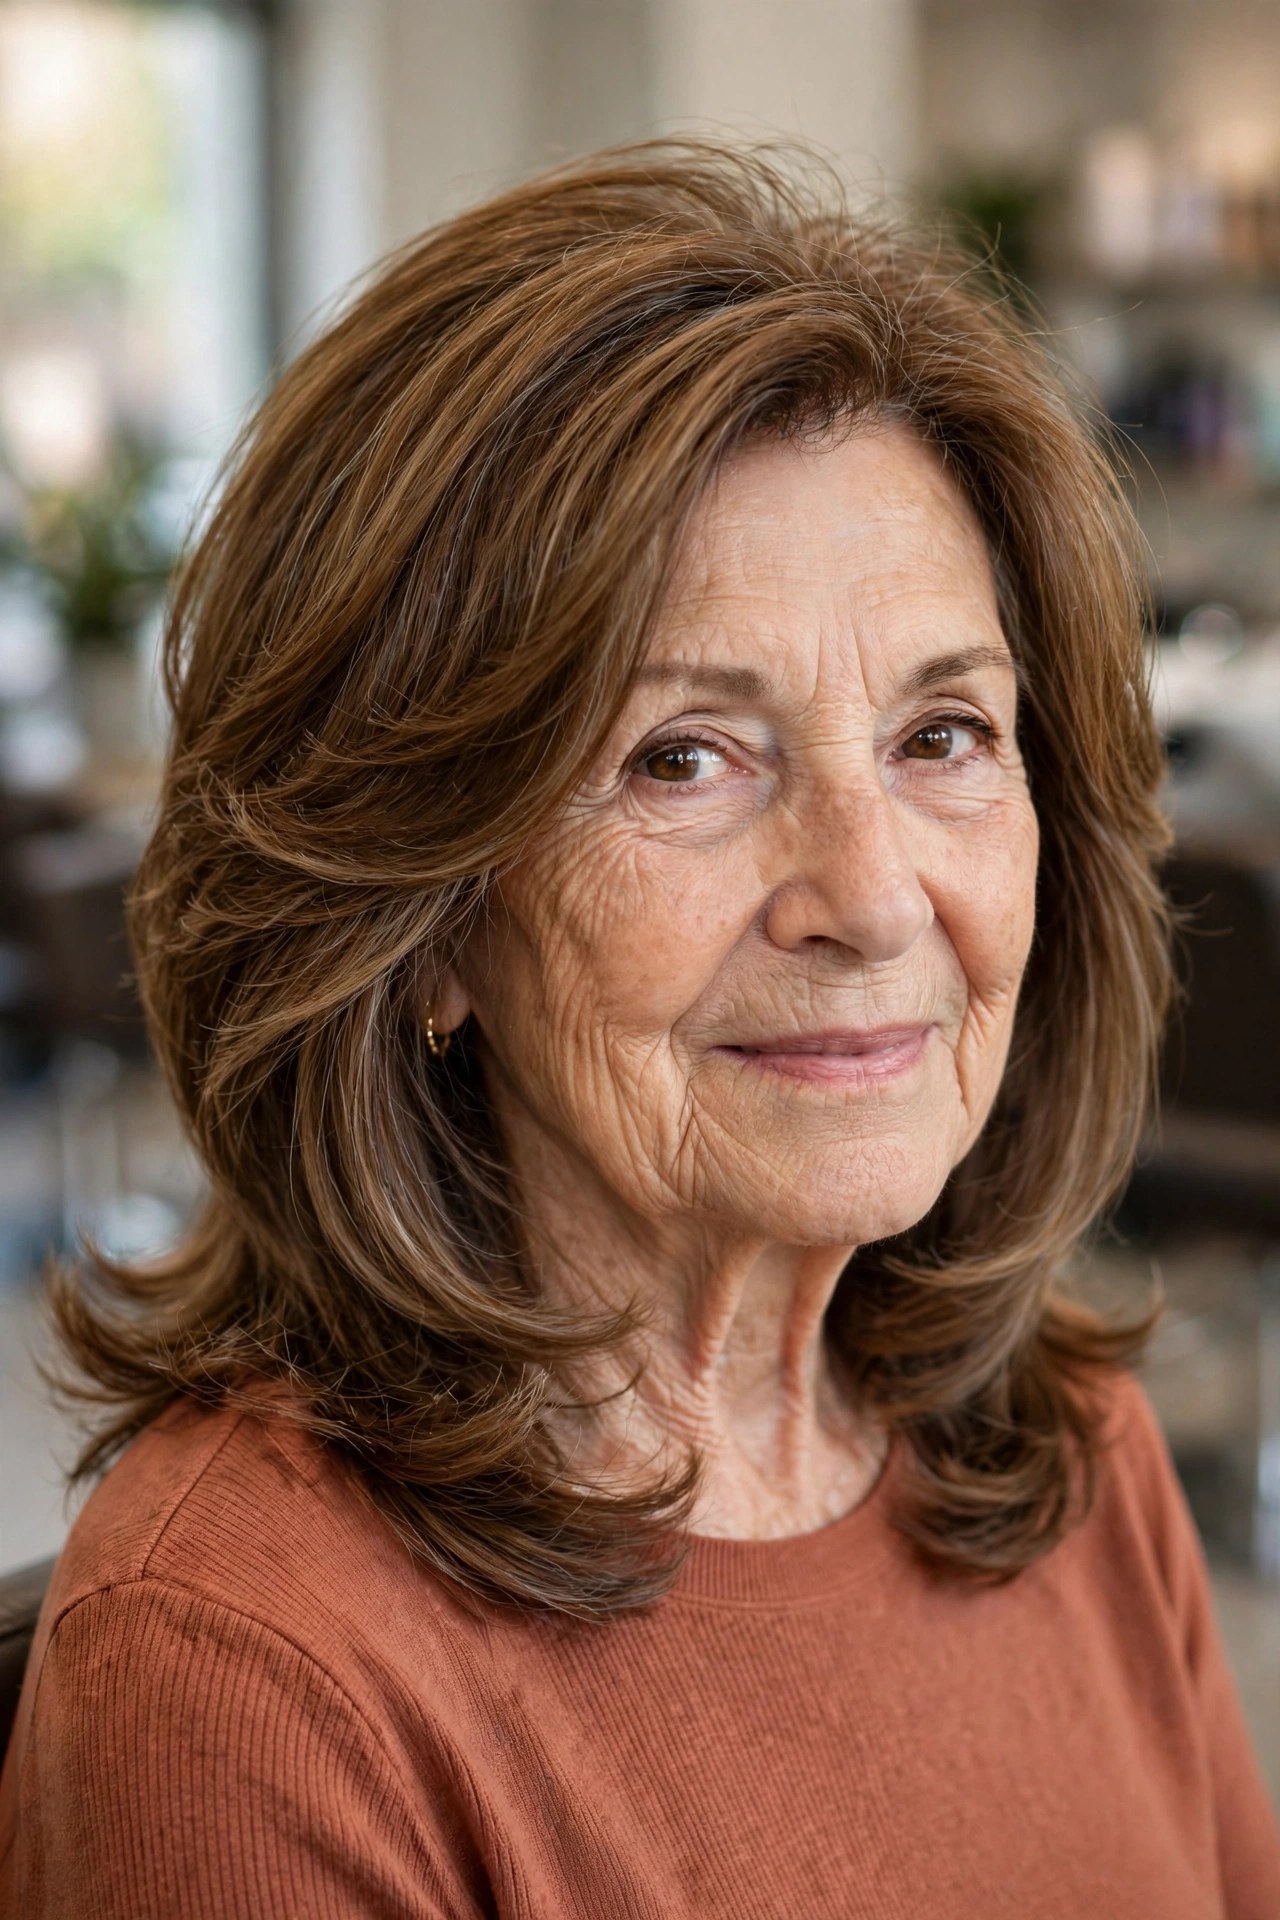
Most layered cuts are described from the front; this one is designed from behind. The back perimeter is cut into a shallow U — longest at the center back, rising gently toward the front — while face-framing layers step down from the cheekbones to meet it. The U keeps maximum length and fullness across the back, where one-length cuts can split or look thin, and gives the silhouette a soft, rounded finish from every angle.
It is a particularly good compromise if you are growing out a bob toward longer hair, because the U removes the awkward shelf stage. Style it with a simple blowout, rolling the front layers back away from the face so they pour into the curve. Our Over-50 readers will find the sister version of this whole guide — shoulder length haircuts for women over 50 with layers — worth a look for how the same placements read a decade earlier.
Recommended Products
These five cover the shoulder-length layered routine: a strong volumizing mousse for fine hair, the round brush every blowout in this guide depends on, a texturizing putty for choppy and shaggy layers, a purple shampoo to keep silver layers bright, and a hot-air styler that builds the bounce in one step.
Layered Shoulder-Length Hair Care Tips for Women Over 60
- ✅ Protect the last two inches. On fine hair, keep layers out of the final inch or two of the perimeter — that intact base is what makes shoulder-length hair read full instead of wispy.
- ✅ Trim every 6–8 weeks. Layers lose their placement as they grow; the crown goes flat and the ends split long before the length itself looks long.
- ✅ Put product at the roots, not the ends. Mousse and lift belong at the crown; heavy creams and oils on layered ends collapse the movement you paid for.
- ✅ Dry in the direction of the design. Feathered and side-swept layers are set while damp — dry them the way they are meant to fall, because mature hair keeps the shape it dries in.
- ✅ Match heat to the layer. Moderate settings plus heat protection, always; layered ends are the thinnest, oldest hair on your head and scorch first.
- ✅ Refresh, do not restyle. Day-two layered hair usually needs only dry shampoo at the roots and a pinch of texture through the ends — a full restyle every day just adds damage.
- ✅ Keep silver layers bright. A purple shampoo once a week stops yellowing, which matters more on layered silver because dull layers stop catching light.
- ✅ Sleep gently. A satin pillowcase keeps layered ends from roughing up overnight, so the morning shape is the one you styled yesterday.
Frequently Asked Questions
Where should layers start on shoulder-length hair after 60?
For most women, the first layer should start no higher than the chin, and on fine hair no higher than the jaw. Layers that start at the cheekbones or above remove too much of the perimeter’s weight, and the ends below them turn thin. The exception is deliberate crown layering — graduated cuts and shags — where short top layers are balanced by keeping the sides and back fuller.
Will layers make my fine shoulder-length hair look thinner?
The wrong layers will; the right ones do the opposite. Short, plentiful layers remove bulk fine hair cannot spare, and the ends turn see-through. Long layers — starting an inch or two above the ends, over a mostly blunt bottom line — add movement and the impression of bounce while the perimeter still reads dense. Ideas 8 and 14 in this guide are built on exactly that formula.
Which layer type is best for thick hair at shoulder length?
Long interior layers. They run from about the jaw through the full length and remove weight from inside the cut, so thick hair lies closer to the head, moves freely, and dries faster, while the surface keeps its fullness. Ask your stylist to layer the interior rather than using thinning shears on the surface, which tends to leave thick mature hair frizzy at the ends.
How often do shoulder-length layers need trimming?
Every six to eight weeks for most placements. Layers are a shape, and shapes drift as hair grows: the crown layers fall flat first, then the face-framing pieces grow past the points they were cut to flatter. Graduated and sleek precision cuts sit at the six-week end; loose shags and wash-and-go layers forgive the full eight.
Can layered shoulder-length hair work with natural curls or waves?
Yes — layering is what makes shoulder-length curls work at all. One-length curly hair builds a pyramid shape, wide at the bottom and flat at the roots. Rounded layers, ideally cut dry so shrinkage is accounted for, let each curl sit on its own level and restore a round, balanced silhouette. Wavy hair needs the same idea with longer layers that follow the wave pattern.
Why keep shoulder length at all after 60 instead of going shorter?
Because it is the most versatile length there is: long enough for a claw clip, a low twist, or soft waves on occasion, short enough to dry quickly, hold a blowout, and stay off the collar. With layers placed correctly it also avoids the two things women dislike about longer hair after 60 — heaviness at the ends and flatness at the crown — without giving up the softness that length brings to the face.
Shoulder length after 60 is not a compromise — cut with the layers in the right places, it is the most flattering, most versatile length of all. Remember the one rule underneath all twenty ideas here: layers add movement and lightness where they are placed, and they cost fullness where they end. Place them for your hair type, keep the base strong, trim on schedule, and your hair will move like it means it.